Migrating apps
To migrate apps permanently to the cloud, use the recommended migration process of tagging your apps in the QMC of your Qlik Sense Client-Managed deployment. Tagging lets you track the status of your app migration and filter the app list for various exports through the Migration app. After tagging, a few additional steps are required in preparation for the actual migration. For how to migrate, see: Migrating the apps
Selecting and tagging apps for migration
When you tag your applications for migration, they become visible for tracking through the Migration app. Use tags to organize apps according to their readiness for migration and their migration status. Tagging helps you prioritize which apps to migrate first and which might need review or remediation before they are ready to move to Qlik Cloud. If you have not created migration tags in QMC, see Creating and applying tags.
The following application tags are used by the Migration app:
-
App - 05 Migrated via Multi-Cloud
-
App - 05 URL Link to Qlik Sense Windows
-
App - 10 Selected for Migration Review
-
App - 20 Migration Remediation Needed
-
App - 30 Ready to Migrate
-
App - 40 Migration Complete
-
App - 99 Will Not Migrate
Apply tags to applications in the QMC.
You can connect a tag to a resource.
Do the following:
-
Open the QMC: https://<QPS server name>/qmc
-
Select a resource type (for example, Apps) on the QMC start page, or from the Start
drop-down menu, to display the overview.
Tip noteYou can filter a column by using the filtering option: -
Select the items that you want a tag to connect to.
- Click Edit in the action bar.
- Ensure Tags is selected in the Properties section.
-
Click the Tags text box to see a list of available tags.
Information noteIf the tag is not available, you must first create the tag. You can neither create nor delete tags when you are editing a resource. You create tags in the Tags section, which is available on the start page. - To filter the list, start typing the tag name.
-
Select a tag.
The tag will added in blue under the text box.
-
Click Apply at the bottom of the page to save your changes.
(x) is added to the label of the tag, where x denotes how many of the resources being edited that use the tag.
You have now connected a tag to the resource.
Reviewing the migration status of an app
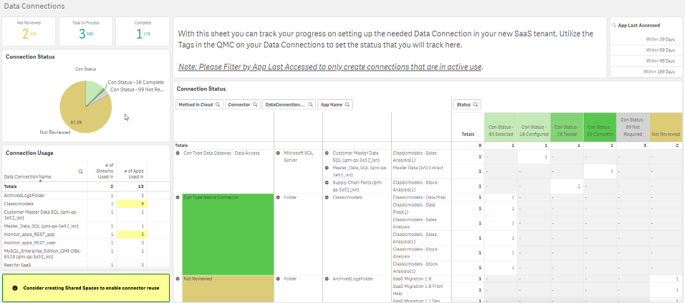
In the Migration app, use the Data connections sheet to track the status of your apps. Charts show apps for which data connectivity is ready, partially ready, or not ready. You can also use the Migration app with Qlik Lineage Connectors to understand app dependencies.
Data connections sheet in the Migration app
Qlik Lineage Connectors
Qlik Lineage Connectors is available with a SaaS subscription.
-
Download and install on your Qlik Sense Enterprise Client-Managed environment.
-
See source lineage to assess which apps can be migrated.
For more information, see Extracting lineage data with Qlik Lineage Connectors.
App limitations
The following table outlines the basic app sizes allowed with Qlik Cloud depending on your subscription.
| App type | Supported app size (in-memory) | Peak memory during scheduled reloads | Peak memory during manual reloads |
|---|---|---|---|
| Standard tier for Qlik Sense Enterprise SaaS | Up to 5 GB | Up to 40 GB | Up to 10 GB |
| Standard tier for Qlik Cloud Analytics Premium and Enterprise | Up to 10 GB | Up to 40 GB | Up to 10 GB |
| Large app capacity | Up to 50 GB | Depends on the purchased capacity | Depends on the purchased capacity |
Determining app size
You can measure app size in two ways:
-
Size in memory the last time the app was reloaded
-
Size on disk
Use the following tools to determine the size of an app:
-
Qlik Sense Enterprise Client-Managed—Use the Meta Data Analyzer app that is included with all Qlik Sense Client-Managed deployments since the September 2019 release. For more information, see Deployment instructions.
-
Qlik Cloud—Use the App Analyzer.
Mitigating issues with app size
If you encounter high memory allocation problems due to large app sizes, there are two main approaches that you can take to mitigate the issues.
-
Review and update the data load script as applicable:
-
Remove unused fields and rows from being loaded.
-
Drop tables when no longer needed in the data processing.
-
Implement incremental loads to optimize the volume of data being processed.
-
Use optimized QVD loads.
-
-
Add more capacity to the tenant to allow for heavier workloads. See Large app support.
Other limitations and considerations
Cloud deployments do not typically allow access to the file system of your host or server, therefore, use these load script modifications when migrating the load script from an on-premises app to Qlik Cloud.
Exporting extensions
If you have only a few extensions, you can manually export them from Qlik Sense Enterprise Client-Managed and import them to Qlik Cloud. With many extensions, consider using the migration script to export extensions to the Extensions folder.
In Qlik Cloud, there are some limitations with extensions compared to Qlik Sense Enterprise Client-Managed. For more information, see Managing Extensions.
You must add requests for external resources to the allowlist in Administration > Content Security Policy. See Managing Content Security Policy.
Do the following:
-
Copy your extension zip files into the .\Data\Extensions folder of the migration tools.
-
Run the following migration script: 4_setextensions.ps1. Successful uploads will move the extension to the Complete folder.
Themes
If you have only a few themes, you can manually export them from Qlik Sense Enterprise Client-Managed and import them to Qlik Cloud. With many themes, consider using the migration script to export themes to the Themes folder of the migration tools.
Do the following:
-
Copy your extension zip files into the .\Data\Extensions folder of the migration tools.
-
Run the following migration script: 5_setthemes.ps1. Successful uploads will move the themes to the Complete folder.
GeoAnalytics
Legacy GeoAnalytics extension objects will run in Qlik Cloud for an app that is uploaded, but no new objects can be authored using these legacy objects.
Start using Native Map objects in new apps.
Migrating from GeoAnalytics Connector to Qlik GeoOperations
Qlik GeoOperations in Qlik Cloud provides similar features and operations as the GeoAnalytics Connector does within Qlik Sense Enterprise on Windows. They also support many of the same data formats. They have the following differences:
- Qlik GeoOperations is an Advanced Analytics Integration (AAI), which is more suitable for sending out and processing data than a connector.
- Script syntax is different for Advanced Analytics Integrations than for connectors.
- Some GeoOperations can also be used in chart expressions.
- Qlik GeoOperations returns a single table. Compared to what the GeoAnalytics Connector returns, the tables are joined in Qlik GeoOperations.
- In Qlik GeoOperations, some fields and parameters has been renamed to be more consistent.
The following outlines how to convert the script produced by the GeoAnalytics Connector Wizard to Qlik GeoOperations:
- In Data load editor, in the GeoAnalytics Connector script code, copy everything after SQL up to the second SELECT or ";", whichever comes first.
- Replace all ' in the GeoAnalytics Connector script with ".
-
Add the selected field names from the secondary SELECT statement in the GeoAnalytics Connector script to the first SELECT statement in the GeoOperations script. Omit any fields that are already there. Add the source table name to the field names, separating them with a period. For example, table.field. This will create a single joined table instead of several tables.
-
Review the reference documentation for the operation and dataset and adjust any parameter or field names where needed.
For a summary of key differences, see GeoOperations and GeoAnalytics field differences
-
Add the following to the start of the GeoOperations script:
Load * Extension GeoOperations.ScriptEval('
-
Add the following to the end of the GeoOperations script:
');
If using a loaded table with the GeoAnalytics Connector, send it as the second parameter to GeoOperations.ScriptEval instead.
As Qlik GeoOperations returns a joined table, only field values that have a corresponding value in the primary table are returned from the secondary tables. For example, if you want to find the closest airports in Germany for some points, only data about airports that are closest to the points are returned. If you want all airports in Germany, they need to be loaded separately with a LOAD operation.
If loading from an SQL database with the connector, the data should instead be loaded with one of the database connectors like the ODBC connector. Make sure to load the geometries as WKT (apply a function usually called st_asText() in the SQL query). Then convert the WKT field by sending the table to Qlik GeoOperations. It will then return a field with the geometries in Qlik Sense format.
Example script conversion
This script conversion example will use the following GeoAnalytics Connector script:
Do the following:
-
Take the script between SQL and the second SELECT statement.
SELECT [LocationDbId], [Clusters_ClusterID] FROM Cluster(distance='10000', points='Points') DATASOURCE Points LOCATIONSERVICE geometry='POINT', type='XIATA', country='de', serviceName='default' -
Replace quotes:
SELECT [LocationDbId], [Clusters_ClusterID] FROM Cluster(distance="10000", points="Points") DATASOURCE Points LOCATIONSERVICE geometry="POINT", type="XIATA", country="de", serviceName="default" -
Add fields from secondary tables:
SELECT [LocationDbId], [Clusters_ClusterID], [Clusters.Clusters_ClusterCenter] FROM Cluster(distance="10000", points="Points") DATASOURCE Points LOCATIONSERVICE geometry="POINT", type="XIATA", country="de", serviceName="default" -
Adjust parameter and field names:
SELECT [LocationDbId], [ClusterID], [Clusters.ClusterPoint] as [Clusters_ClusterCenter] FROM Cluster(distance="10000", points="Points") DATASOURCE Points LOCATIONSERVICE geometry="POINT", type="XIATA", country="de", serviceName="default" -
Enclose in boilerplate code:
Load * Extension GeoOperations.ScriptEval(' SELECT [LocationDbId], [ClusterID], [Clusters.ClusterPoint] as [Clusters_ClusterCenter] FROM Cluster(distance="10000", points="Points") DATASOURCE Points LOCATIONSERVICE geometry="POINT", type="XIATA", country="de", serviceName="default" ');
This script code now can be used with Qlik GeoOperations.
GeoOperations and GeoAnalytics field differences
The default fields between GeoOperations and GeoAnalytics scripts have differences, typically with prefixes. When migrating your GeoAnalytics scripts to GeoOperations, you might need to adjust some of the field names.
AddressToPoint
GeoOperations and GeoAnalytics return the following fields:
-
GeoOperations: <id>, Address, AddressPoint, CountryIso2, Adm1, City, PostalCode, Street, HouseNumber, Match
-
GeoAnalytics: [<id>], [Dataset_Address], [Dataset_Geometry], [CountryIso2], [Dataset_Adm1], [Dataset_City], [Dataset_PostalCode], [Dataset_Street], [Dataset_HouseNumber], [Dataset_Match]
GeoAnalytics and GeoOperations have the following differences:
-
GeoAnalytics fields have prefixes from the dataset.
-
Dataset_Geometry is called AddressPoint in GeoOperations.
Binning
GeoOperations and GeoAnalytics return the following fields:
-
GeoOperations: <id>, BinId, BinTable.BinPolygon, BinTable.CenterPoint
-
GeoAnalytics: [<id>], [RH2W3], [RH2W3_CenterPoint]
GeoAnalytics and GeoOperations have the following differences:
-
In GeoAnalytics, RH2W3 is the polygon field and its name is generated based on grid size / ratio. In GeoOperations the field is BinTable.BinPolygon.
-
GeoAnalytics does not have a BinId field.
Closest
GeoOperations and GeoAnalytics return the following fields:
-
GeoOperations: dataset_dataset2_RelationId, dataset.<ds1 id>, dataset2.<ds2 id>, Distance
-
GeoAnalytics: [Dataset1_Dataset2_RelationId], [Dataset1.<ds1 id>], [Dataset2.<ds2 id>], [Dataset1_Dataset2_Distance]
GeoAnalytics and GeoOperations have the following differences:
-
GeoOperations has no prefixes for the Distance field.
Cluster
GeoOperations and GeoAnalytics return the following fields:
-
GeoOperations: <id>, ClusterID, Clusters.ClusterPoint, Clusters.PointCount
-
GeoAnalytics: [<id>], [Clusters_ClusterID], [Clusters_ClusterCenter], [Clusters_PointCount]
GeoAnalytics and GeoOperations have the following differences:
-
Prefixes are different between GeoOperations and GeoAnalytics.
Dissolve
GeoOperations and GeoAnalytics return the following fields:
-
GeoOperations: <id>, DissolvedPolygon
-
GeoAnalytics: [<id>], [<id>_Geometry]
GeoAnalytics and GeoOperations have the following differences:
-
Name of the geometry column
Intersects
GeoOperations and GeoAnalytics return the following fields:
-
GeoOperations: dataset_dataset2_RelationId, dataset.<dataset1 id>, dataset2.<dataset2 id>, dataset.RelativeOverlap, dataset2.RelativeOverlap
-
GeoAnalytics: [Dataset1_Dataset2_RelationKey], [Dataset1.<ds1 id>], [Dataset2.<ds1 id>], [Dataset1_RelativeOverlap], [Dataset2_RelativeOverlap]
GeoAnalytics and GeoOperations have the following key differences:
-
Prefixes between GeoOperations and GeoAnalytics differ.
IpLookup
GeoOperations and GeoAnalytics return the following fields:
-
GeoOperations: <id>, IpPoint, CountryIso2, Adm1Code, City
-
GeoAnalytics: [<id>], [IpTable_Geometry], [CountryIso2], [IpTable_Adm1Code], [IpTable_City]
GeoAnalytics and GeoOperations have the following differences:
-
IpTable_Geometry in GeoAnalytics is IpPoint in GeoOperations.
-
Prefixes between GeoOperations and GeoAnalytics differ.
Load (location dataset)
GeoOperations and GeoAnalytics return the following fields:
-
GeoOperations (area): LocationDbId, LocationPolygon, Name, CountryIso2, Adm1Code, Adm2Code, LocationDbType
-
GeoOperations (point): LocationDbId, LocationPoint, Name, CountryIso2, Adm1Code, Adm2Code, LocationDbType
-
GeoAnalytics: [LocationDbId], [Dataset_Geometry], [Dataset_Name], [CountryIso2], [Dataset_Adm1Code], [Dataset_Adm2Code], [LocationDbType]
GeoAnalytics and GeoOperations have the following differences:
-
The geometry fields (LocationPolygon and LocationPoint in GeoAnalytics are Dataset_Geometry in GeoOperations.
-
Prefixes between GeoOperations and GeoAnalytics differ.
PointToAddress
GeoOperations and GeoAnalytics return the following fields:
-
GeoOperations: <id>, Address, AddressPoint, CountryIso2, Adm1, City, PostalCode, Street, HouseNumber, Distance
-
GeoAnalytics: [<id>], [Dataset_Address], [Dataset_Geometry], [CountryIso2], [Dataset_Adm1], [Dataset_City], [Dataset_PostalCode], [Dataset_Street], [Dataset_HouseNumber], [Dataset_Distance]
GeoAnalytics and GeoOperations have the following differences:
-
Prefixes between GeoOperations and GeoAnalytics differ.
Routes
GeoOperations and GeoAnalytics return the following fields:
-
GeoOperations: <id>, Distance, Duration, Status, LowResLine
-
GeoAnalytics: [<id>], [Dataset_Distance], [Dataset_Duration], [Dataset_Status], [Dataset_PathLowRes]
GeoAnalytics and GeoOperations have the following differences:
-
The geometry field Dataset_PathLowRes in GeoAnalytics is LowResLine in GeoOperations.
-
Prefixes between GeoOperations and GeoAnalytics differ.
Simplify
GeoOperations and GeoAnalytics return the following fields:
-
GeoOperations: <id>, Simplified_<geo field name>
-
GeoAnalytics: [<id>], [Dataset_Simplified_Geometry]
.GeoAnalytics and GeoOperations have the following differences:
-
The names of the geometry field are different between GeoOperations and GeoAnalytics.
TravelAreas
GeoOperations and GeoAnalytics return the following fields:
-
GeoOperations: <id>, TravelArea, Cost, CostUnit, Status
-
GeoAnalytics: [<id>], [Dataset_TravelArea], [Dataset_Origin], [Dataset_Cost], [Dataset_CostUnit], [Dataset_Status]
GeoAnalytics and GeoOperations have the following differences:
-
GeoOperations does not include an origin field.
-
Prefixes between GeoOperations and GeoAnalytics differ.
Within
GeoOperations and GeoAnalytics return the following fields:
-
GeoOperations: dataset_dataset2_RelationId, dataset.<dataset1 id>, dataset2.<dataset2 id>
-
GeoAnalytics: [Enclosed_Enclosing_RelationId], [Enclosed.<dataset 1/2 id>], [Enclosing.<datasets 1/2 id>]
GeoAnalytics and GeoOperations have the following differences:
-
GeoOperations prefixes include dataset names, while GeoAnalytics also includes the prefix Enclosed.
App links
For apps that will remain in Qlik Sense Enterprise Client-Managed, you can create links from Qlik Cloud back to the app. Links provide a single hub experience for users during migration.
Do the following:
-
In the Migration app > Exports Apps tab, apps tagged as App -05 URL Link to Qlik Sense Windows show in the Export Table for Linked Apps table.
-
Export, and then save as the folder name: links.csv.
-
Run CLI script 6_setlinks.ps1.
App remediation
When you tag an app for remediation, some script changes are required for these apps:
-
Create and Update the data connections.
-
Modify Section Access to correspond to your Identity Provider. See Managing data security with Section Access.
-
Various system and folders related functions. See Load script modifications.
Tag apps for which generic links should be created as App - 05 URL Link to Qlik Sense Windows.
Tag apps that will be distributed via multi-cloud as App - 05 Migrated via Multi-Cloud.
Tag apps that are being reviewed as App - 10 Selected for Migration Review.
Tag apps that are to be migrated to Qlik Cloud as App - 20 Ready to Migrate.
Tag apps for which remediation work is required as App - 30 Migration Remediation Needed.
Tag apps that are completed as App - 40 Migration Completed.
Tag apps that will not be migrated as App - 99 Will Not Migrate.
Migrating the apps
Open the Export Apps tab in the Migration app.
-
Apps that are tagged as App - 30 Ready to Migrate will be shown in the "Export Table for Apps Ready to Migrate" table.
-
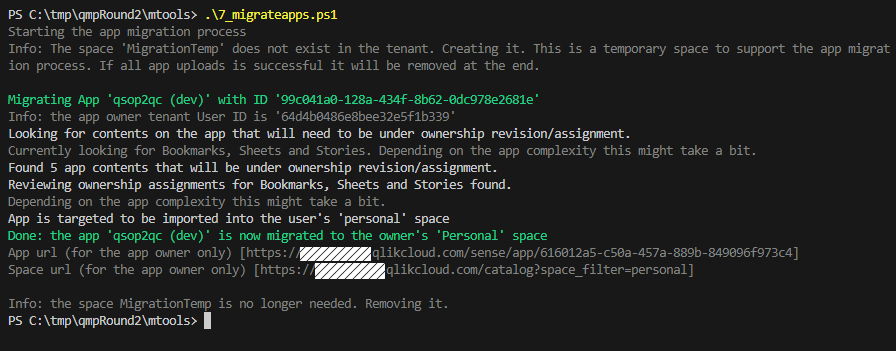
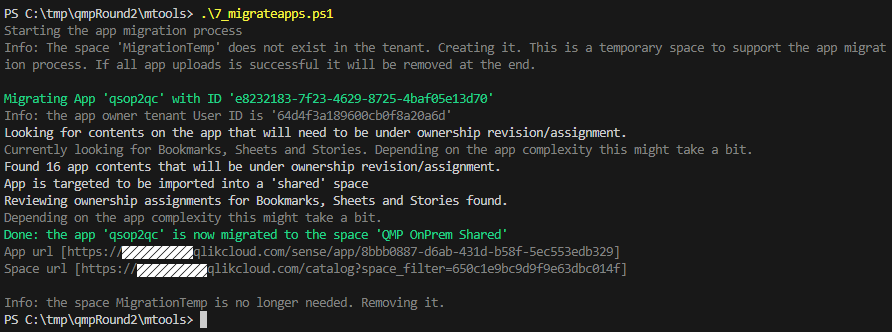
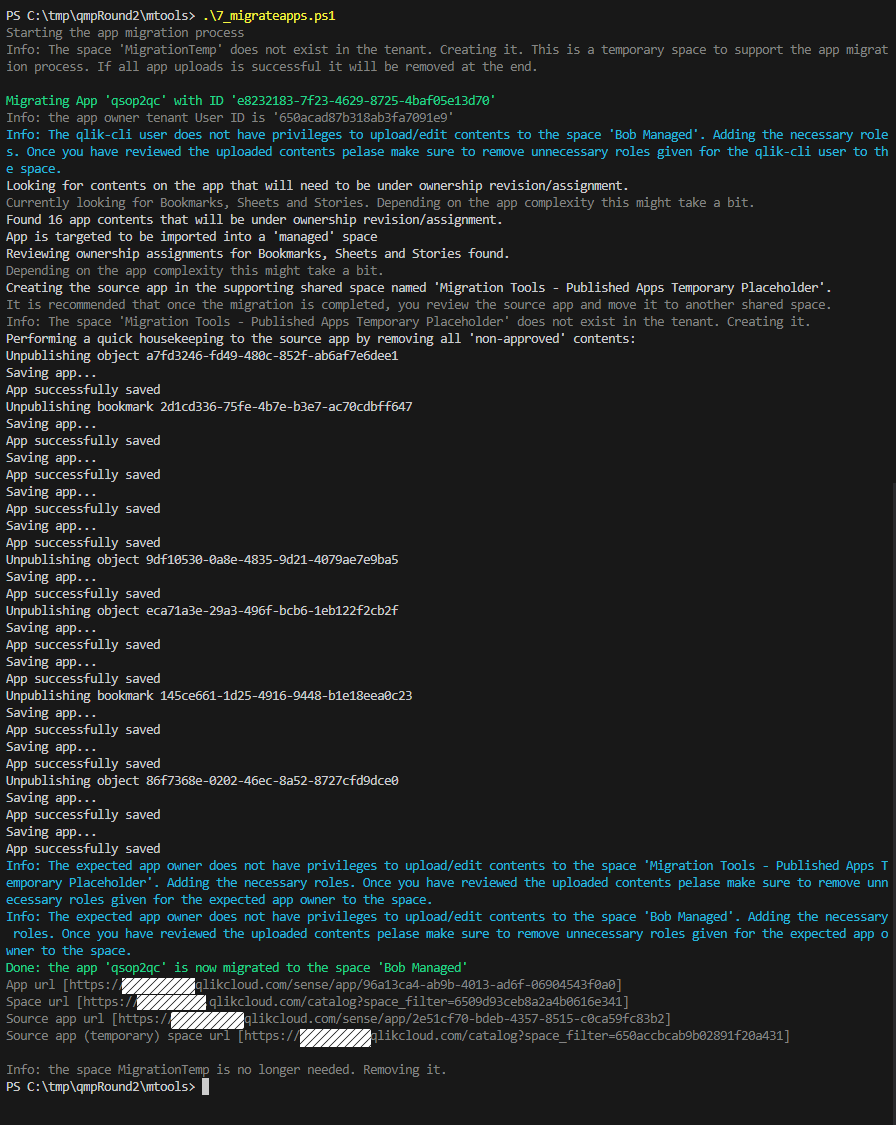
Run the CLI script 7_migrateapps.ps1.
-
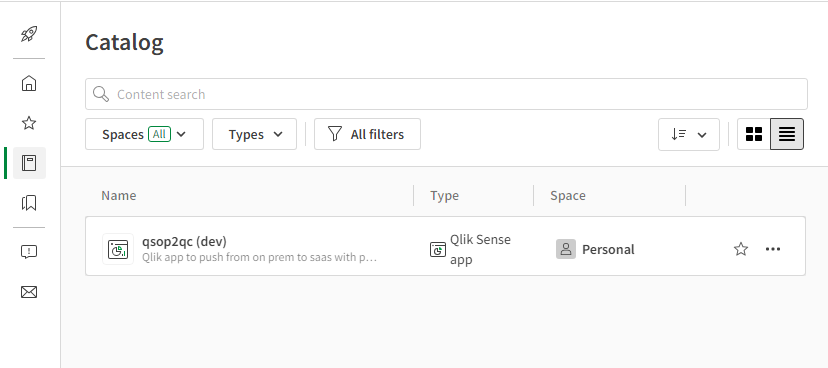
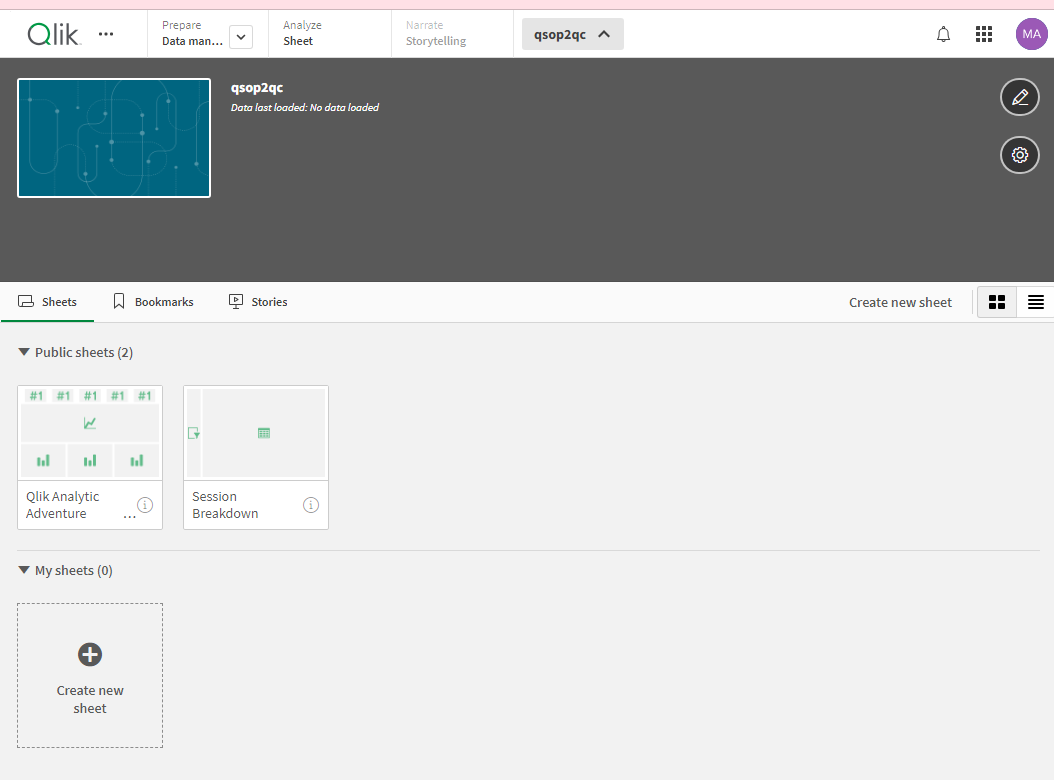
The app is exported from Qlik Sense Enterprise Client-Managed and imported into Qlik Cloud without data.
-
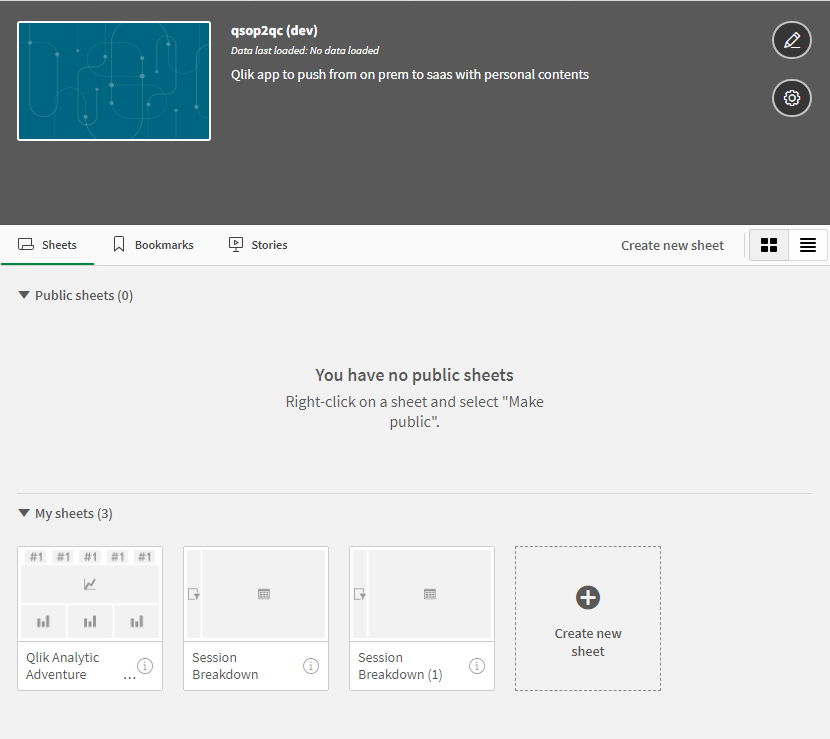
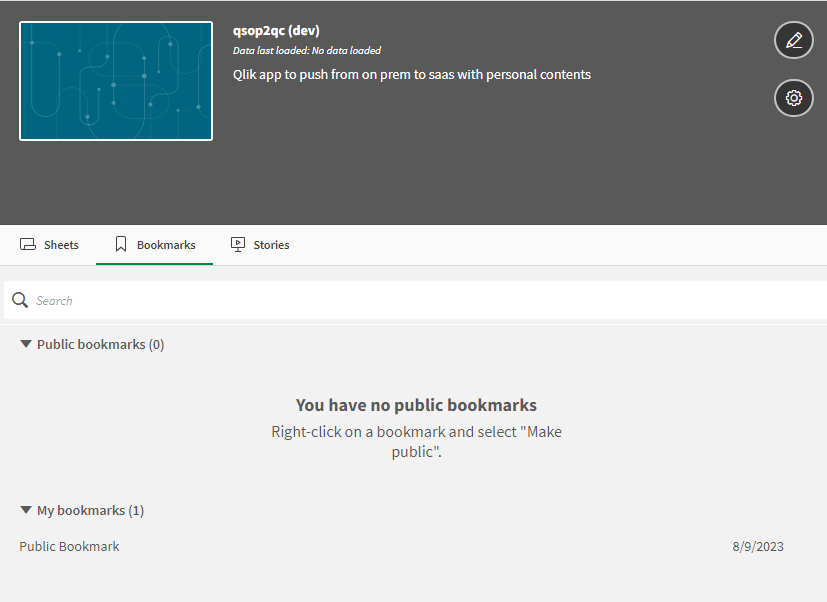
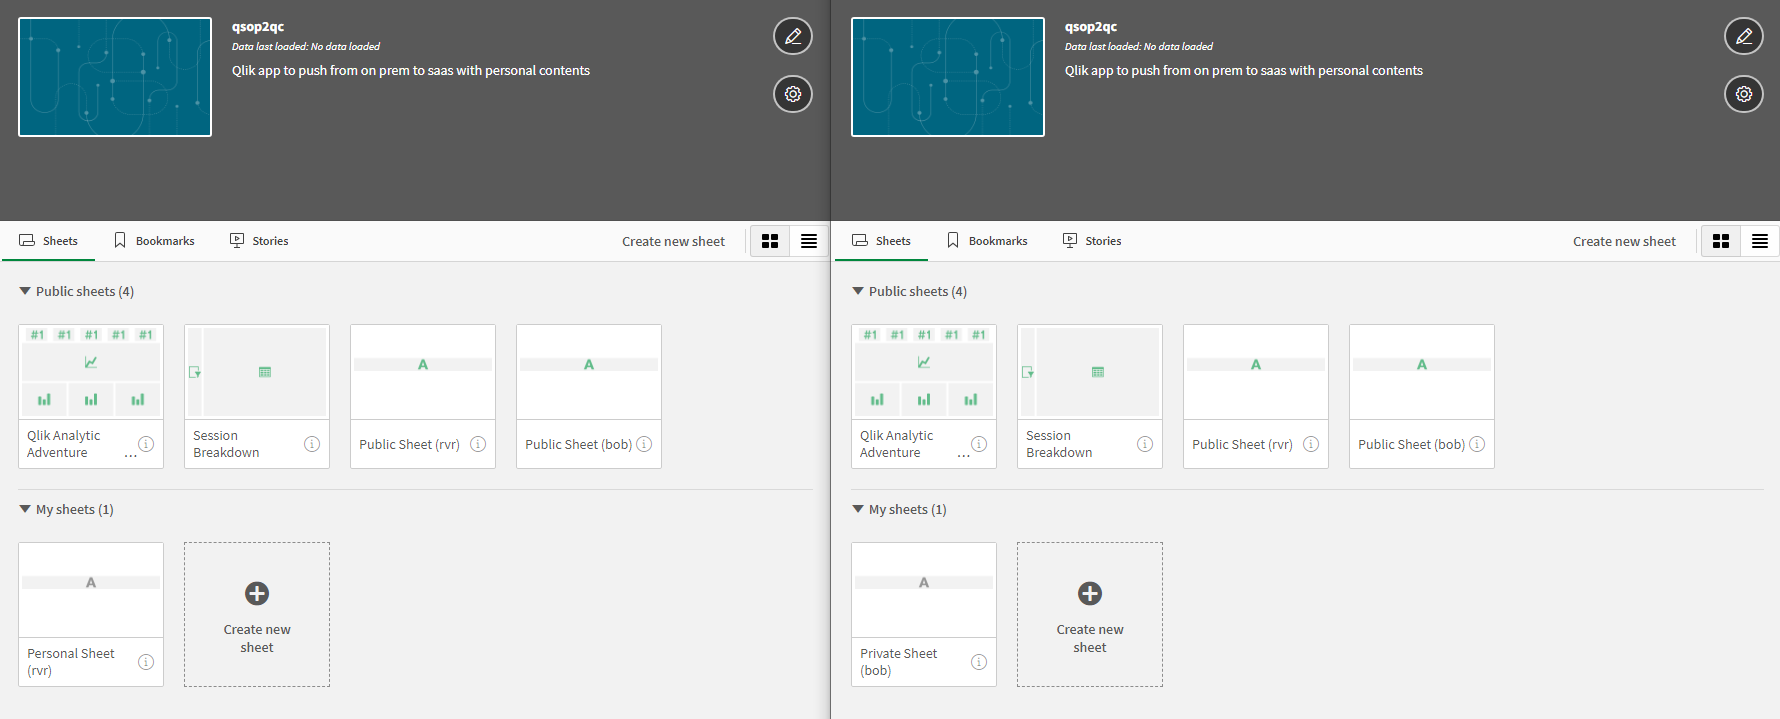
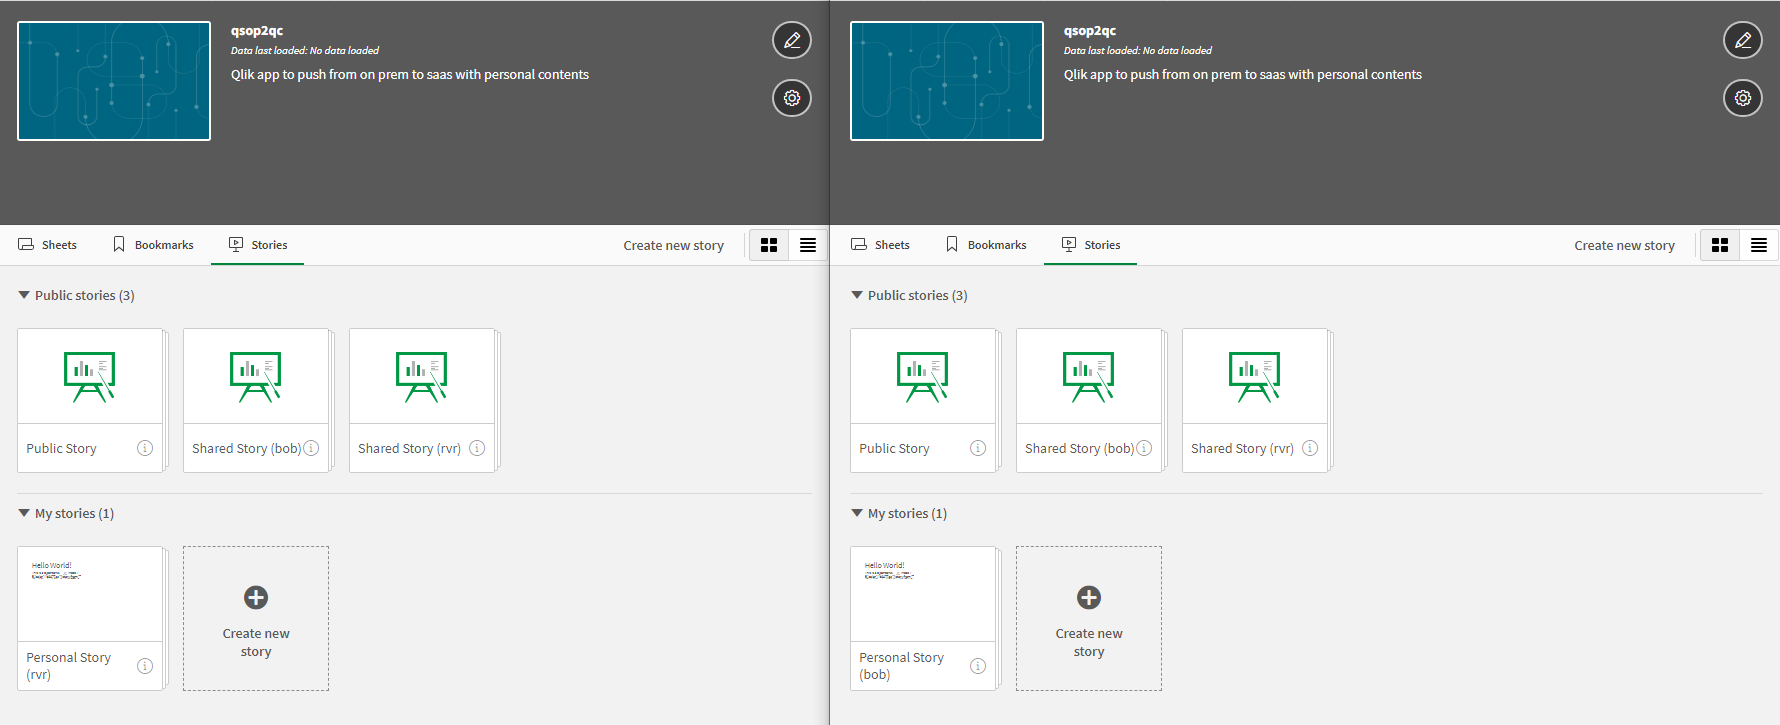
Self-service sheets, bookmarks and stories are also migrated. Their location within the migrated app will depend on the target space.
-
The app owner for Personal space apps in Qlik Cloud must be the same owner as the one for the original app on Qlik Sense Enterprise Client-Managed. If users differ the Sheets, Stories and Bookmarks will not be displayed when the user opens the app in Qlik Cloud. If you need to import the app to a different owner, we suggest two alternatives:
-
Import manually, via export in Qlik Sense Enterprise Client-Managed Qlik Management Console, and then by clicking on Add New > Upload app in the Qlik Cloud Analytics Home page.
-
Move the app imported by the CLI script to a Shared space where the previous or original owner has content creation privileges. The previous owner can now make the contents available to the new owner by publishing them. The new owner will be able to unpublish the contents and assume the ownership.
-
-
In Qlik Cloud, the Personal Sheets, Bookmarks and Stories of apps migrated to Shared or Managed Spaces can only be accessed by the same user that is identified as the owner of those contents on Qlik Sense Enterprise Client-Managed. If you need to import those contents for another user, change the owner of the objects in Qlik Sense Enterprise Client-Managed and re-execute the import.
-
The CLI script will add all available roles automatically for the configured qlik-cli and app owner users in the targeted Qlik Cloud spaces if the content creation privileges for these users are missing. Please revise and remove unnecessary privileges once the migration process with the CLI script is completed.
Examples
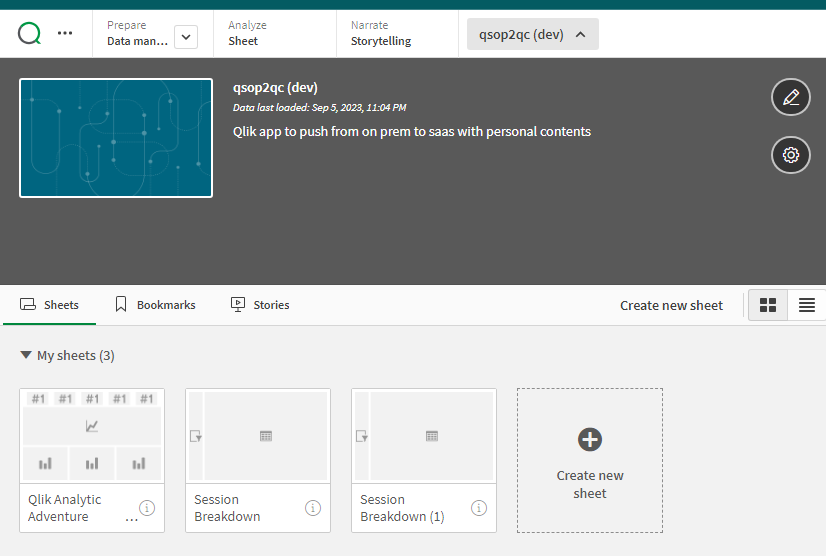
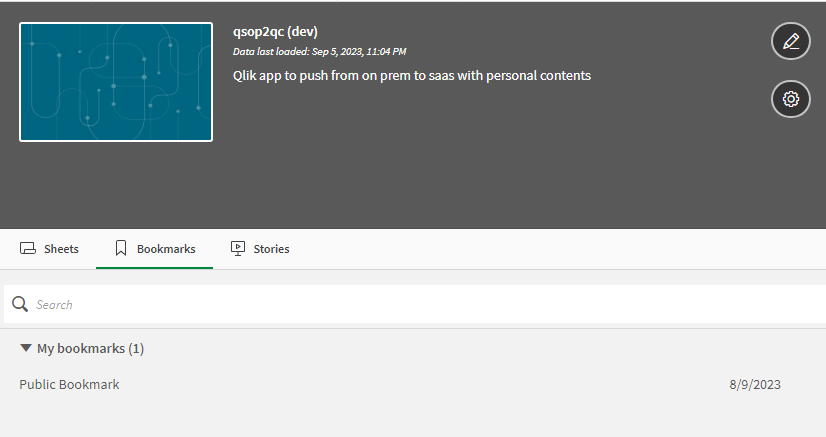
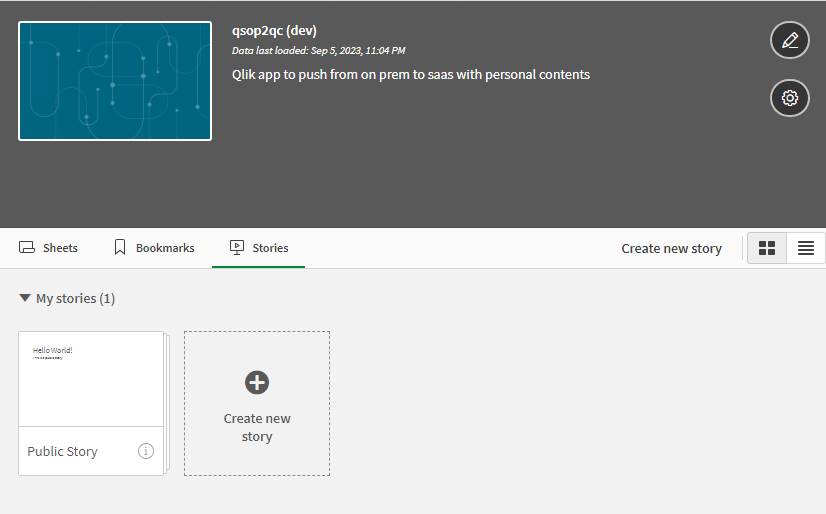
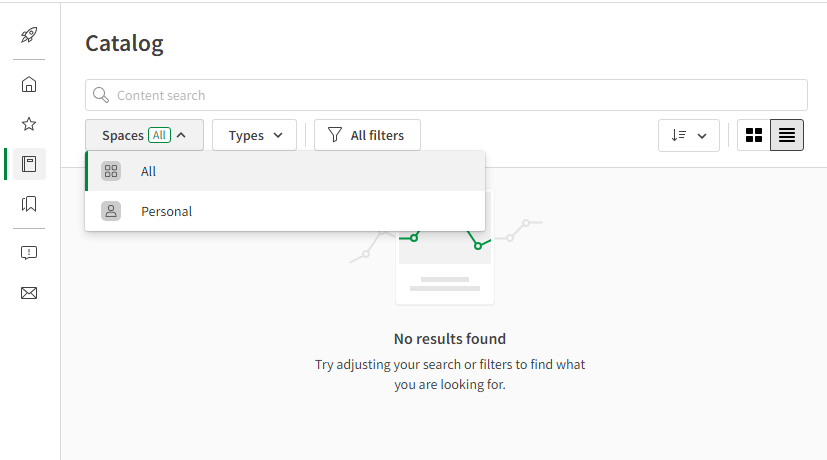
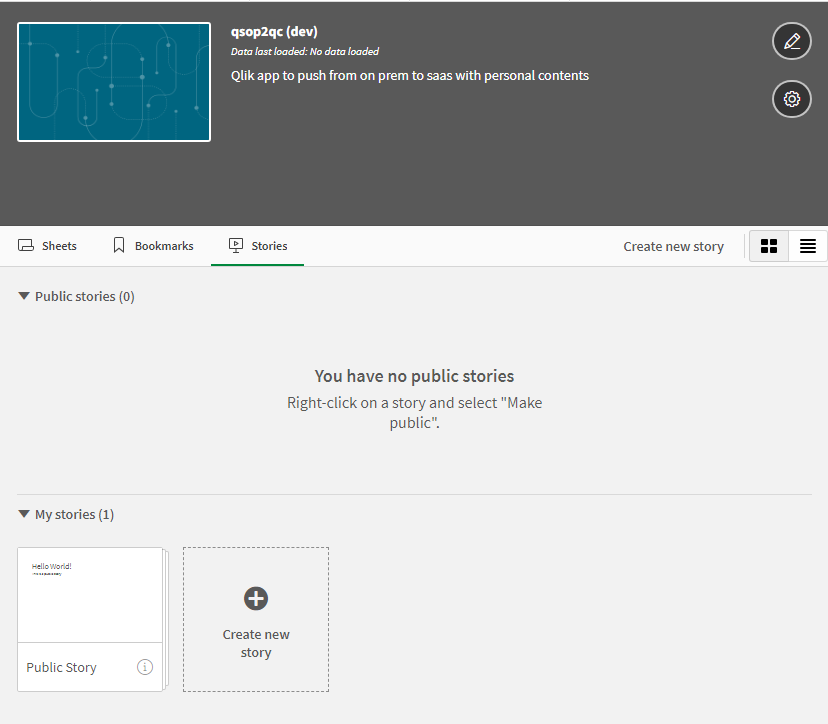
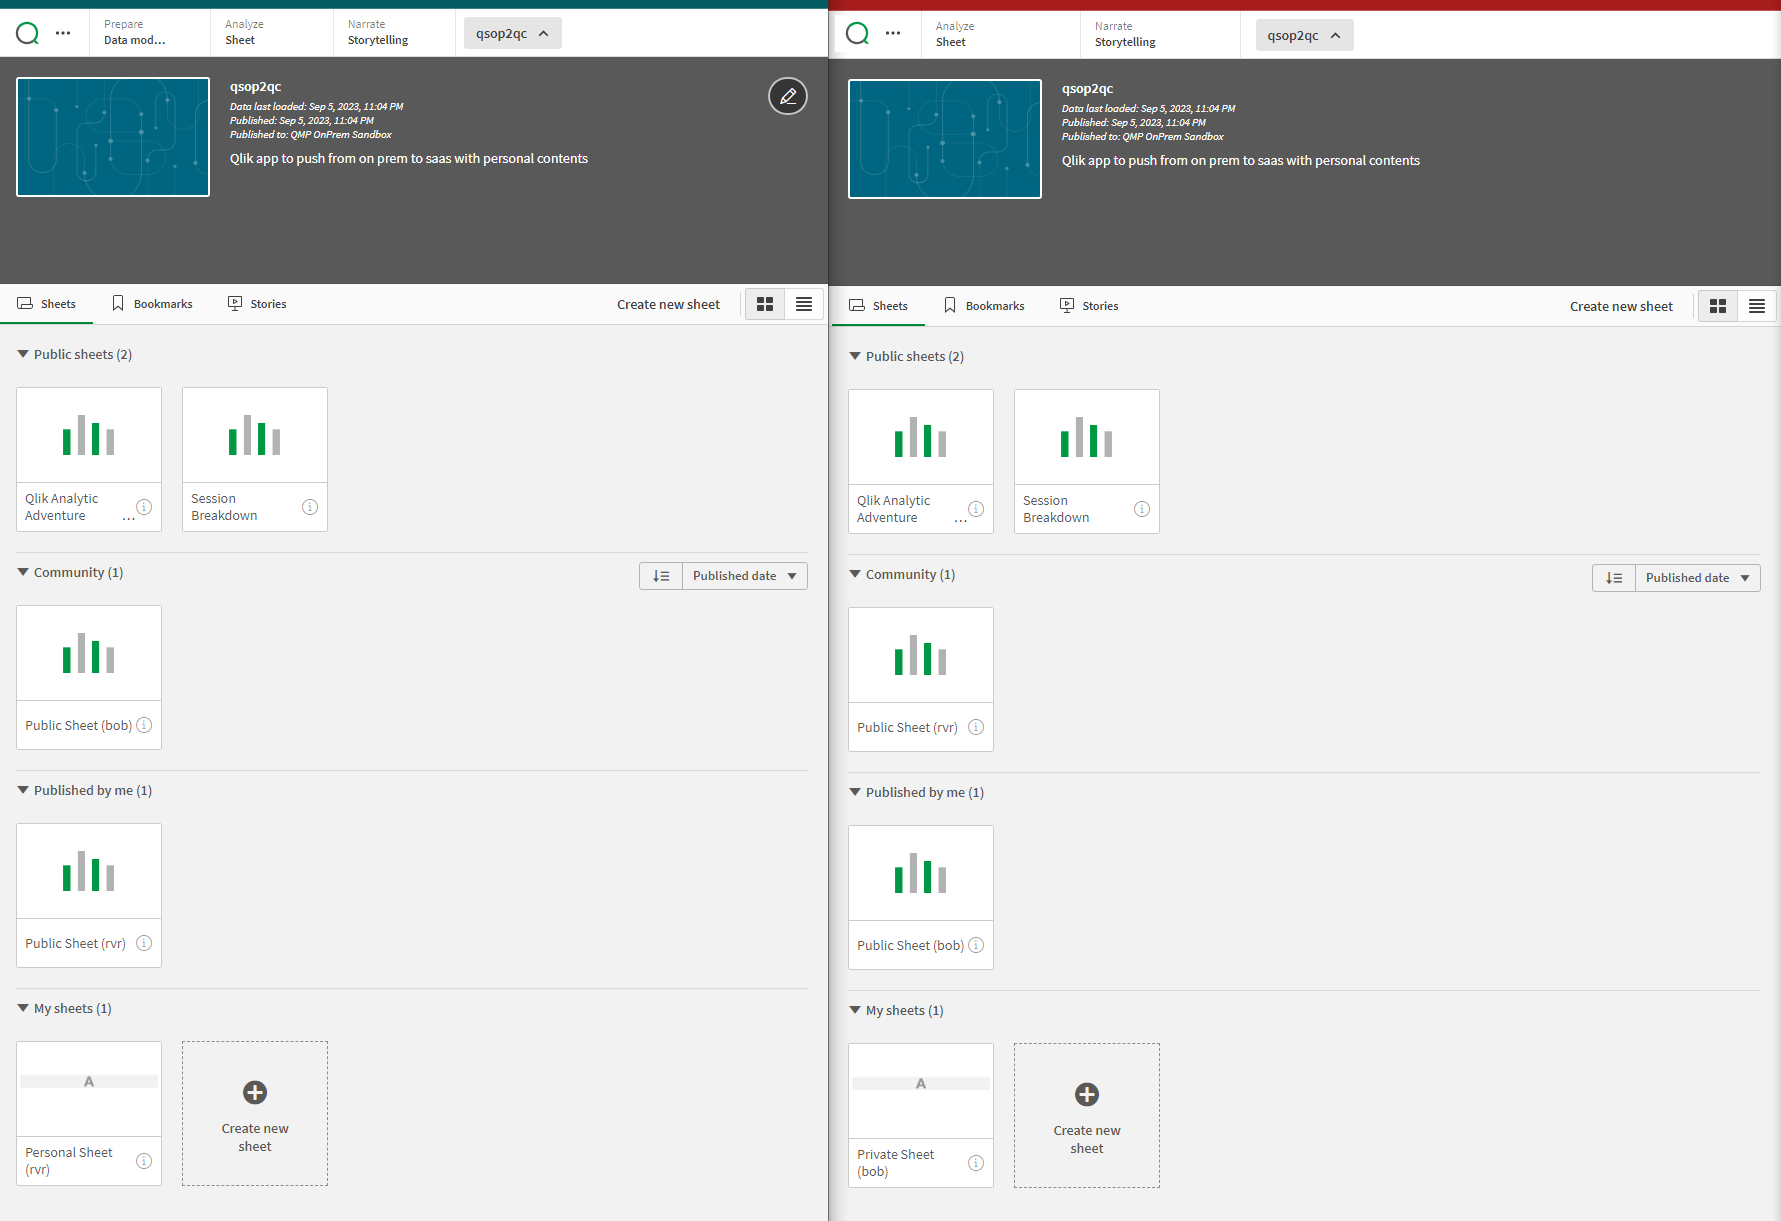
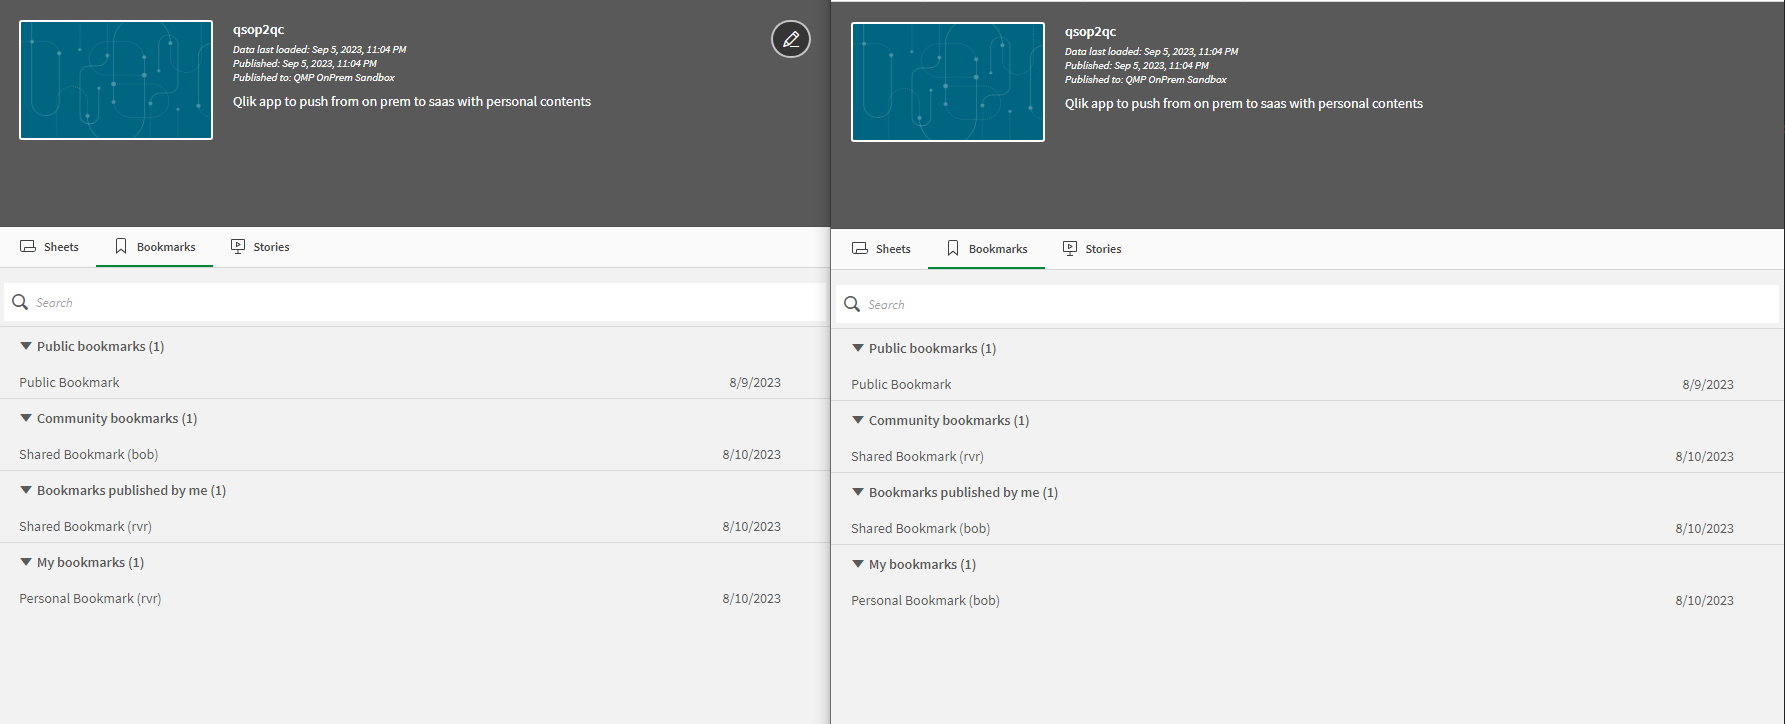
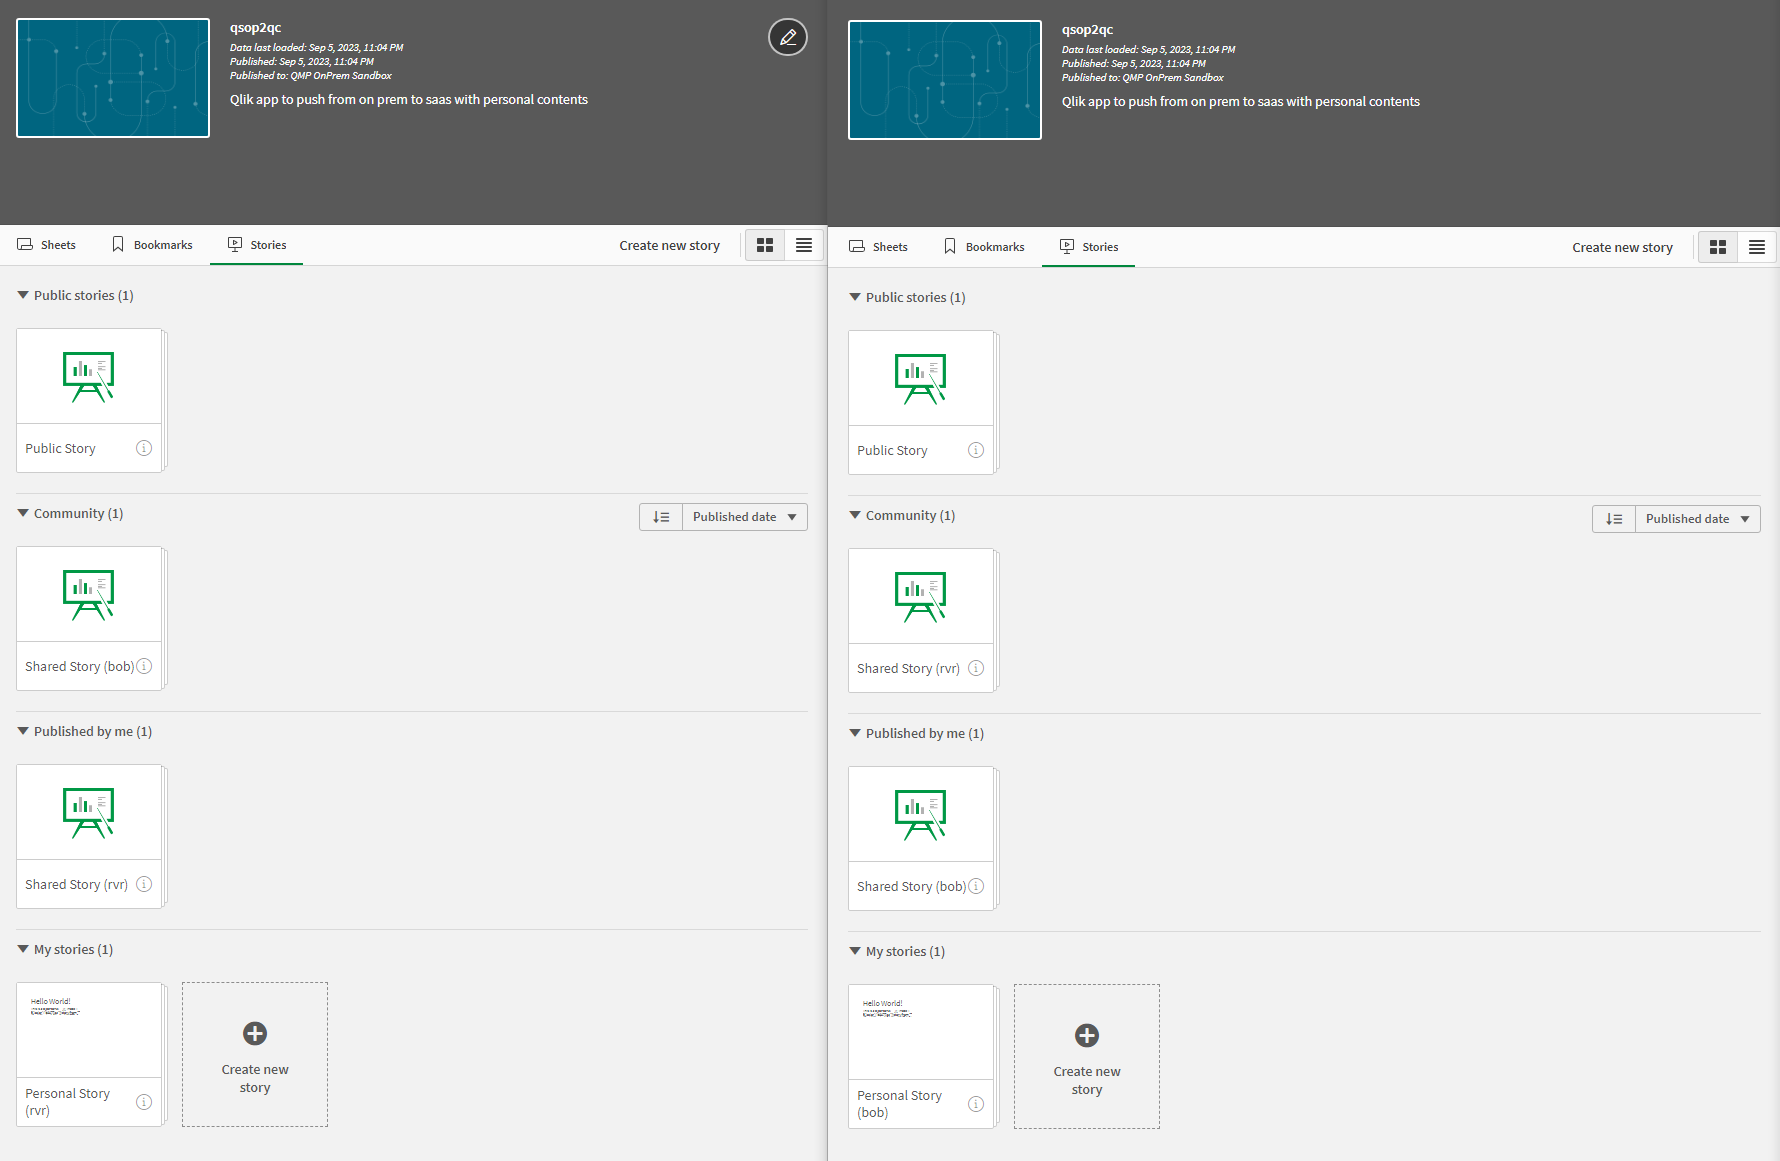
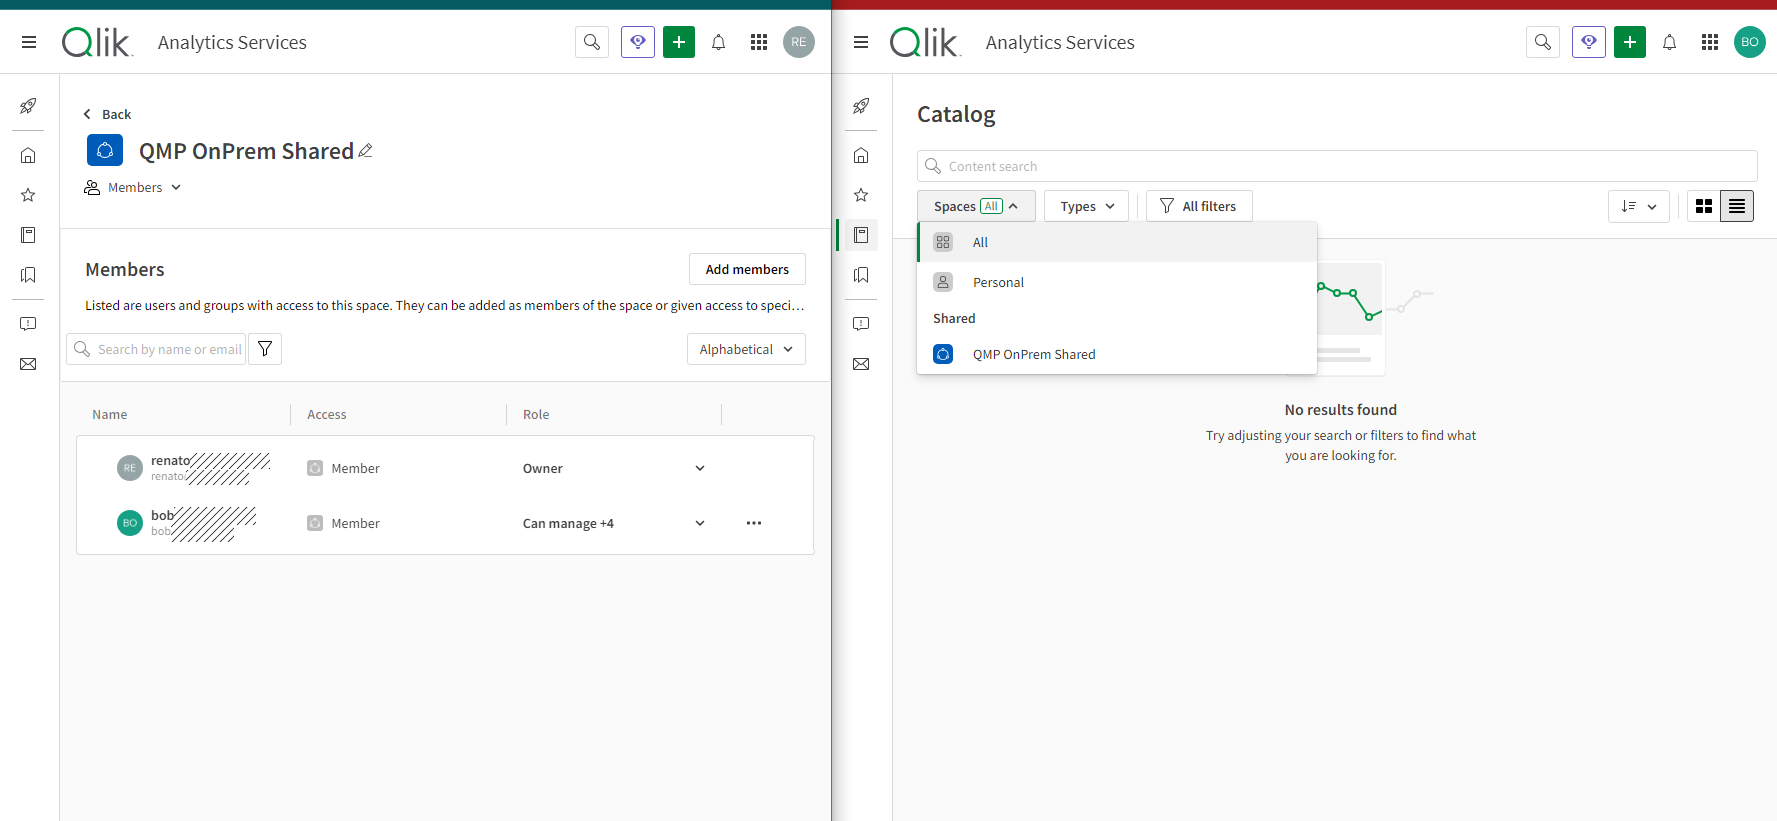
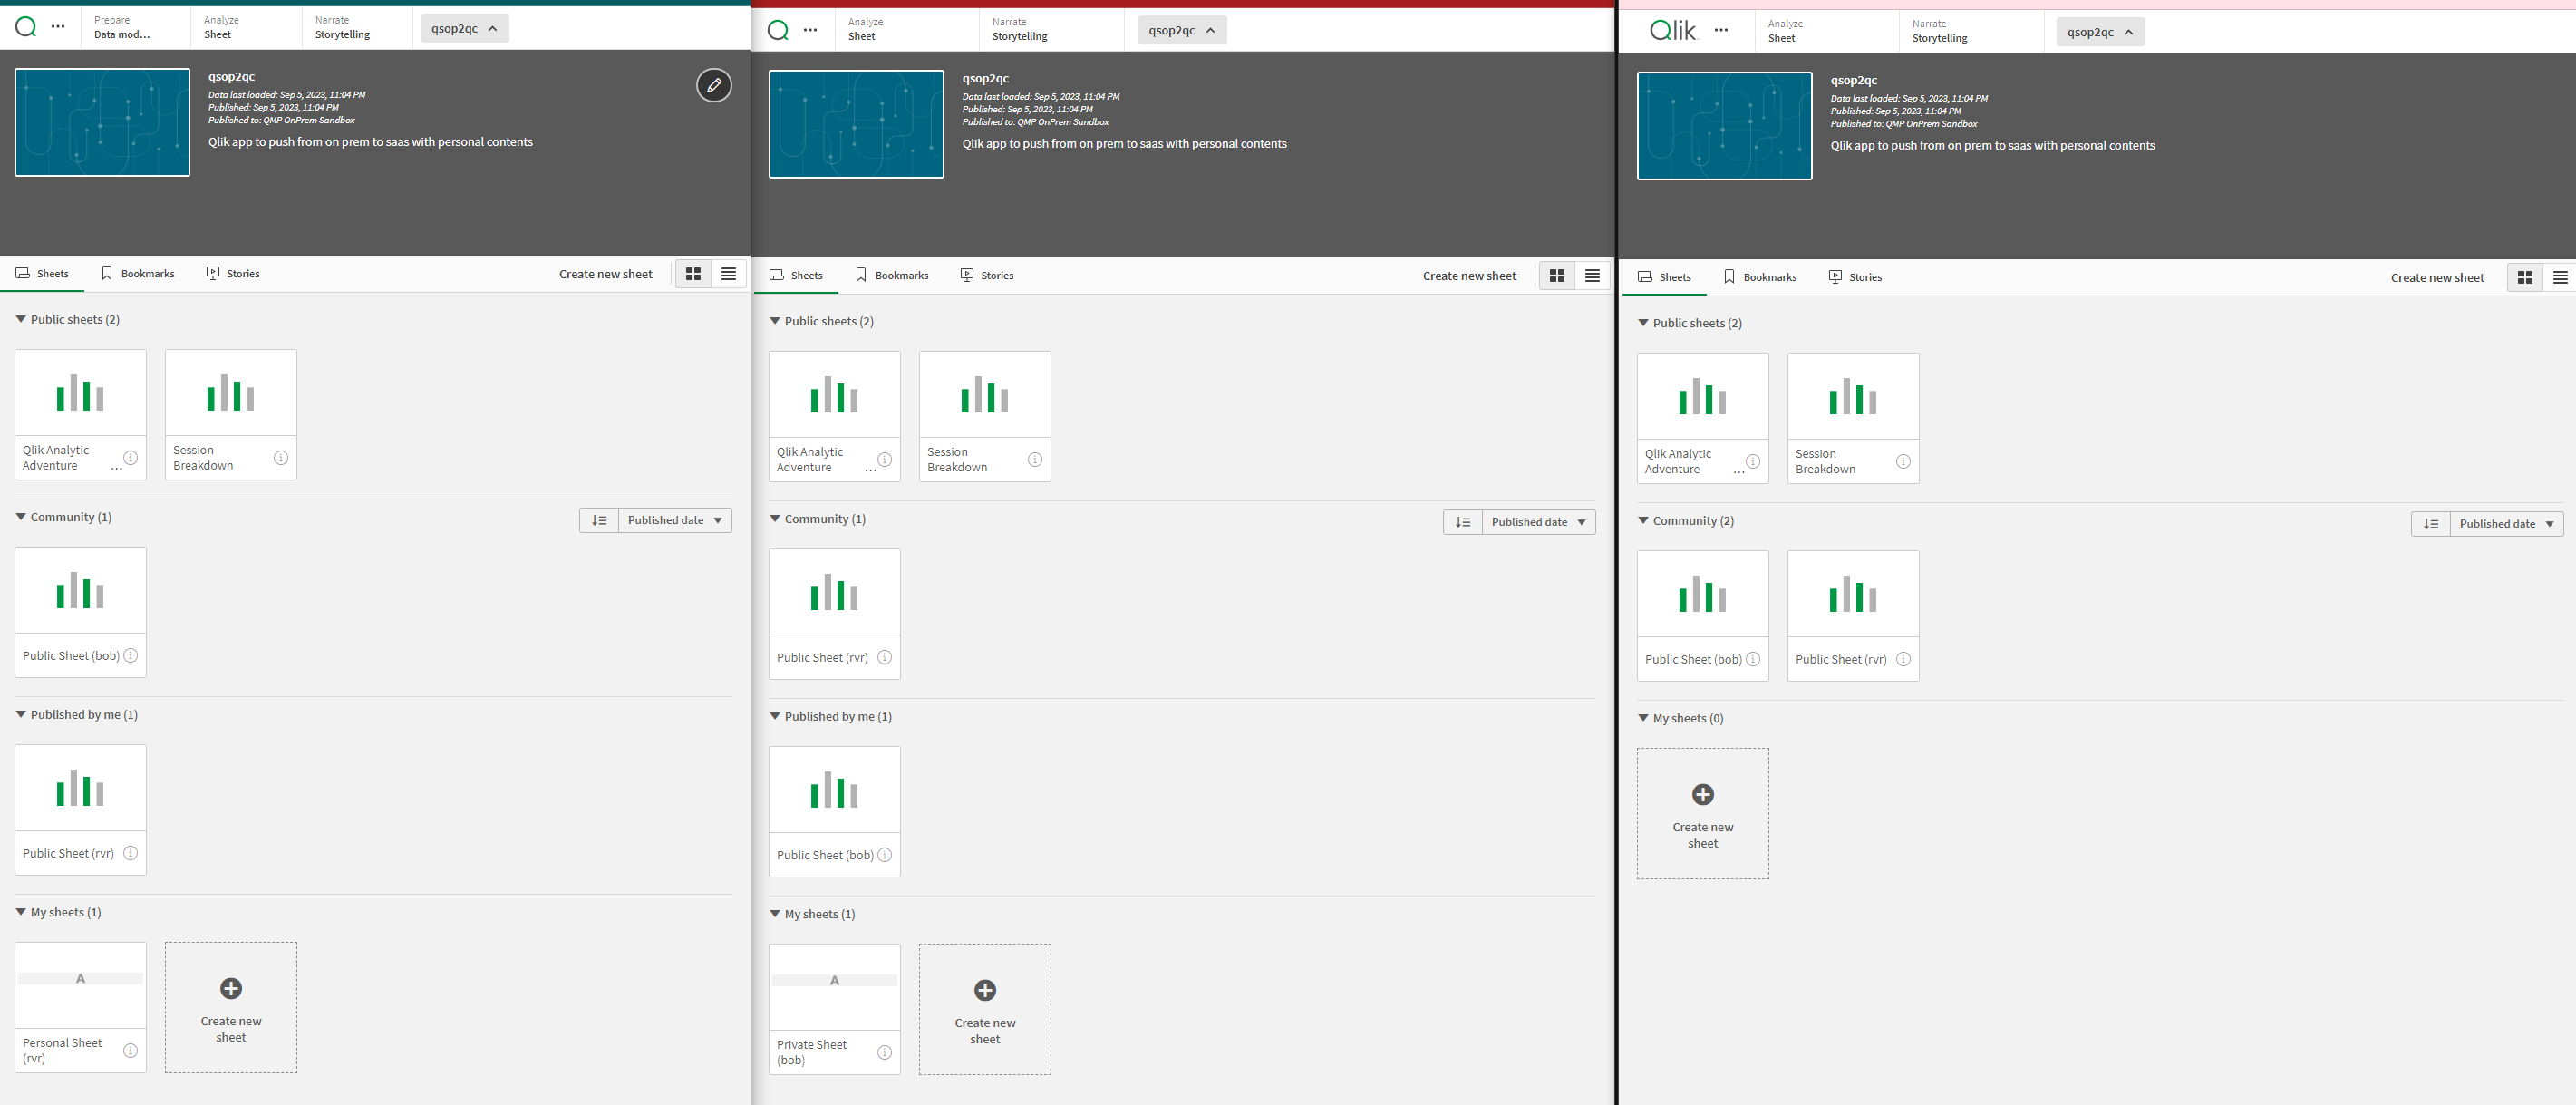
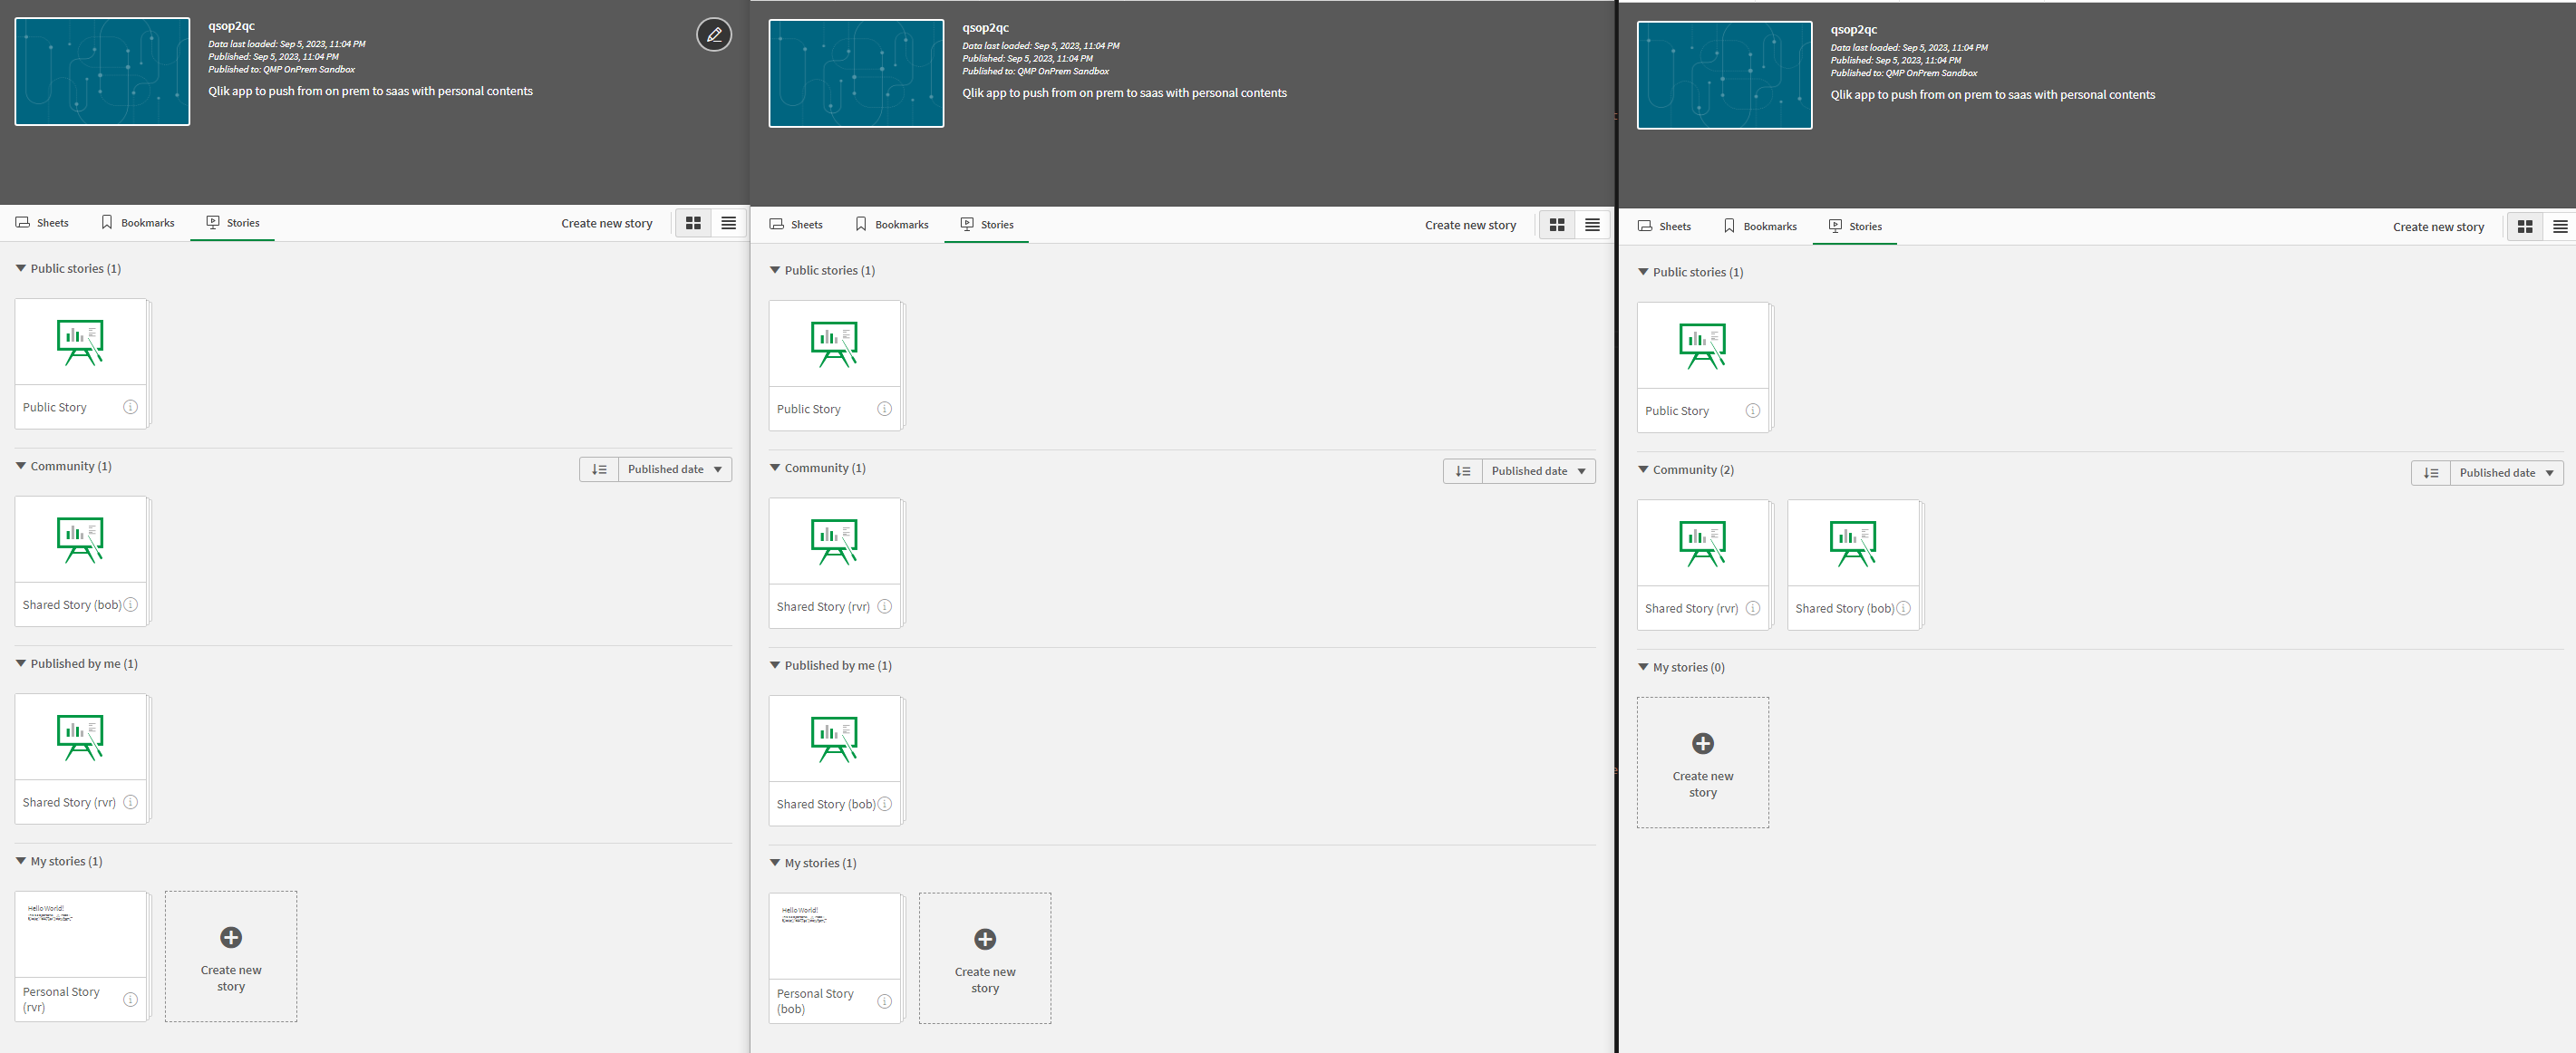
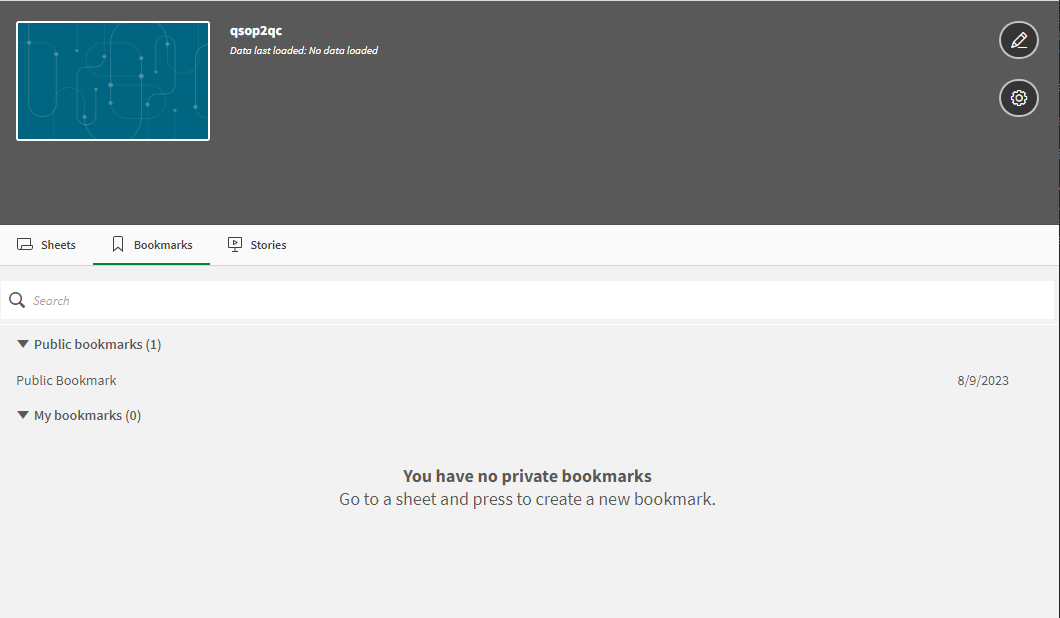
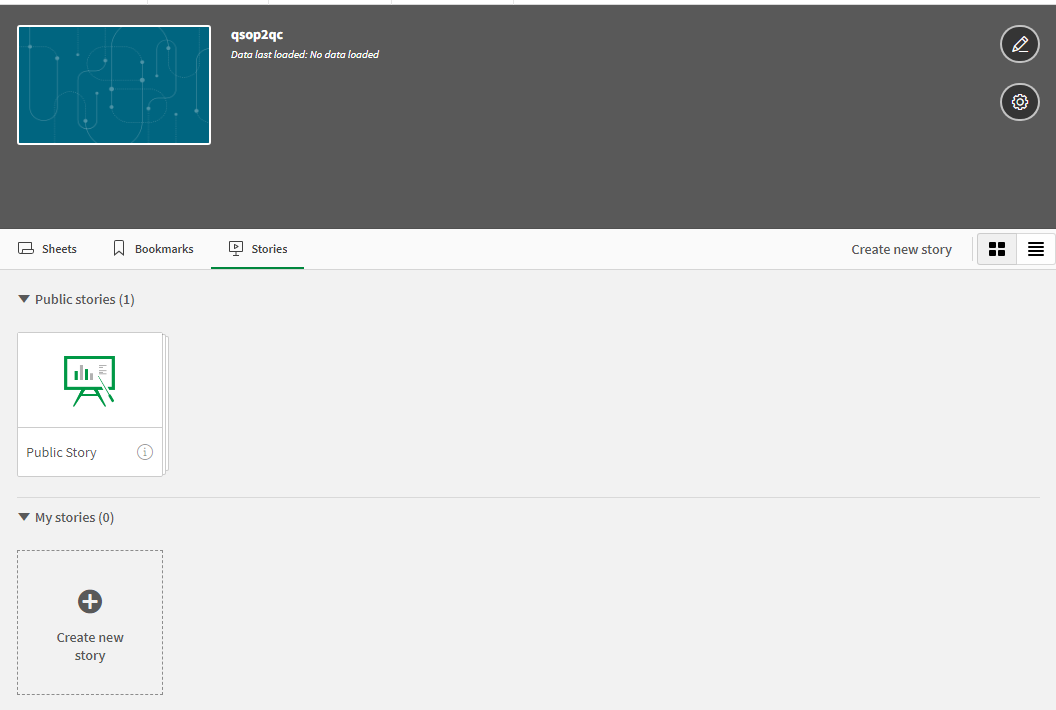
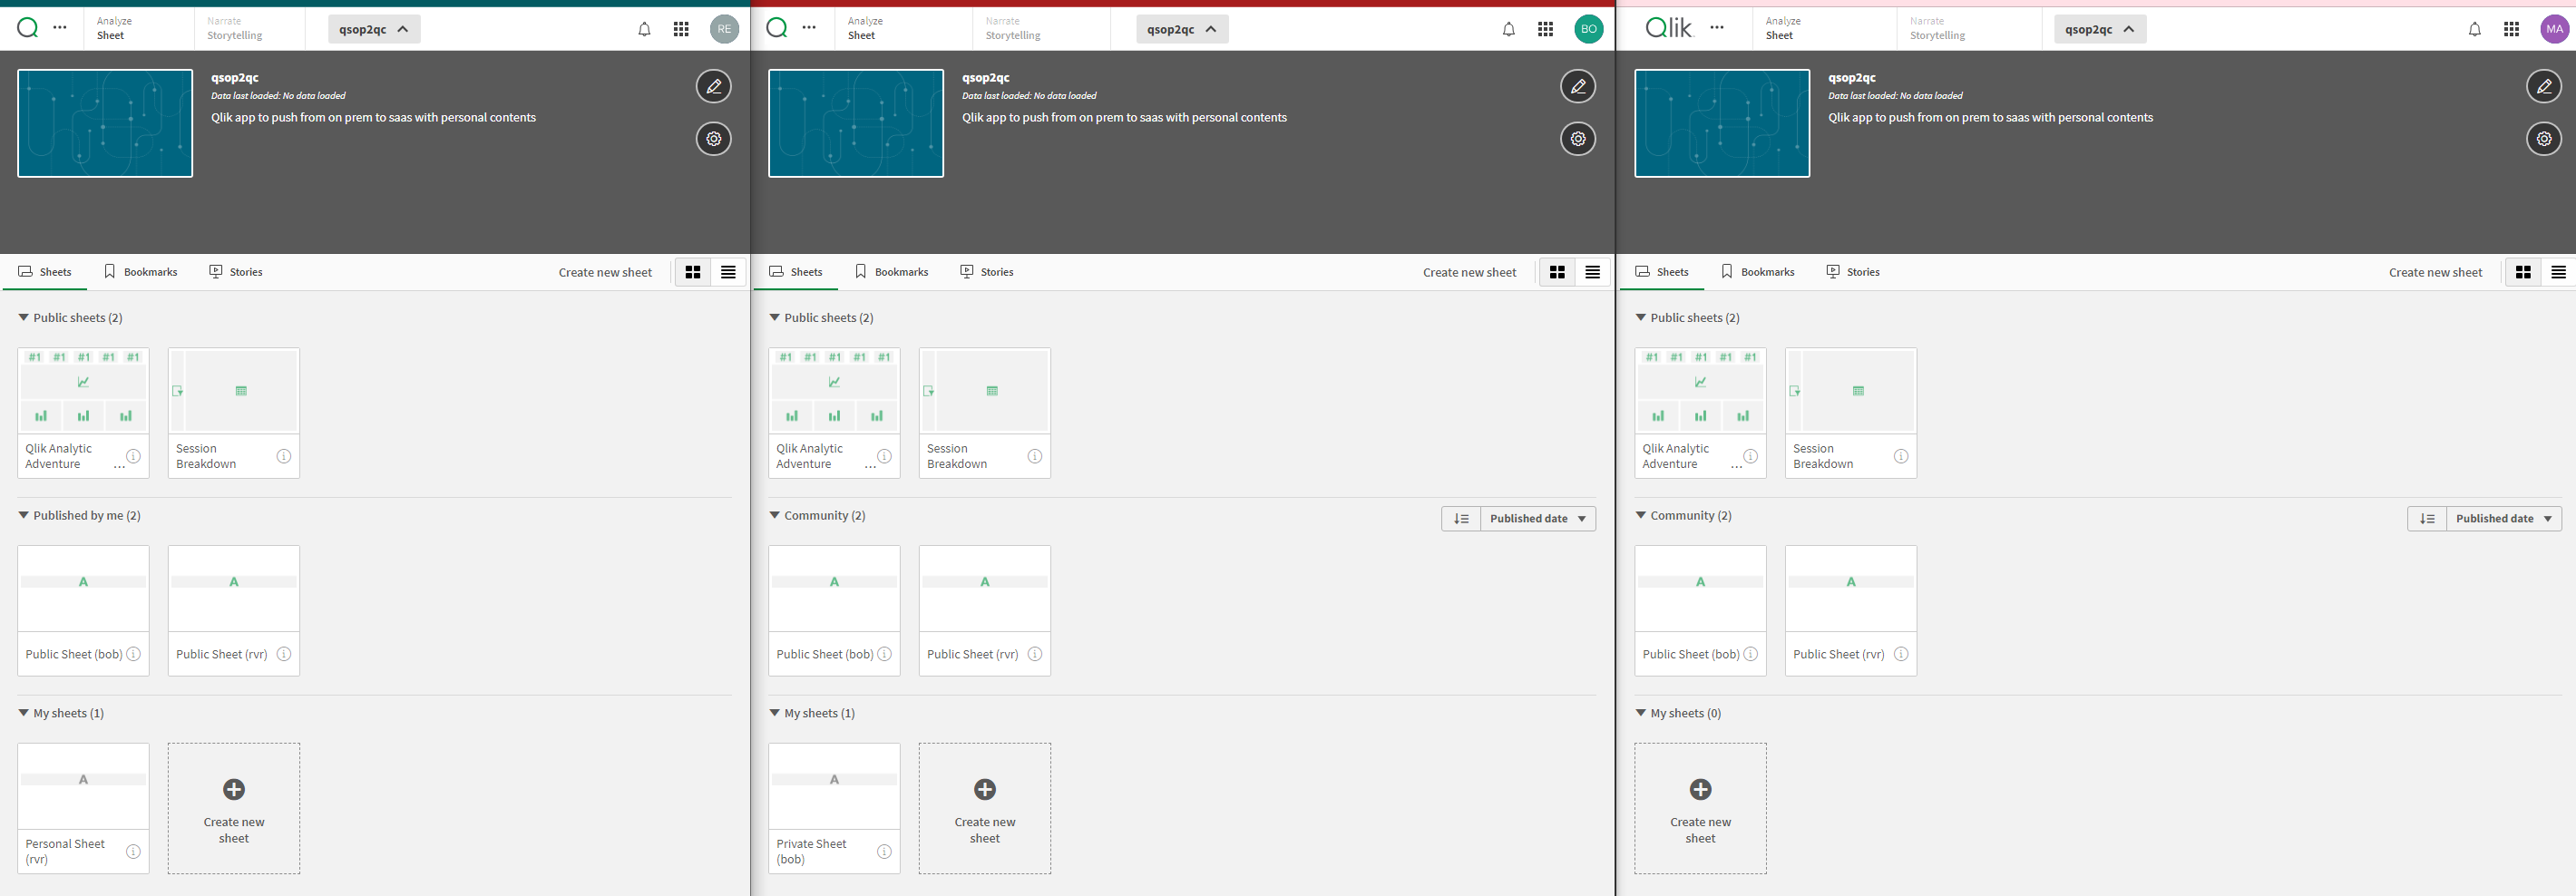
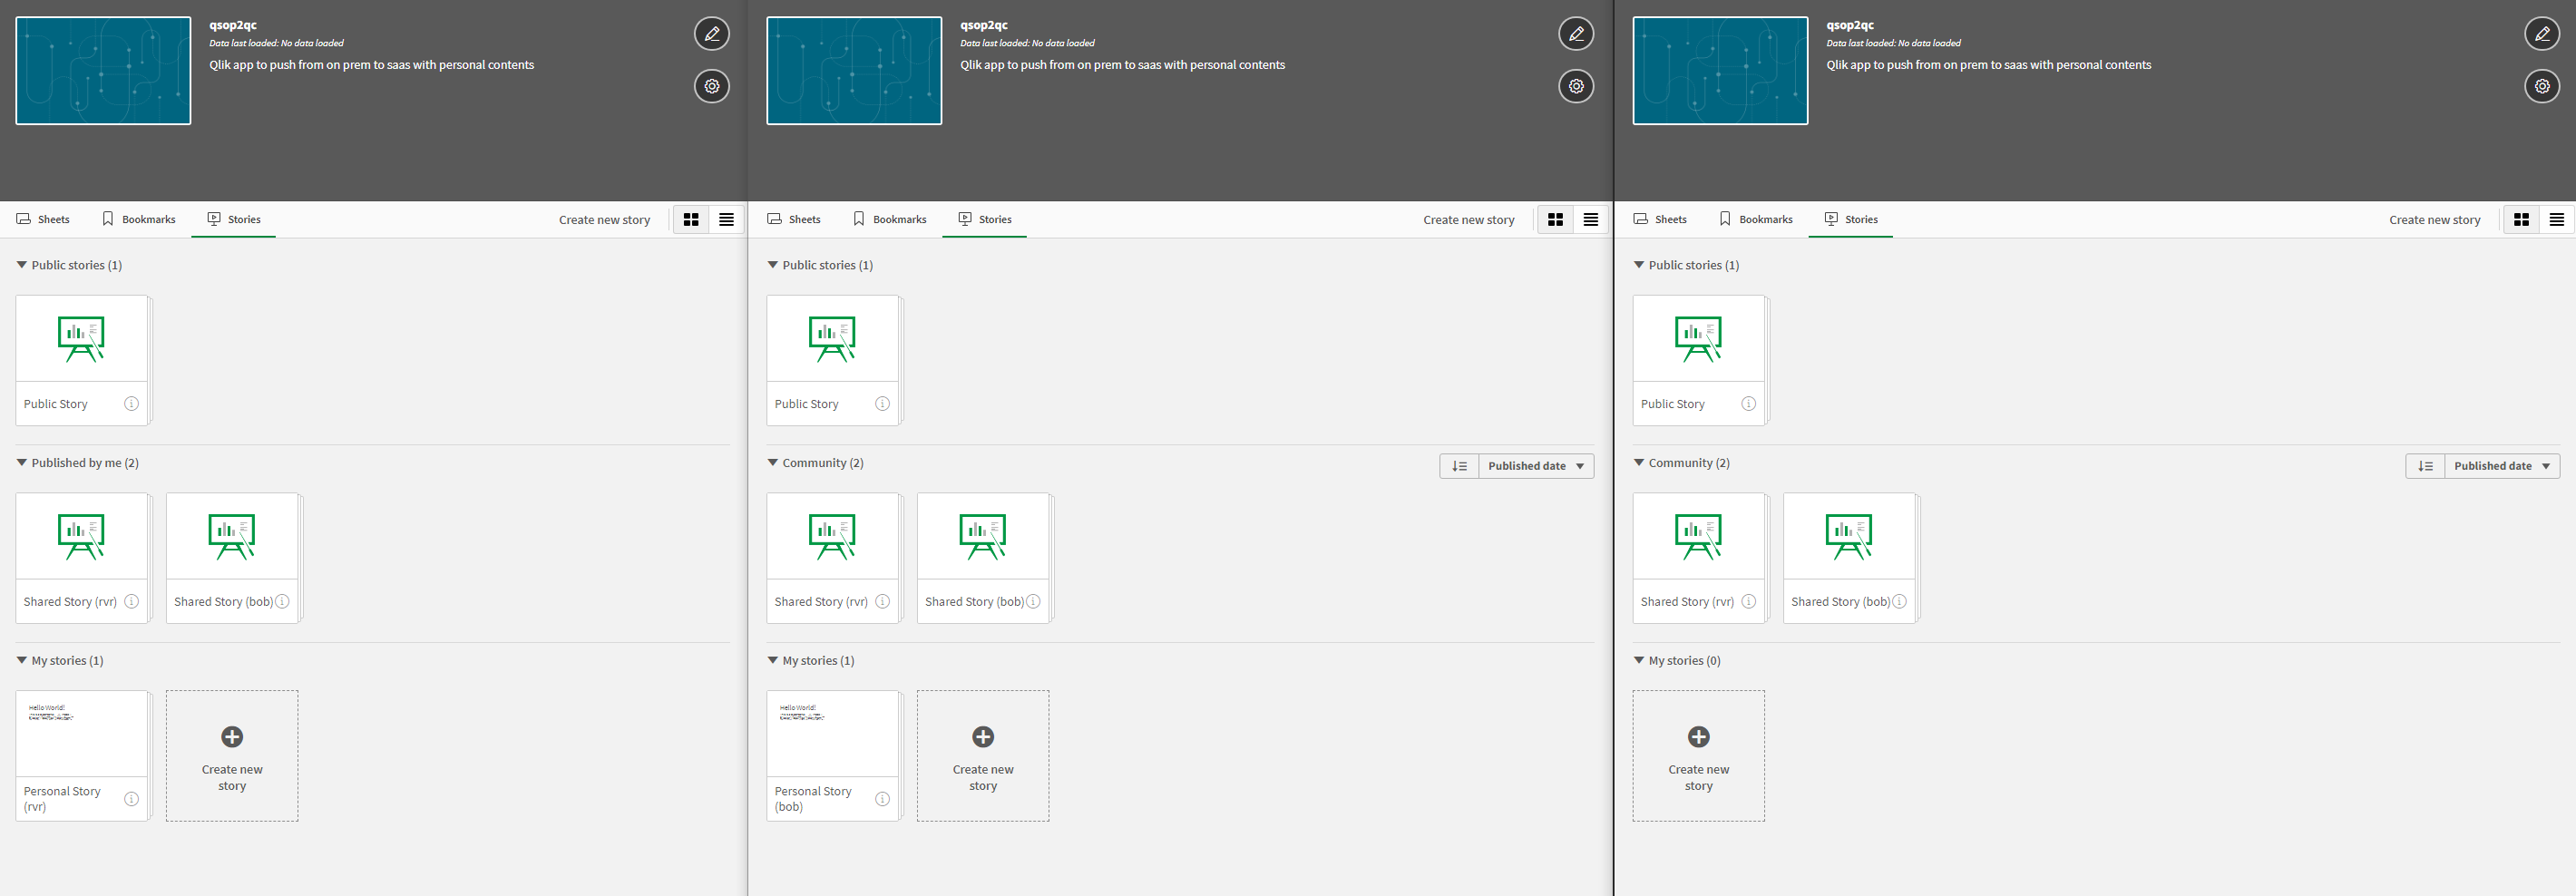
For your reference, here is a set of examples after running the CLI script 7_migrateapps.ps1. The images included in the examples have color coded browser windows. The colors are intended to help in the identification of the users in each example use case.
Dark green window is user renato, dark red window is user bob and pink window is user mariamaria. User renato is a Tenant admin. He is also the qlik-cli user configured to run the CLI scripts.
User content
You can manually export the user contents of an application (including community, shared, and personal) from Qlik Sense Client-Managed and import them to Qlik Cloud.
Manually export app user shared contents from Qlik Sense Client-Managed
The first step in moving user contents to Qlik Cloud is to export the contents from Qlik Sense Client-Managed. Once you create a duplicate of the app, and make yourself the owner of the App objects for the original app, you can start copying the App objects from the original app to the duplicate. You must be the owner to of the App object to copy and move them between the original and duplicate app.
Do the following:
-
Open the QMC: https://<QPS server name>/qmc
-
Select Apps on the QMC start page or from the Start
drop-down menu to display the overview.
-
Select the app that you want to duplicate, click More actions in the action bar, and then select Duplicate in the pop-up menu.
-
Open the duplicated app and verify that the Public Sheets from the original app are available. Leave your web browser tab open for later use.
-
In the QMC, select App objects.
-
Search for your original app (not the duplicated app), by clicking
in the table header.
Clear any previous search criteria if applicable.
-
Edit the App object (of type sheet) to make yourself the owner. Select the app object that you want to edit, and then click Edit in the action bar.
-
Change the Owner of the App object to you. It is recommended that you change each App object individually instead of changing multiple objects at the same time.
Information noteAs a best practice, it is recommended that you assign some type of identification as part of the App object's name to indicate who the original owner is and the publish location. This makes it easier to assign the contents back to the original user once the app is in Qlik Cloud. Note that due to the types of spaces in Qlik Cloud (Shared and Managed), you may not be able to completely replicate the location/ownership of the contents in Qlik Cloud as they were in Qlik Sense Client-Managed.-
Take note of the original App object owner and the location where the object is expected to be (for example, a personal App object or a published one).
-
Open the original app in the Qlik Sense Hub and select the App object to which you assigned yourself ownership.
-
If the App object is published or approved content, right-click the object and demote it until it is a personal and editable content
-
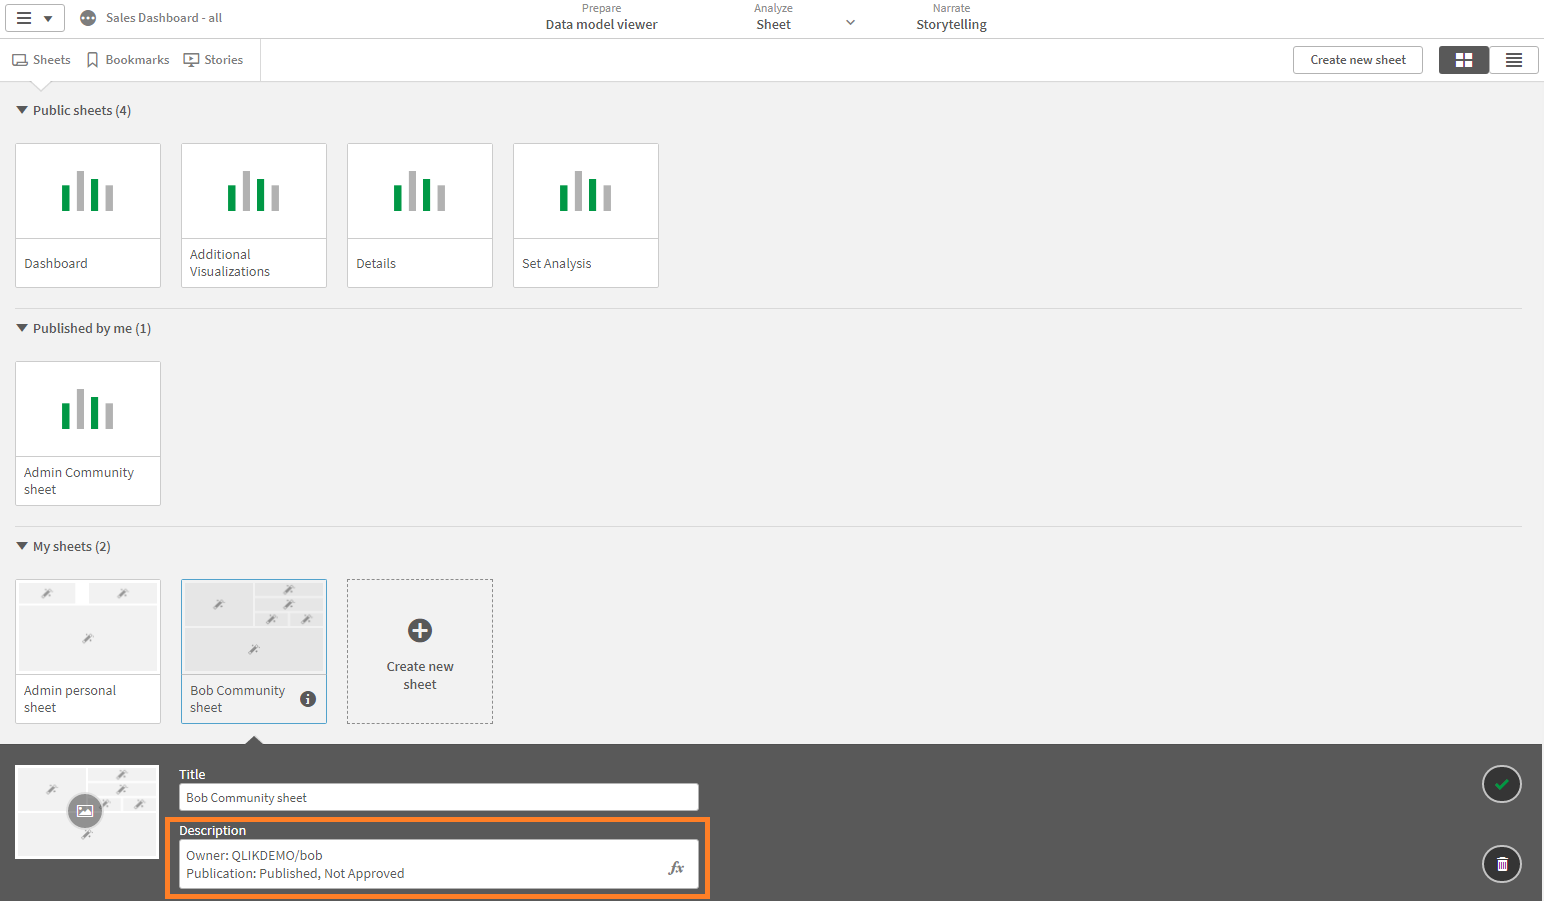
Add a note that will identify the previous owner and publication location. Add the information to the App object title or, if available, on the description field.
-
Right-click the Sheet and select Copy.
-
Go to the duplicated app that you created in step 3. In the App Overview, right-click next to the Create new sheet button and select Paste.
-
To revert the sheet in the original app to its original owner and location, go to the original app in Qlik Sense Client-Managed. Clear the description contents that you added and re-publish/approve the sheet to the original location. In the QMC, select the corresponding App object, click Edit and then change the owner to the original user.
-
Repeat step 5 until all App objects (sheets) are duplicated.
Publication location of an App object

Description field of a sheet
-
-
In the QMC, click Apps and select the duplicated app that you created in step 3. Click, More actions, and then select Export and store the QVF file. Once the app has successfully exported, you are ready to import it to Qlik Cloud.
Manually import Qlik Sense Client-Managed App User Shared Contents to Qlik Cloud
Start by importing your exported Qlik Sense application to your tenant.
Do the following:
-
In the Qlik Cloud Analytics activity center, click Upload. Locate the QVF file you previously exported in Qlik Sense Client-Managed and click Upload.
-
Open the recently uploaded app, preferably on a dedicated web browser tab.
Information noteCurrently, it is assumed that the exported app upload was placed in your Personal space, and the final version (user facing) of the application is already adapted (that is the Data Source Connections) and published in its destination space. -
If the target app is in a shared space:
-
Open the target app where the user contents will be imported.
-
Copy the intended contents from the recently uploaded app to the target app as follows
-
In the App Overview of the recently uploaded app, right-click a Sheet to include in the target app and select Copy.
-
In the App Overview of the target app, under My sheets, right-click the blank space and select Paste.
-
Right-click the sheet and select Make public. This makes sheet you copied available to other users.
Information noteGiven the nature of the Shared Spaces, the concept of Public Sheet vs. Published by me vs. Community sheets is different and there are only either Published or Personal Sheets. For more information refer to the Developing apps collaboratively in shared spaces section of our documentation.-
Optionally, request users to duplicate their personal sheets, now available in the Public sheets section. If you documented the sheet owner, either on the Sheet title or Description, when exporting the contents, you might recommend that users look for those contents to help distinguish them from the rest of the available sheets. Once the user identifies the sheet, they can right-click it and select Duplicate .
-
Once the user has duplicated the sheet to their personal area, you can delete the sheet you published. Right-click the sheet and select Make private to bring it to the My sheets area, and then right-click it again and select Delete.
-
-
-
If the target App is in a Managed space:
-
Open the app on which the published app in the Managed Space is based.
-
Copy the intended contents from the recently uploaded app to the target app as follows:
-
In the App Overview of the recently uploaded app, right-click a Sheet to include in the target app and select Copy.
-
In the App Overview of the target app, under My sheets, right-click the blank space and select Paste.
-
Right-click the sheet and select Make public. This makes sheet you copied available to other users.
-
-
-
Once all relevant sheets are copied, re-publish the app. Click
next to the app and select Publish. Make sure you override the correct Published copy when prompted.
-
Request user(s) to duplicate their personal and community sheets, now available in the Public sheets section of the published app in the managed space. If you documented the sheet owner, either on the Sheet title or Description, when exporting the contents, you might recommend that users look for those contents to help distinguish them from the rest of the available sheets. Once the user identifies the sheet, they can right-click it and select Duplicate .
-
If some of the sheets will reside in the Community area of the app, ask the user to publish the sheet(s) by right-clicking the Sheet and selecting Publish.
-
Once the user(s) has duplicated the sheets to their personal area (and published the community ones if applicable), you can delete the sheets you published in step (c). In the app to which you have been adding contents, right-click the correct sheets, select Make private to bring it to the My sheets area, and then right-click the sheet and select Delete.
-
Once all relevant sheets are deleted, re-publish the app. Click
next to the app and select Publish. Make sure you override the correct Published copy when prompted.
Task chaining and reloads
Self-service Reloads and Task Chaining
In Qlik Cloud, some task reloads can be managed by end users within their shared spaces. This can be done:
-
In Qlik Cloud Analytics activity centers. See Reloading app data.
-
With Qlik Application Automation task chaining. See Task chaining.
Centrally Managed Reloads and Task Chaining
Centrally managed reloads are the reload tasks that are managed by IT administrators. When migrating to Qlik Cloud, there are three options that can be used depending on the complexity of the tasks.
Option 1 - Qlik Application Automation
Use Qlik Application Automation to reproduce the task chains that were used in your Qlik Sense Client-Managed environment. See Task chaining.
Option 2 - Third-party scheduler and qlik-cli
When task chains become very complex, you can use a third-party scheduler and qlik-cli, a Command Line Interface for automating administrative functions using commands and scripts in Qlik Cloud. In the Qlik Cloud migration toolset, you will find a PowerShell script that you can call with a third-party scheduler and reload the sequence of applications. Use reloadqlikcloudapp.ps1 and pass the appid as the parameter.

See Setting up the Qlik Cloud migration tools to download the toolset.
Option 3 - Qlik Sense Client-ManagedScheduler with External Program Tasks
Use the External program task functionality in Qlik Sense Client-ManagedScheduler to call the PowerShell script reloadqlikcloudapp.ps1 found in the Qlik Cloud migration toolset and pass the appid as the parameter.

See Creating and editing external program tasks.
Additional utility scripts
The following scripts are included in the migration toolset.
-
ReloadQlikCloudApp.ps1
-
Reloads an app in Qlik Cloud
-
Usage: reloadqlikcloudapp.ps1 -appid <guid>
-
-
UploadQlikCloudDataFile.ps1
-
Uploads a supported file format to a given space
-
Usage: uploadqlikclouddatafile.ps1 <spacename> <filename>
-
-
UploadQlikCloudDataFolder.ps1
-
Uploads a folder and subdirectories of supported files to a given space
-
Usage: uploadqlikclouddatafolder.ps1 <spacename> <foldername>
-
For all scripts, make sure to set the working directory of the QlikMigrationPlaybook within the .ps1 file


