Skip to main content Skip to complementary content

Using context variables to connect to the report database

You can use context variables in the report editor to define the data mart connection where to store report results.

You can define context parameters and use them to execute data quality reports in different configurations, Prod and Test for example. There might be various testing stages you want to perform and validate before a group of reports is ready to go live on production.

Talend Studio offers you the possibility to create multiple context data sets. You can either create context data sets on a one-shot basis from the Preferences window of Talend Studio, or you can create context data sets from the Contexts node in the Integration perspective and store them in the Talend Studio repository.

You can then select any of these repository context variables from the report editor in the Profiling perspective and use them to store report results.

For further information about contexts and how to centralize them in the Talend Studio repository, see Using contexts and variables.

Exporting the report data mart settings as a context

About this task

  • You have defined the settings of the report data mart in the Preferences window as outlined in Setting up a distant database.
  • You have selected the Profiling perspective.

To export the settings of the report database as a context and use the context variables in the report editor, do the following:

Procedure

  1. In the menu bar, select Window > Preferences to display the Preferences window.
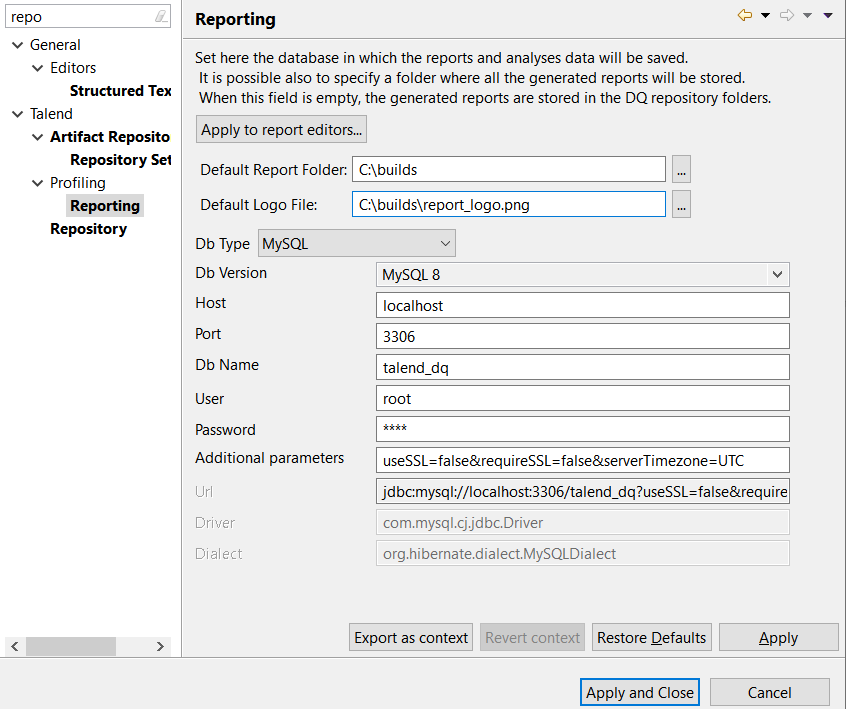
  2. Start typing Reporting in the filter field and then select Reporting from the list.
    Overview of the Reporting window.
  3. Click Export as context to open a context creation wizard.
  4. Follow the steps in the wizard to define the context variables and export as a context the data mart connection and the path of the report folder and logo file.
    A by-default name will be given to the context variables if you do not change them in the context creation wizard. The context variables will be centralized under the Contexts node in the DQ Repository tree view.
    For further information about how to centralize contexts in the Talend Studio repository, see Centralizing context variables in the Repository.
    A message appears to show the progress of the operation, and then all connection settings become read-only.
  5. To switch the connection back to its initial state, click Revert Context.
  6. In the DQ Repository tree view, right-click, one, or several analyses and generate a report.
    The report editor opens on the report settings.
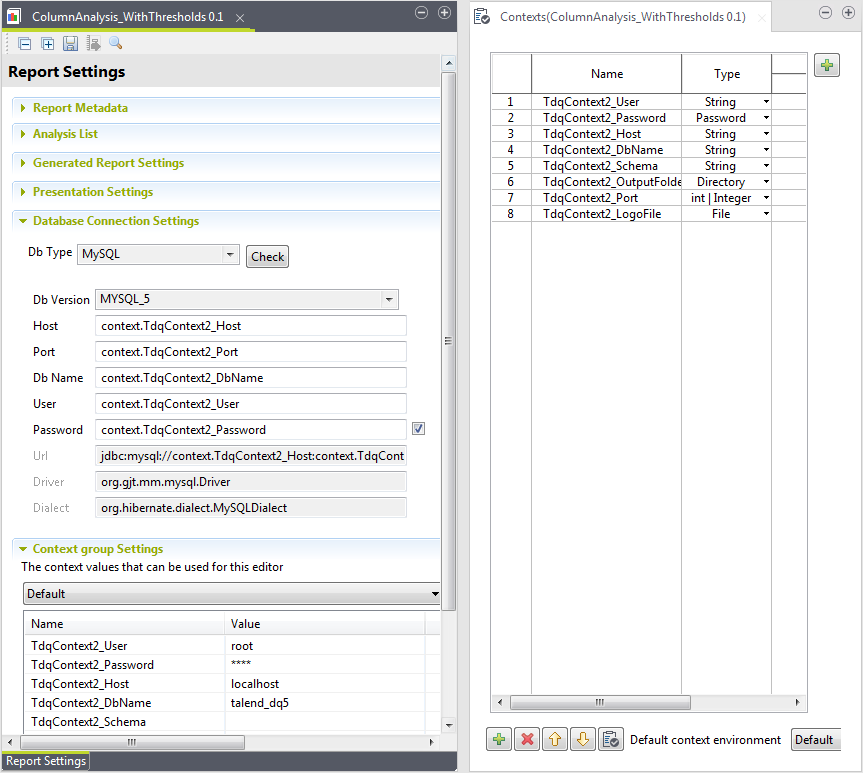
    Overview of the Report Settings tab and the Context view.
    In the Database Connection Settings view at the bottom of the editor, the connection settings are already filled in with the context variables defined and exported as a context in the Preferences window.
    The Context Settings view shows the values of the context connection.
    The Context view shows the variables you exported and centralized in the Talend Studio repository, under the Contexts node in the DQ Repository tree view. If this view is not open in Talend Studio, use the combination Window > Show View > Profiling > Context to open it.
    Information noteRemember: A report created in Talend Studio before you define and export context variables keeps its initial database settings. If you want to use it with a different data mart or context connection, you must open the report and select the context connection manually from the report editor. For further information, see Selecting or updating context variables from the report editor.
  7. Save the report and execute it.
    The report results will be written to the context connection defined in the report editor.

Selecting or updating context variables from the report editor

Before you begin

  • You have selected the Profiling perspective.
  • At least one context connection has been created and saved in the Talend Studio repository.

About this task

From the Context view in the report editor in the Profiling perspective, you can:
  • To select context variables from the Talend Studio repository, even if you have not exported the data mart settings as a context from the Preferences window, click Manage variables.

  • To define context variables from scratch, click the [+] button at the top left corner view.

  • To configure context environments for the report, click Manage environments at the top right corner of the view.

For further information about contexts and their variables, see Using contexts and variables.

To change the context connection for a report from the report editor, do the following:

Procedure

  1. Double-click a report in the DQ Repository tree view to open the report editor.
    If the Context view is not open in the editor, select Window > Show View > Profiling > Context to open it.
  2. In the Context view, click Manage variables.
    A dialog box opens to list all the context variables created and centralized in the Talend Studio repository.
  3. Select the check box of the context connection you want to use to generate the results of the current report.
    You can select more than one context connection.
    If you do not want to get the context variables from the Talend Studio repository but define them from scratch, you can click the [+] button at the bottom of the Context view and define the context values.
  4. Click OK.
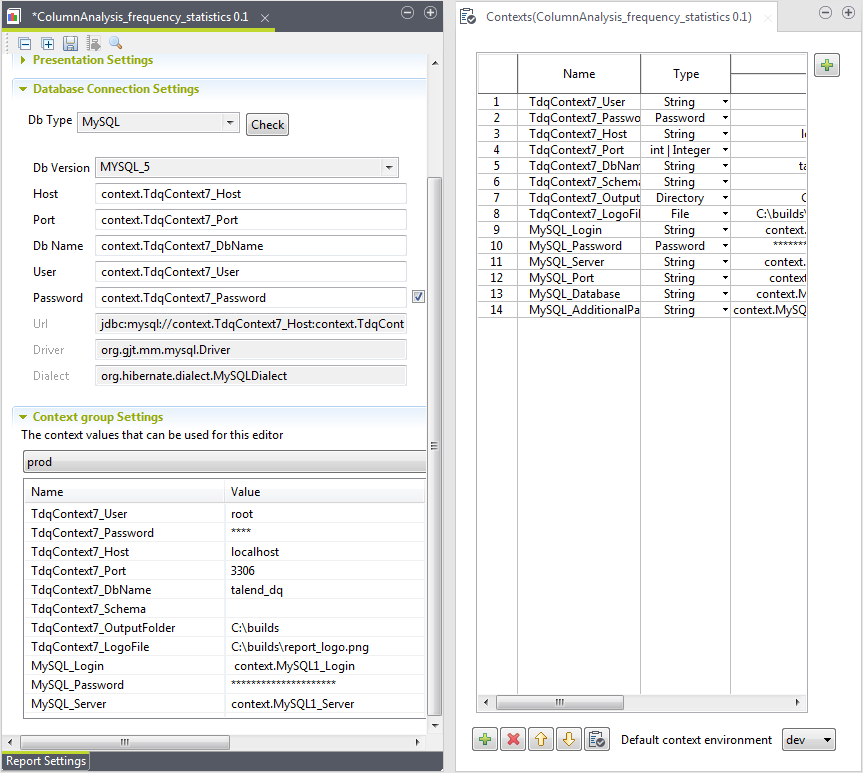
    The variables of the selected context connections are listed in the Context view and in the Context Settings view.
    Overview of the Report Settings tab and the Context view.
  5. Write the name of the context variables from the Context Settings table into the Database Connection Settings view. Write context. followed by the variable name.
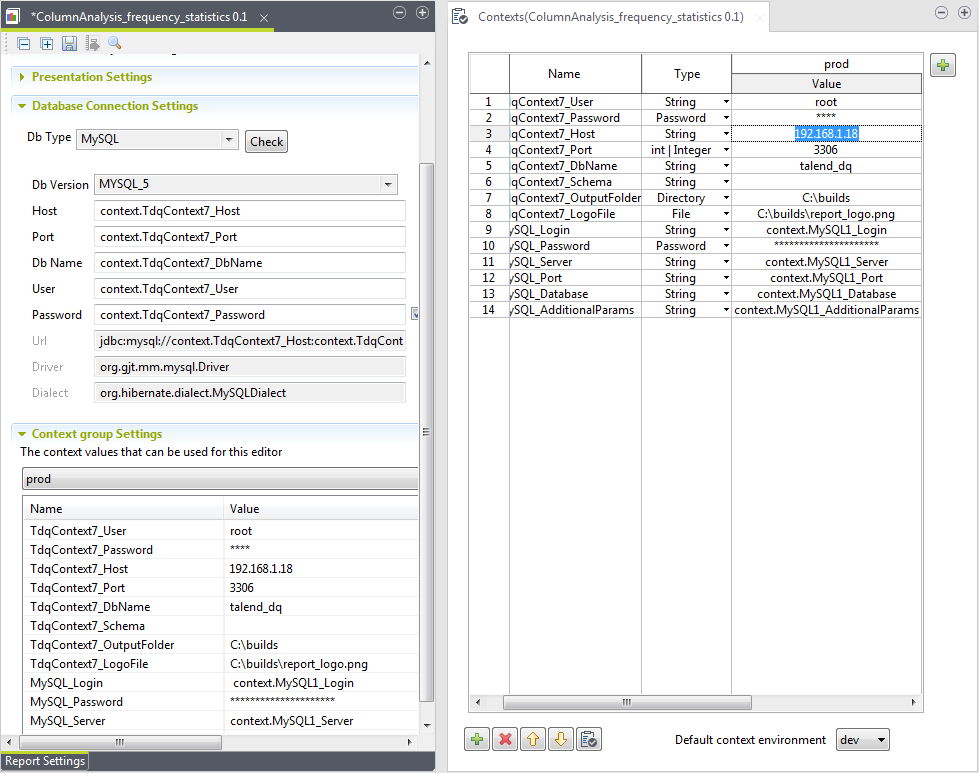
  6. If required, you can modify any context variable by clicking the value you want to modify in the Context view.
    Example of modifying a context variable in the Context view.
    Context values are modified accordingly in the report editor but these updates are not propagated to the context group in the repository. You can run only the current report with the new context values.
  7. In the Database Connection Settings view, click Check to make sure that your connection is successful.
  8. Save the report and execute it.
    The report results will be written to the context connection defined in the report editor.

Did this page help you?

If you find any issues with this page or its content – a typo, a missing step, or a technical error – please let us know!