Make sure your user or user group has the correct permissions to access the
Amazon S3 resources.
If you do not have these permissions you can try one of the following options.
(recommended) Ask the administrator who manages your Amazon account to give
you/your user the correct S3 permissions.
Implement your access policy yourself by following the Amazon documentation if you are allowed to do
so.
(not recommended) Attach the AmazonS3FullAccess policy to your group/your
user through the IAM console. This allows you to read and write to S3
resources without restrictions to a specific bucket. However this is a quick
fix that is not recommended by Talend.
Information noteNote: The default error that displays when trying to access S3 resources without
sufficient permissions is Bad Gateway.
The Cloud Engine for Design
and its corresponding run profile come embedded by default in Talend Management Console
to help users quickly get started with the app, but it is recommended to install
the secure Remote Engine Gen2
for advanced processing of data.
On the Home page of Talend Cloud Pipeline Designer,
click Connections > Add connection.
In the panel that opens, select Amazon S3, then click
Next.
Select your Remote Engine Gen2 in
the Engine list.
Information noteImportant: If the Remote Engine Gen2
does not have the AVAILABLE status that means it is up and
running, you will not be able to select a Connection type
in the list nor to save the new connection. The list of available connection types
depend on the engine you have selected.
Enter your credentials, check your connection, then click
Next.
Give a name to your connection, S3 connection for example,
then click Validate. .
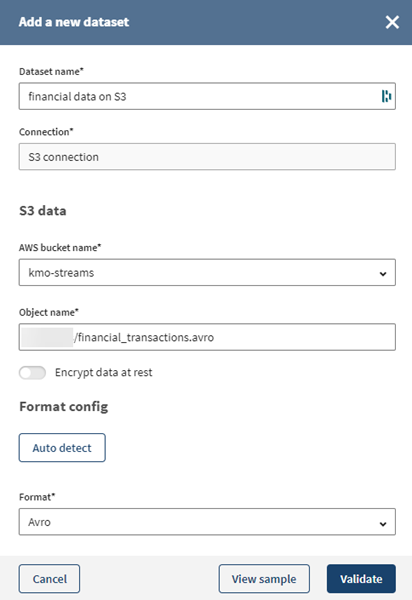
Click Add dataset to point to the file that you have
previously uploaded in your S3 bucket.
In the Add a new dataset
panel, fill in the connection information to your S3 bucket:
Give a display name to your dataset, financial data on S3 for example.
In the AWS bucket name field, select, or type the name
of your S3 bucket.
In the Object name field, type in the path to the
financial_transactions.avro file you have previously
uploaded to your S3 bucket.
In the Format list, click Auto
detect to automatically detect the format or select
Avro in the list.
Click View sample to check that your data is valid and can
be previewed.
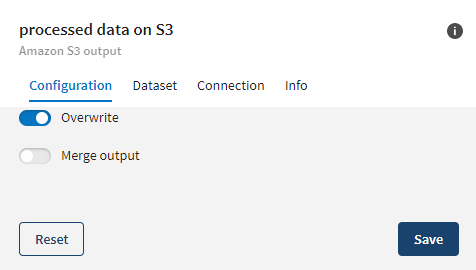
Before executing this pipeline, select whether you want to overwrite the existing data
on S3 or merge them in the configuration tab of the destination dataset:
Once your pipeline is executed, the updated data will be visible in the file located
on Amazon S3.
Did this page help you?
If you find any issues with this page or its content – a typo, a missing step, or a technical error – please let us know!