URL redirection support
This topic provides an end-to-end example of using an NGINX reverse proxy or an IIS server with a redirection URL to the Qlik Alerting server.
Problem use case
The expected behavior of the Qlik Alerting extension when added to a sheet is to display the server information in the extension, as shown in the image below.
Qlik Alerting extension
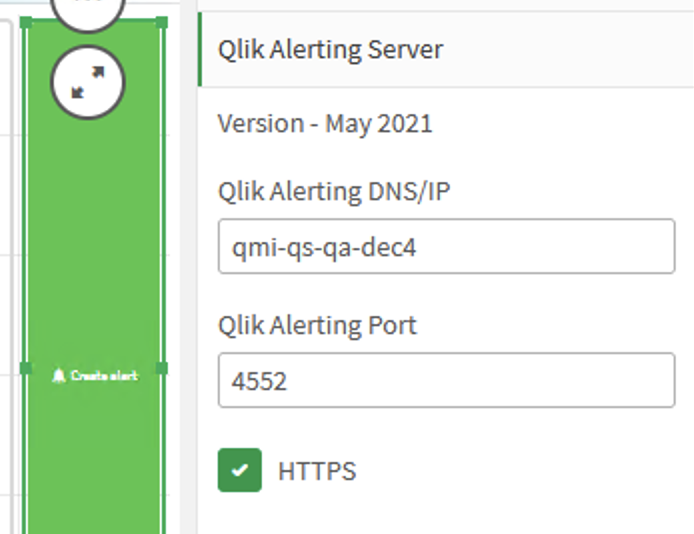
This works only if the Qlik Sense and Qlik Alerting are on the same network. If the Qlik Alerting server is outside of the network, you must set up a reverse proxy to redirect the request coming from outside of the network to the Qlik Alerting server. For example, if the Qlik Alerting proxy server QMI-WN-BL-2263 is outside the network, then the extension will fail, as shown below.
Failed Qlik Alerting extension
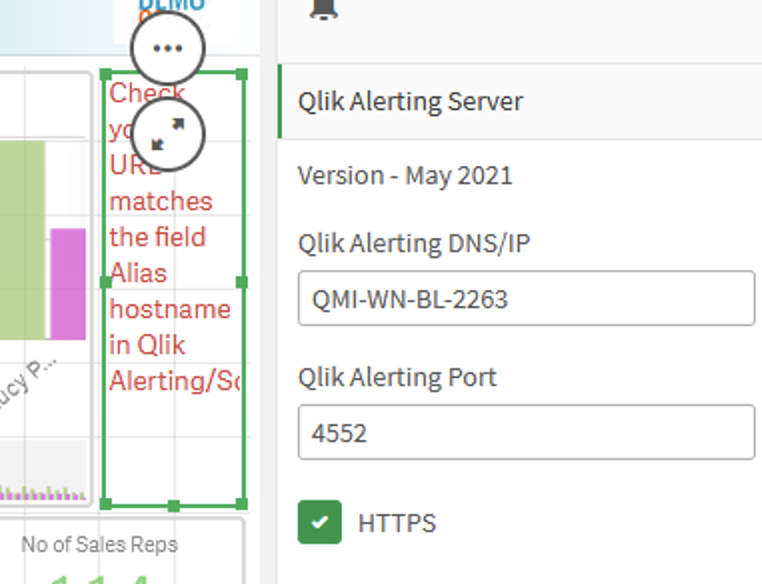
Configurations on Qlik Sense hub and Qlik Alerting
The solution is to configure the extension, the Qlik Alerting server, and the proxy server. The following instructions show how to implement an IIS server and an NGINX server to act as a reverse proxy.
Qlik Alerting registration process
- During the registration process (or on the sources tab for servers with the product already installed), enter the URL from the redirection proxy server. Do not include the protocol or port information. This provides a security check to match the value the customer is trying to configure on the extension.

Configure the Qlik Sense extension
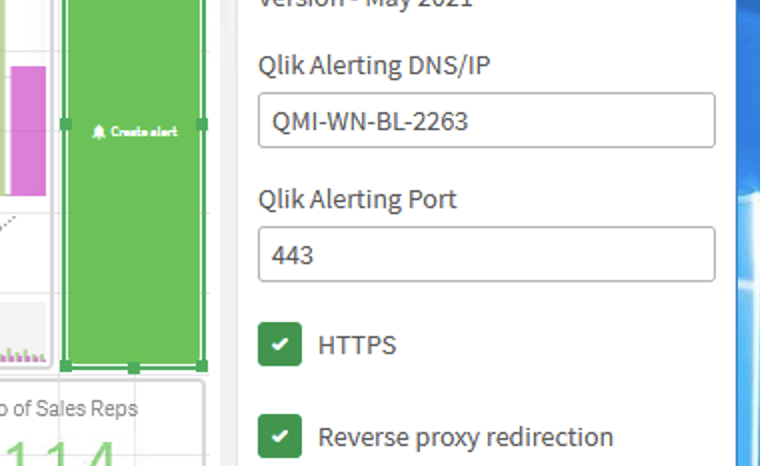
- In the extension configuration window, enter the Qlik Alerting DNS name and port number.
- Select HTTPS.
- Select Reverse proxy redirection. This option tells Qlik Alerting that this is a redirection URL, and it should be checked with the one in the reverse proxy URL redirection field.
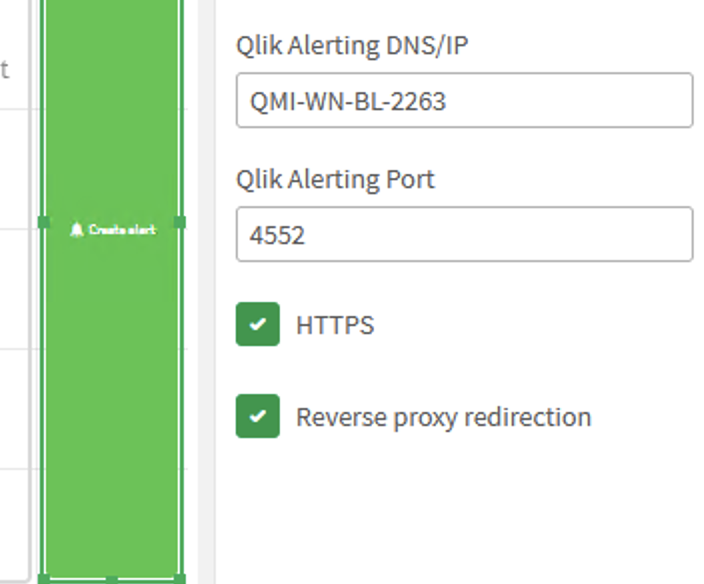
Configure the proxy servers
This section covers the configuration instructions for two servers: IIS server and NGINX reverse proxy server.
IIS server
-
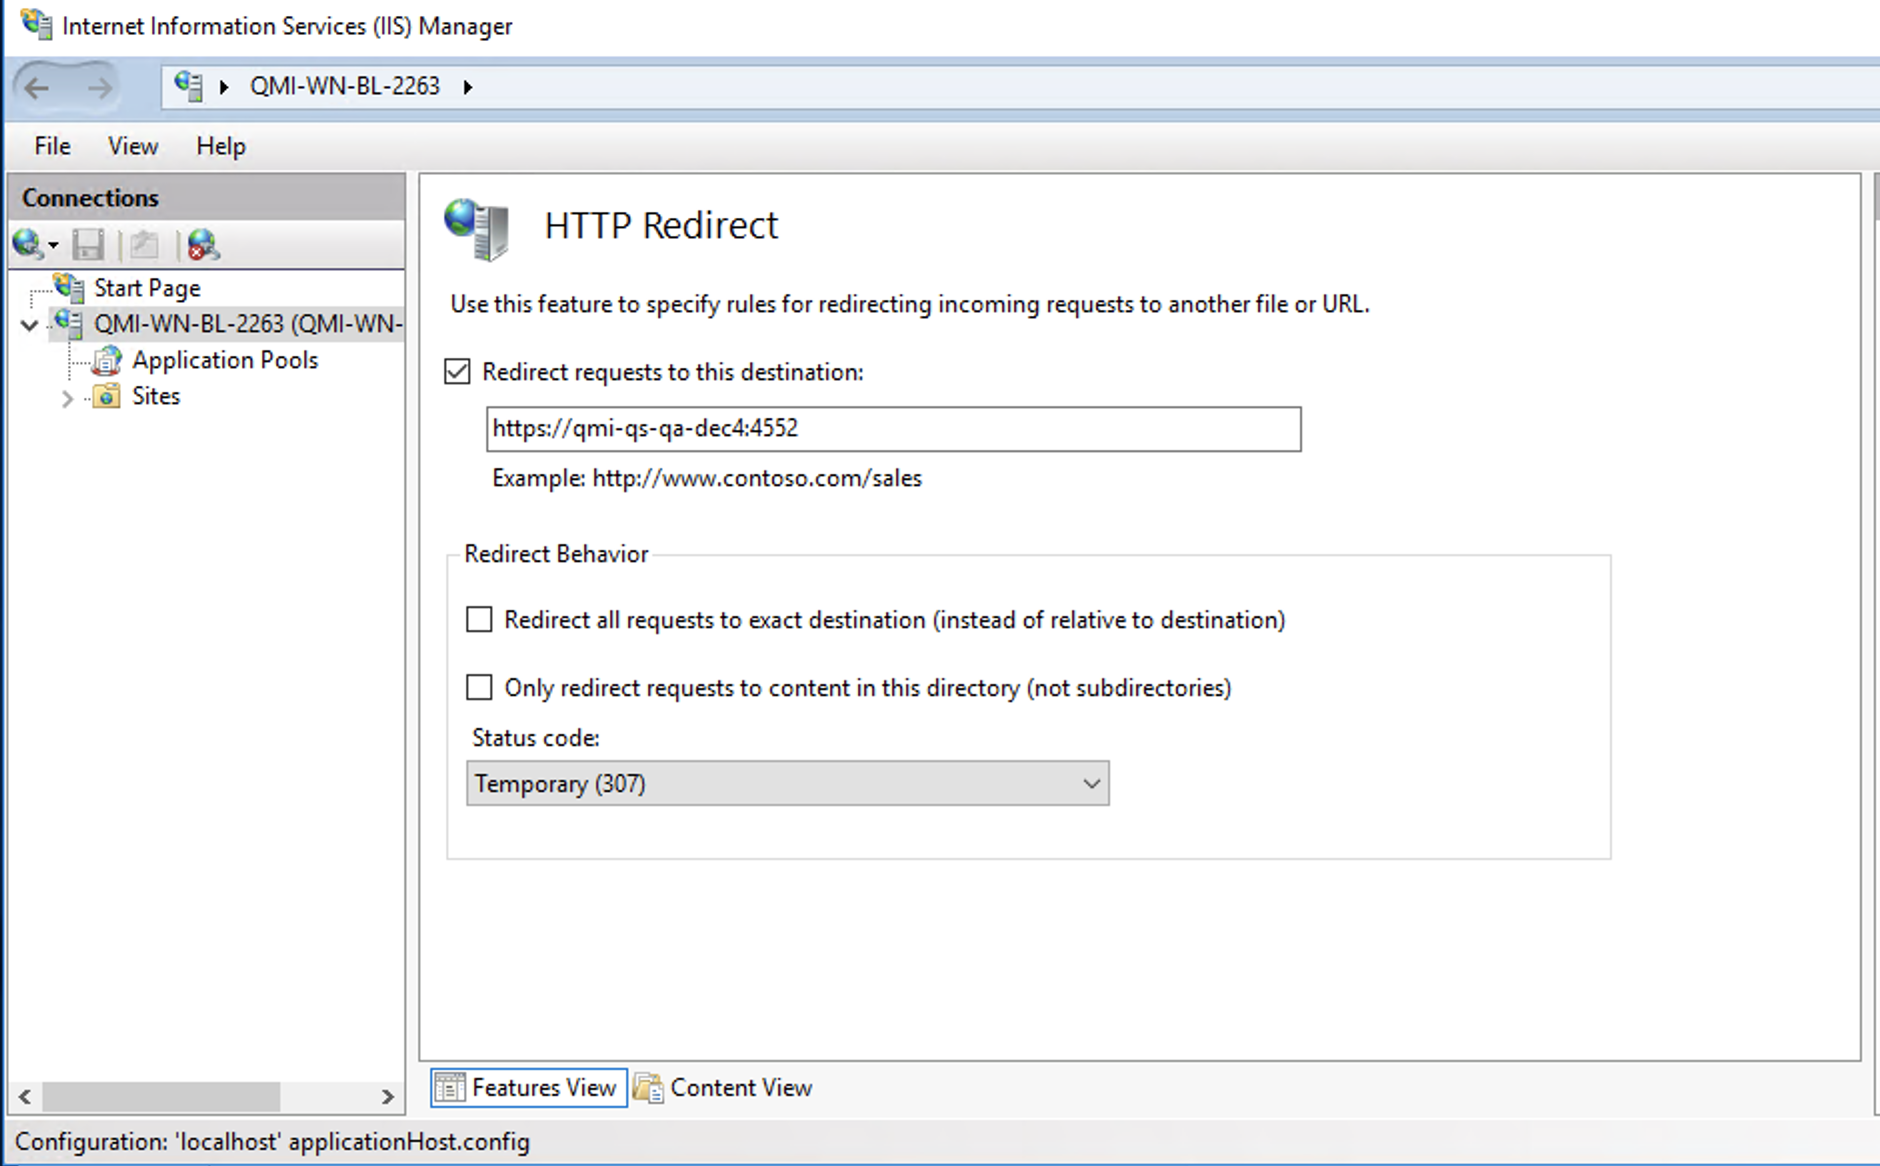
On the IIS Manager, set the status code to 307. Every request to the IIS server that redirects to the original Qlik Alerting server must return a 307 code (which means temporary redirection). This allows the extension connect properly with the alerting server in the request.
-
Download CORS: https://www.iis.net/downloads/microsoft/iis-cors-module
You need to enable CORS for IIS.
-
Once CORS is downloaded, return to the IIS Manager.
-
From the left-side pane, go to Default Web Site.
-
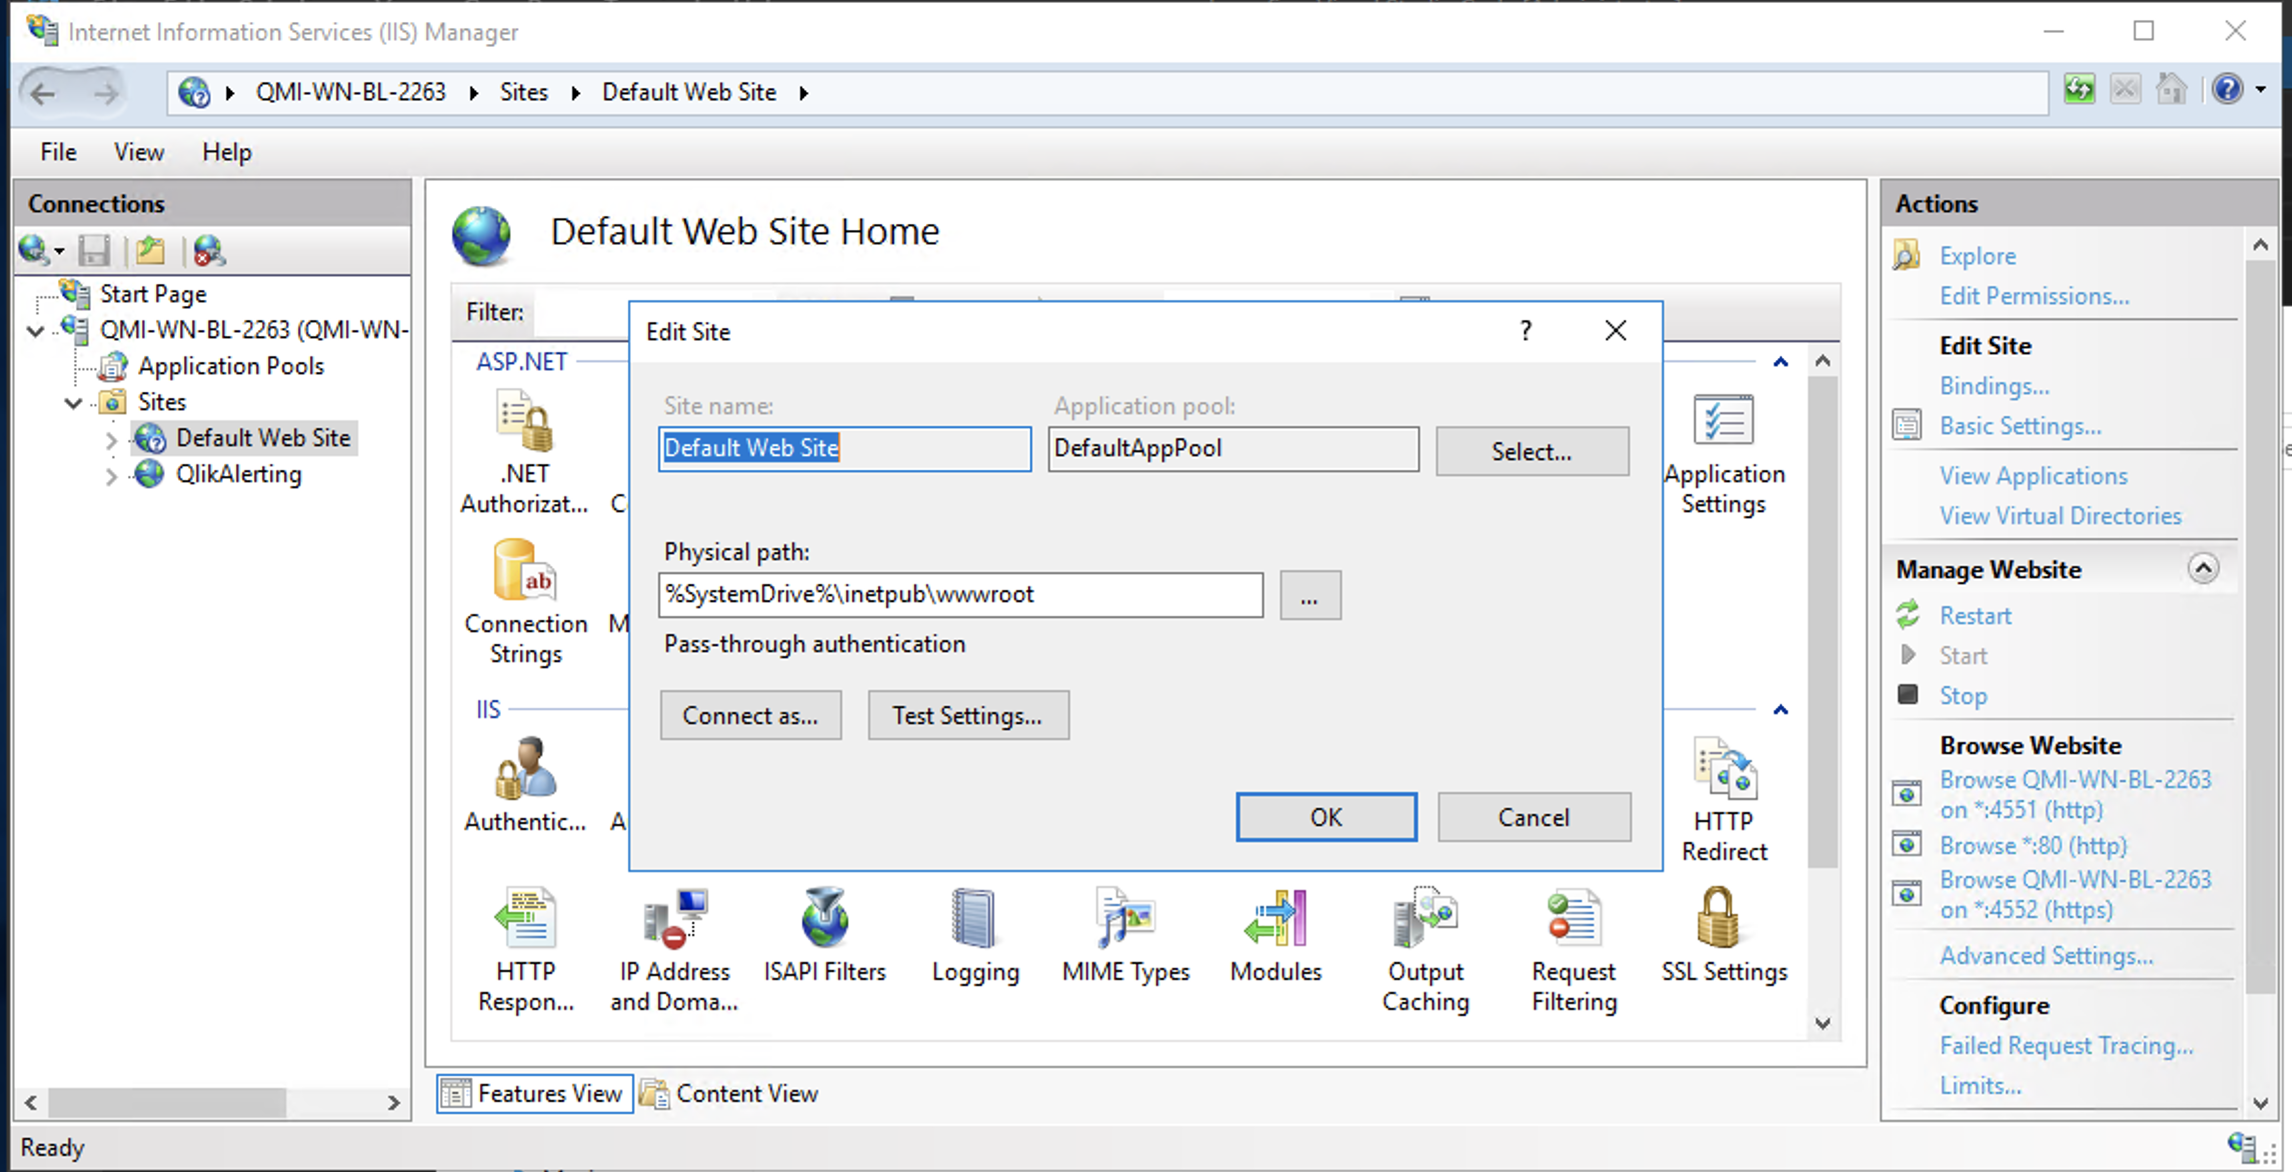
On the right-side pane, click Actions > Edit site > Basic settings.
-
In the Physical path field, verify the path to the wwwroot folder. C:\inetpub\wwwroot is the default IIS location.
-
Go to this folder and open the web.config file.
When you open that file, by default, looks like this:
<?xml verion="1.0" encoding="UTF-8"?> <configuration> <system.webServer> <httpsRedirect enabled="true" childOnly="true" /> </system.webServer> </configuration> -
Modify this file to look like this:
Information noteWhere origin is the Qlik Alerting server.<?xml version="1.0" encoding="UTF-8"?> <configuration> <system.webServer> <directoryBrowse enabled="true" /> <cors enabled="true" failUnlistedOrigins="true"> <add origin="https://qmi-qs-qa-dec4" allowCredentials="true" maxAge="120"> <allowHeaders allowAllRequestedHeaders="true"> <add header="header1" /> <add header="header2" /> </allowHeaders> <allowMethods> <add method="OPTIONS" /> </allowMethods> </add> </cors> </system.webServer> </configuration> -
Save this file and restart the IIS server.
Enter the redirection address and port on the extension. If the configuration it correct, and there are no firewall restrictions or other internal security measures, the button should pop up and you can create an alert.
NGINX reverse proxy
Lets say we have the same server as before with the address https://QMI-WN-BL-2263, and we want to use this server as a reverse proxy with NGINX to redirect all the request to the original Qlik Alerting server using the port 443.
Every NGINX server has the configuration file to set the properties for the http or https server we are running, it should be located under the root NGINX folder where you have installed it, under the name nginx.conf , to be able to handle the redirections properly and bypass the CORS issue, we have to set the following properties:
-
Open the nginx.conf file.
You need to allow requests on the extension.
-
Set the add_header to the following:
add_header 'Access-Control-Allow-Origin' $scheme://<OriginalServer>
					add_header 'Access-Control-Allow-Headers' 'token,isreverseproxy,reverseproxyurl,Content-Type,Range';
Information noteWhere <OriginalServer> is either your Qlik Sense server or the Qlik Alerting server. If you get a message on the console that the origin doesn't match, try the other. -
Set the request method to 'options' to make a preflight request to the redirection server to check for CORS. Add the following:
if ($request_method = 'OPTIONS') { return 200; } -
Add a redirection for requests with a 307 code to the Qlik Alerting server.
return 307 $scheme://qmi-qs-qa-dec4:4552:port$request_uri;The entire config file should look like this:
#user nobody; worker_processes 1; #error_log logs/error.log; #error_log logs/error.log notice; #error_log logs/error.log info; #pid logs/nginx.pid; events { worker_connections 1024; } http { include mime.types; default_type application/octet-stream; #access_log logs/access.log main; sendfile on; #tcp_nopush on; #keepalive_timeout 0; keepalive_timeout 65; #gzip on; server { listen 80; server_name localhost; #charset koi8-r; #access_log logs/host.access.log main; location / { root html; index index.html index.htm; } #error_page 404 /404.html; # redirect server error pages to the static page /50x.html # error_page 500 502 503 504 /50x.html; location = /50x.html { root html; } } # HTTPS server server { listen 443 ssl; server_name QMI-WN-BL-2263; ssl_certificate cert.pem; ssl_certificate_key cert.key; ssl_session_cache shared:SSL:1m; ssl_session_timeout 5m; ssl_ciphers HIGH:!aNULL:!MD5; ssl_prefer_server_ciphers on; add_header 'Access-Control-Allow-Origin' add_header 'Access-Control-Allow-Headers' 'token,isreverseproxy,reverseproxyurl,Content-Type,Tange'; if ($request_method = 'OPTIONS') { return 200; } location / { root html; index index.html index.htm; } #redirecting return 307 $scheme://qmi-qs-qa-dec4:4552$request_uri; } } -
Restart the NGINX server.
-
Return to the extension to verify the redirection. The button should appear and you should be able to create alerts.
Troubleshooting for Chrome browser
Requests that are directed through different servers are hard to debug when they fail. For example, with CORS, you can check your network tab to see when request fail.

To determine where the requests fail:
-
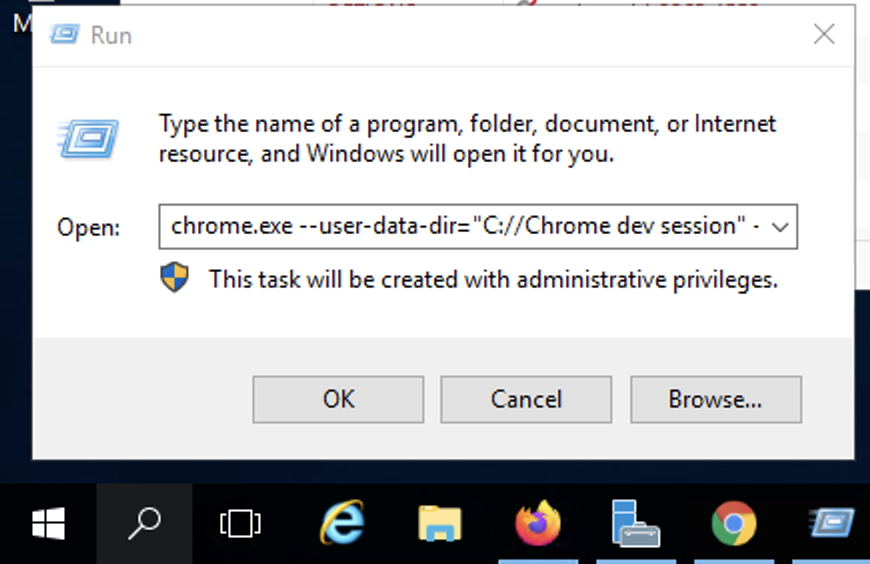
Go to the Windows search menu, type "Run".
-
In the Run window, enter: chrome.exe --user-data-dir="C://Chrome dev session" --disable-web-security
-
This starts a browser with the flag --insecure and you will be able to check if you have a CORS issue or something else that is blocking your request between severs.
