Configuring Azure AD Single Sign-On
Procedure
- Go to the All applications view of Azure Active Directory on the Azure portal and select the application created earlier for Talend Management Console.
-
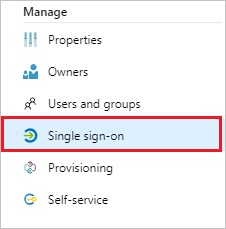
Select Single sign-on.
-
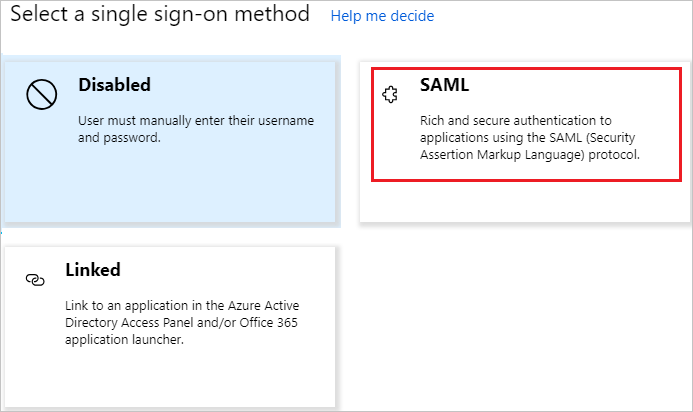
On the Select a single sign-on method dialog box, select
SAML.
-
On the Set up Single Sign-On with
SAML page, click the Edit icon in the Basic SAML
Configuration section.

-
Specify an Identifier and the Reply
URL in the Basic SAML Configuration section and
next to the Identifier check box, select the
default check box to set Talend Cloud SSO
URL as the default value.
-
Identifier (Entity ID): Talend Cloud SSO URL. For example:
- AWS: https://iam.us.cloud.talend.com/oidc/ssologin
- Azure: https://iam.us-west.cloud.talend.com/oidc/ssologin
When setting up SSO for multiple accounts (multiple tenants) on Talend Management Console, use their account IDs to define the unique entity ID of each account. For example, the entity ID for the AWS US region becomes https://iam.us.cloud.talend.com/oidc/ssologin/<your_account_ID>. Remember to perform the SSO setup individually for each tenant using their respective account IDs. This federates these tenants into a single SSO authentication system.Information noteNote: The account federation mentioned is exclusive to SSO authentication. The Talend Management Console objects, such as environments and workspaces, remain specific to each tenant and cannot be shared across tenancies.You can find the account ID on the Subscription page of your Talend Management Console.
-
Reply URL: Talend Cloud SSO URL. For example:
- AWS: https://iam.us.cloud.talend.com/oidc/ssologin
- Azure: https://iam.us-west.cloud.talend.com/oidc/ssologin
Do not set the other parameters.
-
Identifier (Entity ID): Talend Cloud SSO URL. For example:
- Click Save.
-
Edit the User Attributes & Claims to include the
attributes required in Talend Management Console.
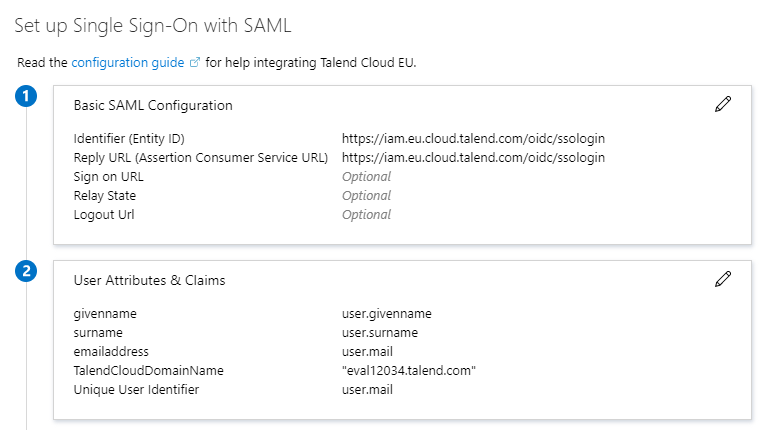
Talend Management Console requires the following attributes:
- emailaddress: enter user.mail
- givenname: enter user.givenname
- surname: enter user.surname
-
TalendCloudDomainName, enter your domain name within
double quotation marks, for example,
"eval12345.talend.com". The value of the
TalendCloudDomainName attribute is your Talend Cloud domain name:
- If you already logged in Talend Cloud, find the domain name in the Domain field of the Subscription page of your Talend Management Console.
- Otherwise, three options are available for you to find your domain. For more details, see Find domains.
- middlename: enter user.middlename
- CustomerRoles: if you need to set up SCIM provisioning to
synchronize users, groups, and roles between your SSO provider and Talend Cloud, you must add the CustomerRoles attribute and in its
value, enter user.assignedroles.
- For further information about how to define these roles for Talend Cloud in Azure AD, see https://learn.microsoft.com/en-us/azure/active-directory/develop/howto-add-app-roles-in-apps.
- For a step-by-step demonstration about how to set up SCIM provisioning, see this example.
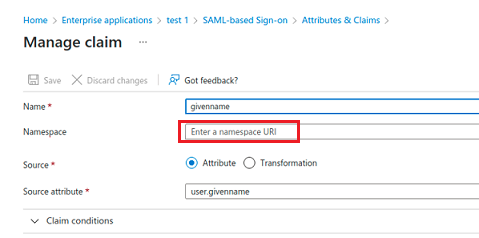
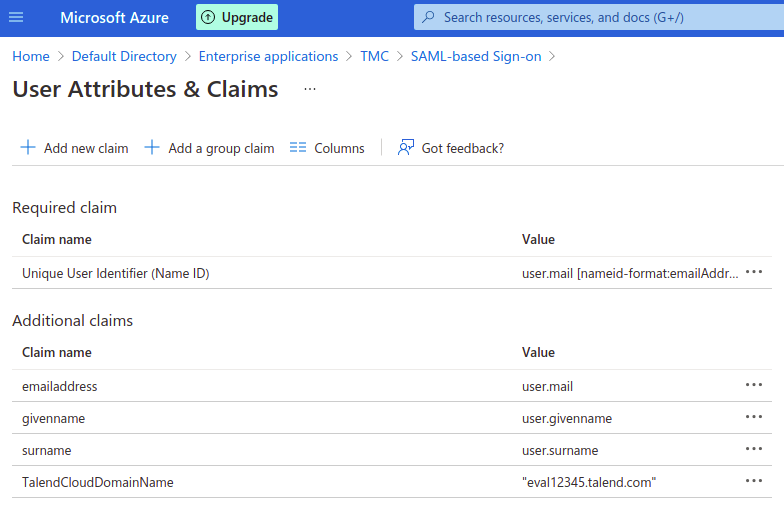 Information noteNote: By default, claim names are displayed with a namespace URI, but they must be empty for emailaddress, givenname and surname fields.
Click on each claim separately and clear the Namespace field:
-
On the Set up Single Sign-On with SAML page, go to the
SAML Signing Certificate section and download the
Federation Metadata XML file.

The downloaded metadata.xml file must specify a NameIDFormat. If this is not the case, add the following line in the <IDPSSODescriptor> area in this file: <NameIDFormat>urn:oasis:names:tc:SAML:1.1:nameid-format:emailAddress</NameIDFormat>
-
Copy the URL in the Login URL field.
This URL will have to be provided in Talend Management Console to enable SSO.

What to do next
Did this page help you?
If you find any issues with this page or its content – a typo, a missing step, or a technical error – please let us know!
