Skip to main content Skip to complementary content

Configuring the components

Procedure

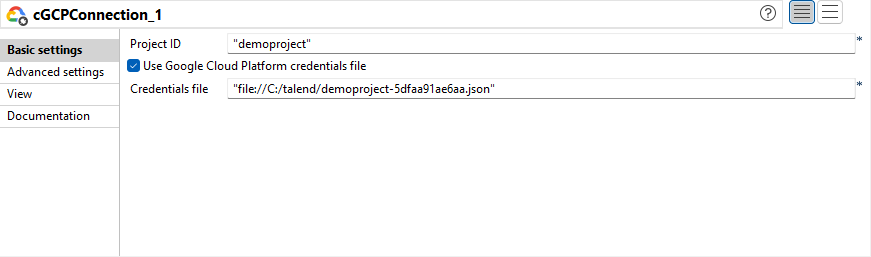
  1. Double-click the cGCPonnection component to display its Basic settings view in the Component tab.
  2. From the Project ID field, enter your Google Cloud project ID.
    Select the Use Google Cloud Platform credentials file check box and enter the path to your credentials file in the Credentials file field.
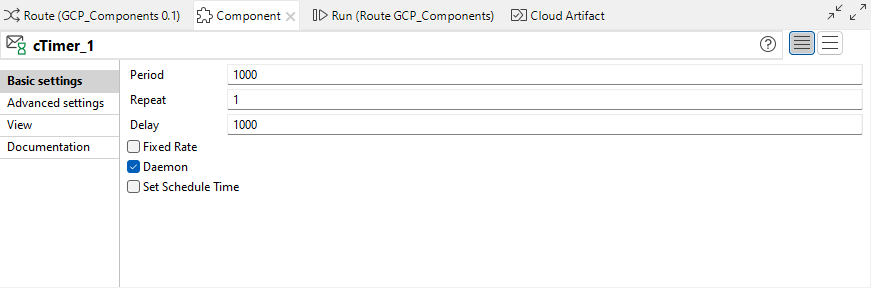
  3. Double-click the cTimer component to open its Basic settings view in the Component tab.
  4. In the Repeat field, enter 1 to generate a message exchange. Keep the default settings of the other options.
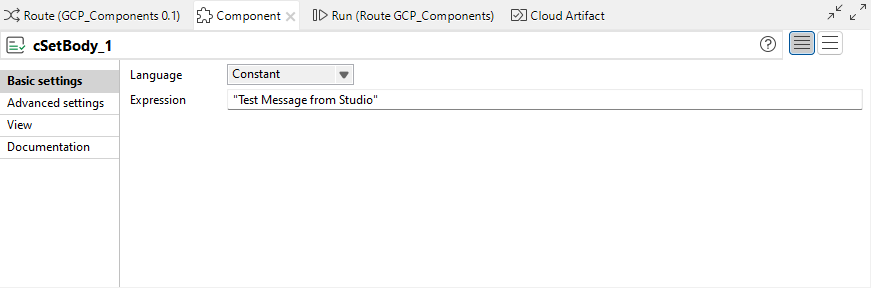
  5. Double-click the cSetBody component to open its Basic settings view in the Component tab.
  6. Select Constant from the Language list box and type in "Test Message from Studio" in the Expression field as the message body.
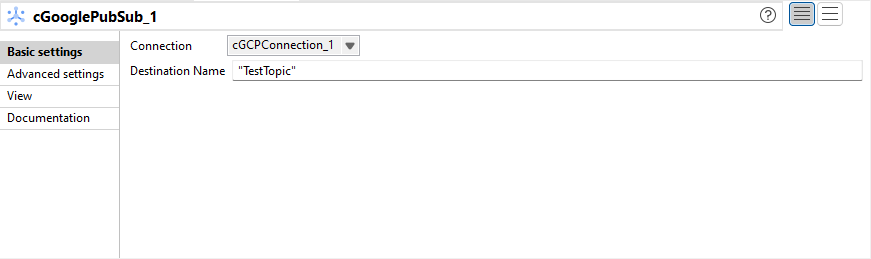
  7. Double-click the first cGooglePubSub component to open its Basic settings view in the Component tab.
  8. In the Connection list, select the cGCPonnection component that you have just configured to handle messages.
    In the Destination Name field, type in the topic name to publish to, for example "TestTopic".
  9. Double-click the second cGooglePubSub component to open its Basic settings view in the Component tab.
  10. In the Connection list, select the cGCPonnection component that you have just configured to handle messages.
    In the Destination Name field, type in the subscription name for the consumer, "TestTopic-sub" in this example.
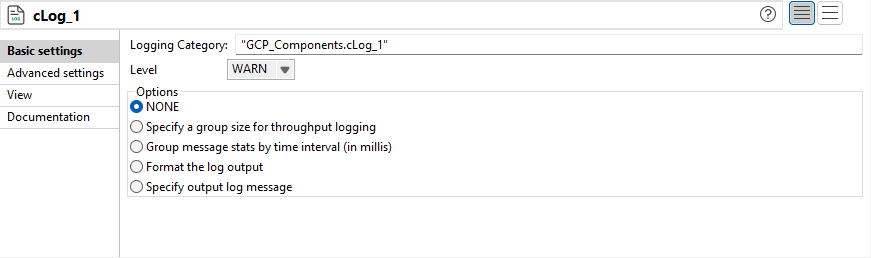
  11. Keep the default settings of the cLog component to log the message exchanges.
  12. Press Ctrl+S to save your Route.

Did this page help you?

If you find any issues with this page or its content – a typo, a missing step, or a technical error – please let us know!