Configuring the components
Procedure
-
In the Basic settings view of the
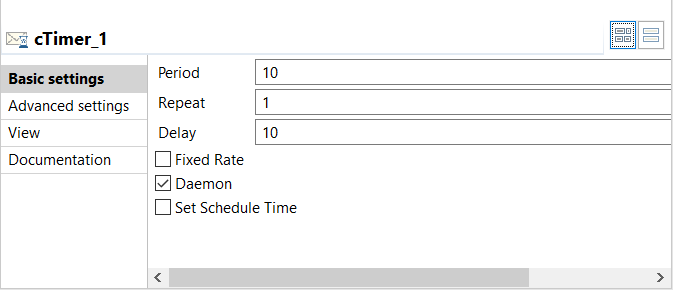
cTimer component, enter 1 in the Repeat field
to trigger the message exchange one time.

-
In the Basic settings view
of the cSetHeader component, click the
[+] button to add two headers in the
Headers table, and then give each header a name and a
value.
In this example, name the first header "Authorization" and give its value an email address.The other header is org.apache.camel.component.cxf.common.message.CxfConstants.CAMEL_CXF_RS_RESPONSE_CLASS. Set it value to String.class to turn the response object to string.

-
In the Basic settings view of the
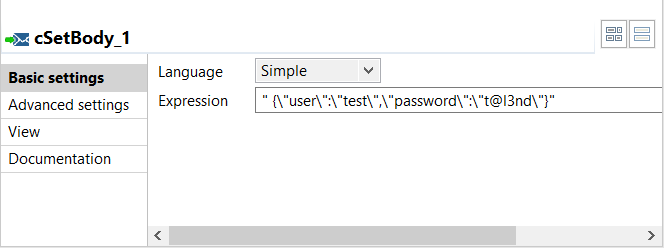
cSetBody component:
- Select SIMPLE from the Language list to trigger a simple text message exchange in this example.
- In the Expression field, enter {\"user\":\"test\",\"password\":\"t@l3nd\}" there in double quotation marks as the content of the message.

-
In the Basic settings
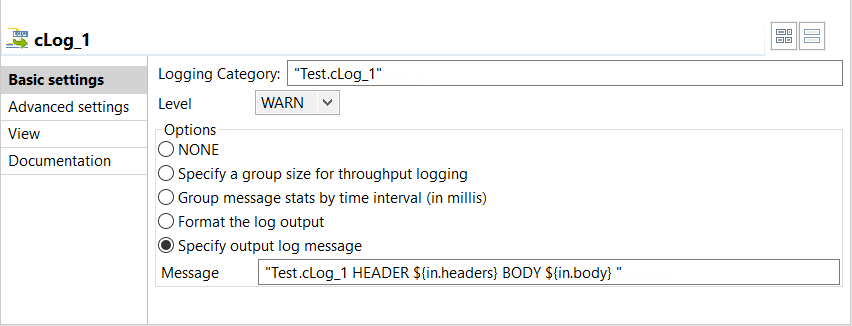
view of the first cLog component, click
Specify output log message in the
Options area and enter "Test.cLog_1 HEADER ${in.headers} BODY ${in.body} "
in the message field to log the message header and body.

-
In the Basic settings view
of the cREST component:
- Fill the Endpoint field with the URL of the Web service you are going to invoke.
- From the Type list, select Manual to determine the REST API mapping manually.
- In the Relative Path field, enter constant("").
- Select POST in the HTTP Method list.
- Select JSON in the Content Type and Accept Type lists.
- In the Response Class field, enter javax.ws.rs.core.Response.

-
In the Basic settings
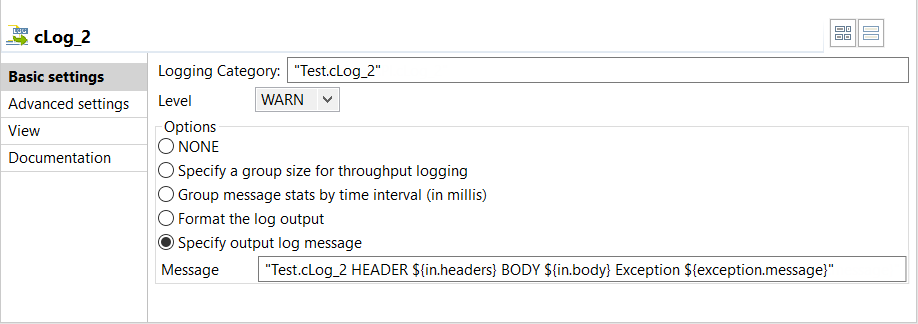
view of the second cLog component, select
Specify output log messge in the
Options area and enter "Test.cLog_2 HEADER ${in.headers} BODY ${in.body} Exception
${exception.message}" in the message field to log the header and
body of the response message and the exception.

- Press Ctrl+S to save your Route.
Did this page help you?
If you find any issues with this page or its content – a typo, a missing step, or a technical error – please let us know!
