Skip to main content Skip to complementary content
  • New archived content: Talend MDM, Talend Data Catalog 8.0, and Talend 7.3 products reached their end of life in 2024. Their documentation was moved to the Talend Archive page and will no longer receive content updates.
Close announcements banner

How to create a Route using a data service

This section provides a scenario to illustrate how to create a Route using the data service you created in the previous section.

In this scenario, you will define a Route using the Web service you just created, send a request to this Web service and retrieve the response from the Web service for a further use.

Creating the Route

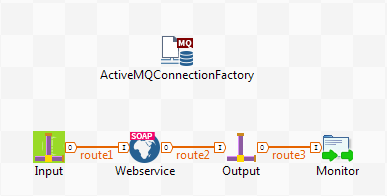
To create the Route, you need:

  • a cJMSConnectionFactory component to specify the connection factory for message handling,
  • two cJMS components, one to read a JMS message from one queue and send the request to the Web service and the other to retrieve the response from the Web service and save it in another queue,
  • and a cSOAP component to connect to the Web service.

Before you begin

To send data to request the Web service, you use Apache ActiveMQ as the message broker. You need to launch the ActiveMQ server before executing the Route. For more information about installing and launching ActiveMQ server, see Installing Apache ActiveMQ and the Apache website.

Procedure

  1. On the Repository tree view, right-click the Route node and from the contextual menu, select Create Route.
  2. In the pop-up wizard, enter the information corresponding to the fields you need to complete. In this scenario, enter airportRoute in the Name field and click Finish.
    The Route is opened in the design workspace.

Dropping and linking the components for the Route

Procedure

  1. From the Palette, place the following components on to the design workspace:
    • a cMQConnectionFactory,
    • a cSOAP,
    • a cProcessor,
    • and two cJMS components.
  2. Label the components for better identification of their roles and link them using the Row>Route connection as shown below.
    Screenshot of the Job in the design workspace.

Configuring the components

Procedure

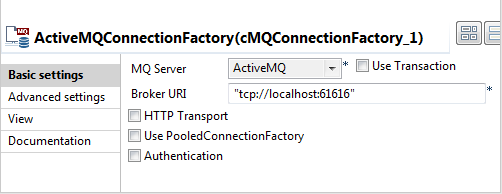
  1. Double-click the cMQConnectionFactory component to display its Basic settings view in the Component tab.
    Basic settings view.
  2. From the MQ Server list, select ActiveMQ. In the Broker URI field, type in the URI of the local ActiveMQ server, "tcp://localhost:61616" in this use case.
  3. Double-click the cJMS component labeled Input to display its Basic settings view.
    Basic settings view.
  4. From the Type list, select queue to send the messages to a JMS queue. In the Destination field, type in a name for the JMS queue, "IN" in this use case. From the list of ConnectionFactory, select the ActiveMQ connection factory that you have just configured.
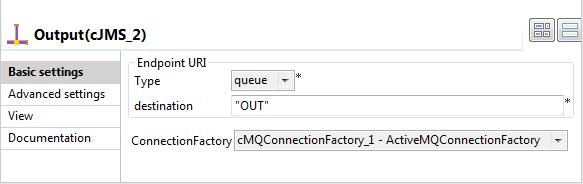
  5. Repeat this operation to configure the cJMS component labeled Output with the same ConnectionFactory and name the destination JMS queue OUT.
    Basic settings view.
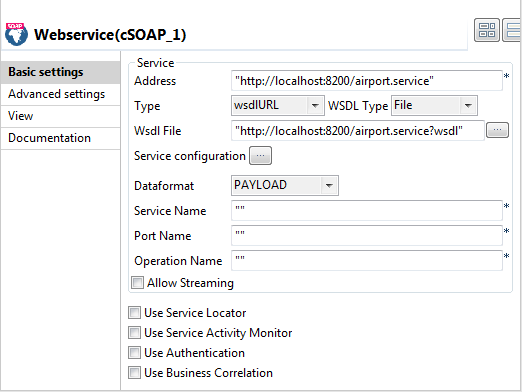
  6. Double-click the cSOAP component to display its Basic settings view.
    Basic settings view.
  7. In the Address field, type in the service endpoint URL of the web service that we have created, http://localhost:8200/airport.service in this example. From the Type list, select wsdlURL. In the WSDL File field, type in the path to the WSDL file, http://localhost:8200/airport.service?wsdl in this example. From the Dataformat list, select PAYLOAD.
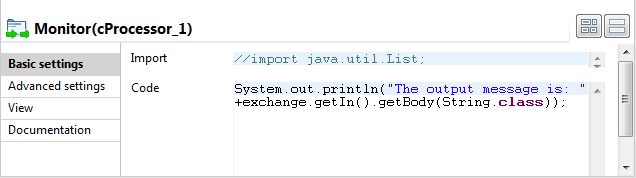
  8. Double-click the cProcessor component to display its Basic settings view.
    Basic settings view.
  9. In the Code area, customize the code as shown below to display the message body on the Run console.
    System.out.println("The output message is: "+
    exchange.getIn().getBody(String.class));

Executing the Route to implement the data service

Procedure

  1. Click the Run view to display it and click the Run button to launch the execution of the Route. You can also press F6 to execute it.

    The Route is successfully started.

    Screenshot of the console results after successfully running the Job.
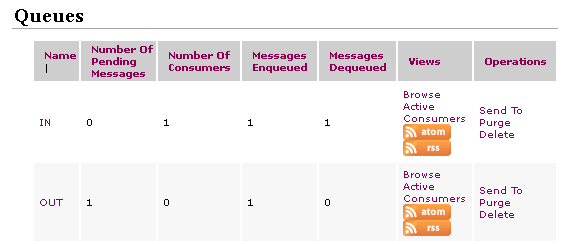
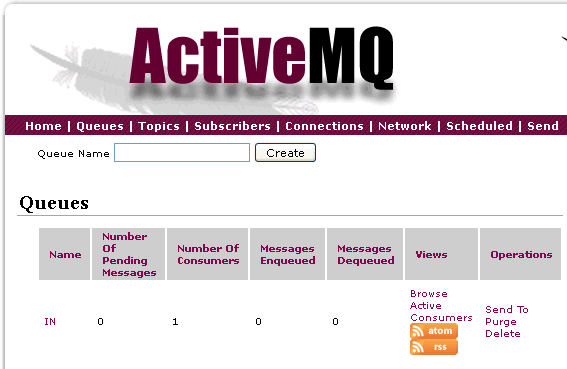
  2. Switch to the ActiveMQ Web console. The incoming queue is already created.
    Screenshot of the incoming queue in the ActiveMQ interface. The queue has one consumer.
  3. Enter the following message body in the incoming queue and send the message.
    <air:getAirportInformationByISOCountryCode>
       <air:CountryAbbrviation>CN</air:CountryAbbrviation>
    </air:getAirportInformationByISOCountryCode>
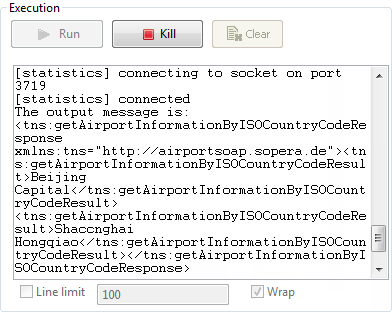
  4. In the Route designer, we can see that the message payload is sent to the Web service. The Web service gets called and the response is sent to another queue, OUT as we have configured.

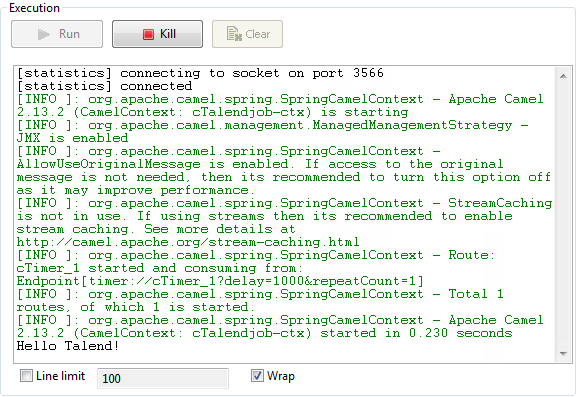
    The message body of this queue is printed on the console.

    Message in the console.

    You can also view the OUT queue from the ActiveMQ Web console. It has one message in it, as shown below.

    Screenshot of the queues in the ActiveMQ interface. The outcoming queue has one message pending and one message enqueued. The incoming queue has one consumer, one message enqueued, and one message desqueued.

Did this page help you?

If you find any issues with this page or its content – a typo, a missing step, or a technical error – please let us know!