In the panel that opens, select the type of connection you
want to create.
Example
data
generator
Select your engine
in the Engine list.
Information noteNote:
It is recommended to use the Remote Engine Gen2 rather than
the Cloud Engine for Design for advanced
processing of data.
If no Remote Engine Gen2 has been created from Talend Management Console or if it exists but appears as unavailable
which means it is not up and running, you will not be able to select
a Connection type in the list nor to
save the new connection.
The list of available connection types depends on the engine you
have selected.
In the Add a new dataset
panel, name your dataset.
Example
customer generated
data
Fill in the properties to generate the test customer data of
your choice. In this example:
In the Rows
field, type in 100 as you want to generate 100
test records.
Click Add
field, type in firstname in the
Name field of the element, select
First Name in the Type
list and type in 0 in the Blank
% field as you want to generate random first names with
no empty fields.
Click Add
field, type in lastname in the
Name field of the element, select
Last Name in the Type
list and type in 0 in the Blank
% field as you want to generate random last names with
no empty fields.
Click Add
field, type in age in the
Name field of the element, select
Age in the Type list,
type in 18 in the Min
field and 99 in the Max
field and type in 0 in the Blank
% field, as you want to generate ages between 18 and 99
with no empty fields.
Click Add
field, type in hair_color in the
Name field of the element, select
Random within list in the
Type list and type in
0 in the Blank %
field. Add elements to the random list you want to create, here
different hair color values and weight.
Type in brown in the first
Element field and 0.4 in the
Weight field, type in blond in
the second Element field and 0.2
in the Weight field, and type in
red in the third Element field
and 0.4 in the Weight field, as
you want to generate hair color fields that contain 40% of brown hair, 20% of
blond hair and 40% of red hair.
Click Add
field, type in email in the
Name field of the element, select
Email in the Type list
and type in 20 in the Blank
% field as you want to generate random emails with 20%
of empty values.
Click Add
field, type in phone in the
Name field of the element, select
Phone number (ext) in the
Type list and type in
0 in the Blank % field
as you want to generate random phone numbers with no empty values.
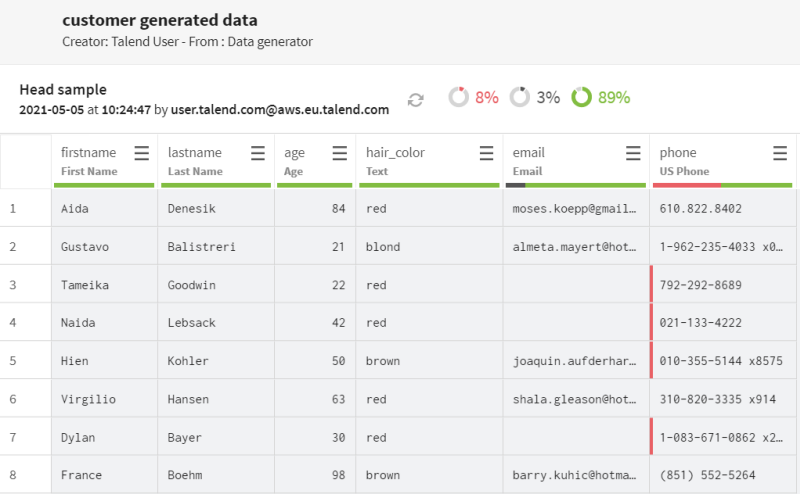
Click Validate to save your dataset. In the dataset
detailed view, you can view the generated data that corresponds to the criteria
you have defined.
Add two Test datasets that will be used as destinations in
your pipeline. Fill in the connection properties as described in Test connection properties.
Click Add
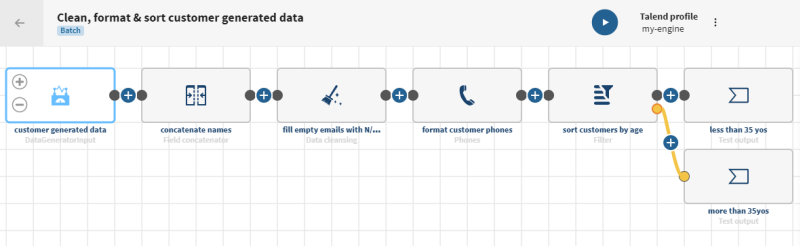
pipeline on the Pipelines page. Your new pipeline opens.
Give the pipeline a meaningful name.
Example
Clean, format & sort customer
generated data
Click ADD SOURCE and
select your source dataset, customer generated
data in the panel that opens.
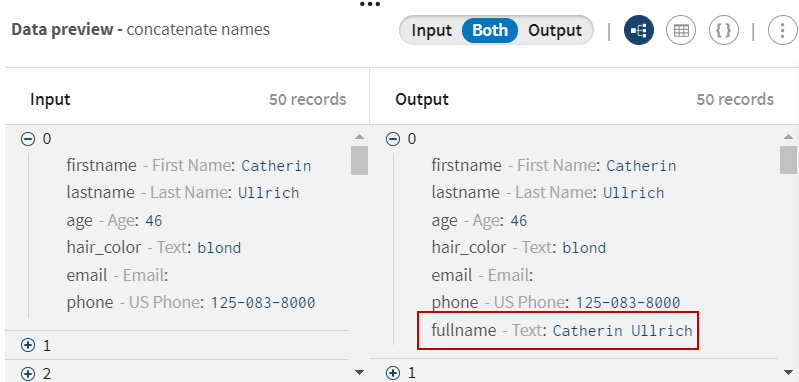
Click and add a Field concatenator processor to the
pipeline. Give it a meaningful name, concatenate names for
example and use the Concatenate with value/another field
function to concatenate the firstname and
lastname fields together.
Click Save to
save your configuration.
All first and last names are now combined with a a space as
a separator.
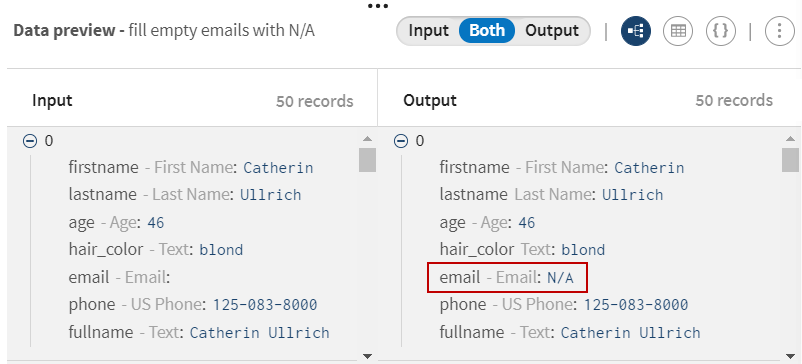
Click and add a Data cleansing processor to the pipeline.
Give it a meaningful name, fill empty emails with N/A for
example and use the Fill empty cells with text function to
fill the email empty values with the
N/A text.
Click Save to
save your configuration.
All the empty values in the email fields are now replaced
with N/A.
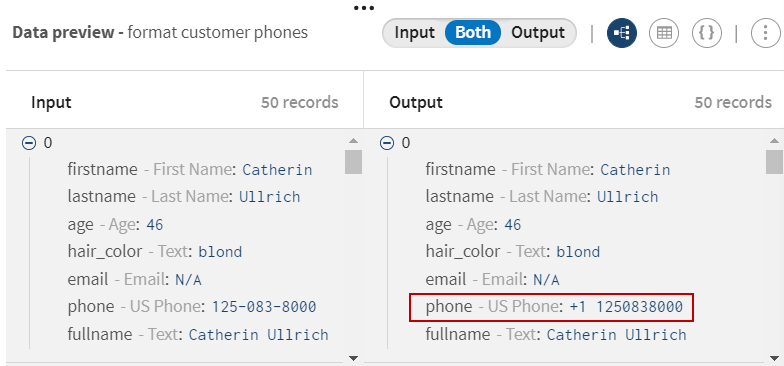
Click and add a Phones processor to the pipeline. Give it a
meaningful name, format customer phones for example and use
the Format phone number function to format the generated phone
number fields using the correct American standard syntax.
Click Save to
save your configuration.
All the phone number values are now formatted.
Click and add a Filter processor to the pipeline. Give it a
meaningful name, sort customers by age for example and use the
<=Operator with the 35 value to split the
customers based on their age (less or more than 35 years old).
Click Save to
save your configuration.
In this preview, 10 records match the criteria (less than 35 years old) you
have defined.
Click the ADD
DESTINATION item after the Filter processor and select the dataset that will hold the data
that matches the filter criteria.
Rename it if needed.
Click the button on the Filter processor and select the dataset
that will hold your rejected data.
Rename it if needed.
On the top toolbar of Talend Cloud Pipeline Designer,
click the Run button to open the panel allowing you to select
your run profile.
Select your run profile in the list (for more information, see Run profiles), then click Run to
run your pipeline.
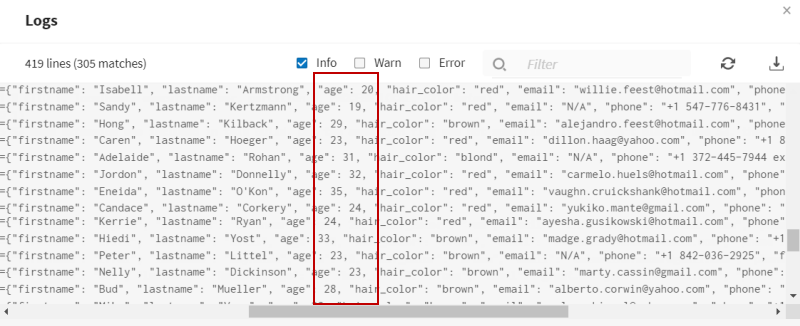
Results
Your pipeline is being executed, the 100 generated test fields are being processed and
the output flows are sent to the Test datasets you have defined. You can see in the logs
that the data is split between customers who are less than 35 years old and customers
who are more than 35 years old.
Did this page help you?
If you find any issues with this page or its content – a typo, a missing step, or a technical error – please let us know!

 and add a Field concatenator processor to the
pipeline. Give it a meaningful name, concatenate names for
example and use the Concatenate with value/another field
function to concatenate the firstname and
lastname fields together.
and add a Field concatenator processor to the
pipeline. Give it a meaningful name, concatenate names for
example and use the Concatenate with value/another field
function to concatenate the firstname and
lastname fields together.

 button on the Filter processor and select the dataset
that will hold your rejected data.
Rename it if needed.
button on the Filter processor and select the dataset
that will hold your rejected data.
Rename it if needed.