Configuring the components
Procedure
-
Double-click tBonitaDeploy
to open its Basic settings view and do the
following.
- Select the Bonita version of the Bonita Runtime engine you are using from the Bonita version drop-down list.
- Select Java Client from the Bonita Client Mode drop-down list.
-
Enter the Bonita Runtime environment directory in the Bonita Runtime Home field.
You can also click the [...] button next to this field and navigate to the Bonita Runtime environment directory.
- In the Business Archive field, specify the path to the Bonita process.
- In the Username and Password fields, enter the user authentication credentials.
Information noteNote: The values in the fields of this component are examples only. You can enter your own values for these fields.
-
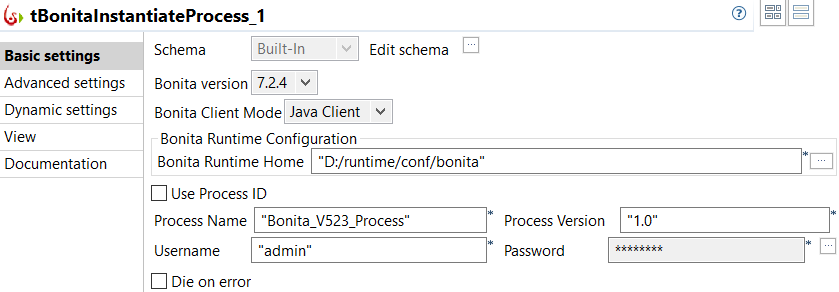
Double-click tBonitaInstantiateProcess to open its Basic settings view and do the following.
- Select the Bonita version of the Bonita Runtime engine you are using from the Bonita version drop-down list.
- Select Java Client from the Bonita Client Mode drop-down list.
-
Enter the Bonita Runtime environment directory in the Bonita Runtime Home field.
You can also click the [...] button next to this field and navigate to the Bonita Runtime environment directory.
- In the Process Name and Process Version fields, enter the process information.
- In the Username and Password fields, enter the user authentication credentials.
Information noteNote: The values in the fields of this component are examples only. You can enter your own values for these fields.
- Double-click tLogRow to open its Basic settings view.
-
In the Mode area, select Table (print values in cells of a table for
better display.

Did this page help you?
If you find any issues with this page or its content – a typo, a missing step, or a technical error – please let us know!
