Verifying and formatting email addresses
Procedure
-
Double-click tVerifyEmail to display the
Basic settings view and define the component
properties.

- If required, click Sync columns to retrieve the schema defined in the input component.
-
Click the Edit schema button to open the
schema dialog box.
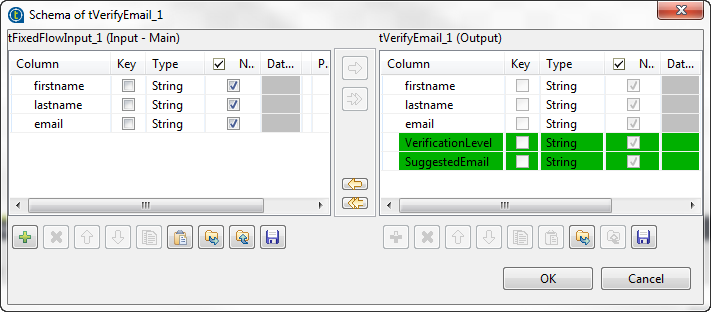
tVerifyEmail proposes predefined read-only address columns as shown in the below capture.
 The VerificationLevel column returns the verification status of input email addresses. The SuggestedEmail column returns a suggested content for the email part before the @ sign. This column is shown in the output schema only if you select theUse column content option in the Local Part Options section. For further information about output columns, see tVerifyEmail Standard properties.
 - Move any of the input columns to the output schema if you want to show them in the verification results, click OK and accept to propagate the changes.
- From the Column to validate list, select the email column.
-
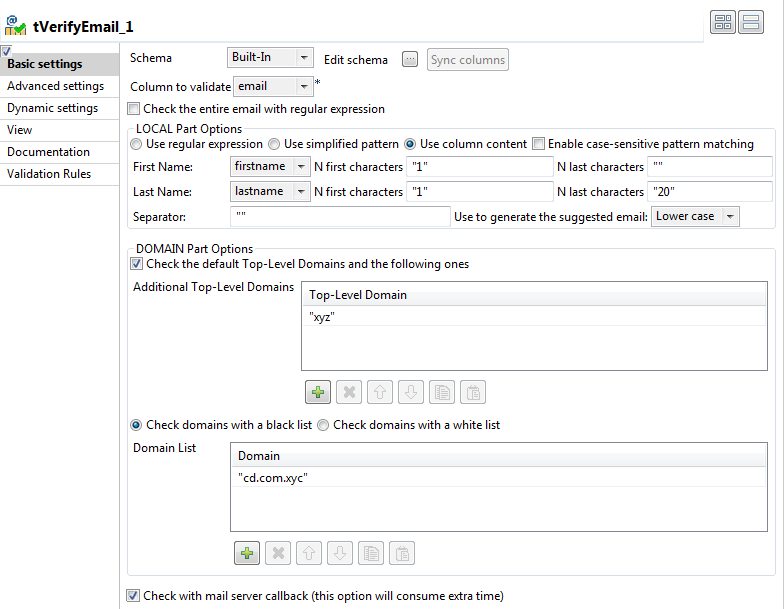
In the LOCAL Part Options section, select the
Use column content option.
In this example, you want to check the email part before the @ sign to see if it starts with the first letter of the first name followed by the family name, all in lower case. If the local part does not match what you have defined, tVerifyEmail will rewrite it by using the parameters you define.
-
In the DOMAIN Part Options, select:
-
the Check the default Top-level Domains and the following ones check box and define in the table the additional top-level domain against which you want to validate email addresses.
-
the Check domains with a black list check box and define in the Domain list table the domain to consider as black listed.
-
- Select the Check with mail server callback check box to enable the mail server to verify the complete address and accept or reject the email.
Did this page help you?
If you find any issues with this page or its content – a typo, a missing step, or a technical error – please let us know!
