Skip to main content Skip to complementary content

Creating an API with API Assistant

You can create an API by interacting with an AI model using natural language. This option might help you to create the required API more rapidly.

Information noteNote: For help on how to create a new empty API or work with an API example, see Creating a new API.

Before you begin

  • A Talend tenant user must create a secure connection with Qlik Cloud by following the procedure in Configuring Qlik Cloud Authentication. To configure this connection, first follow the procedure in Creating an OAuth client to generate a client ID and secret code. You need to provide the following values:
    • Client type: Web
    • Scope: select all check boxes.
    • Allow Machine to Machine (M2M): select this check box.
    • Consent method: Trusted.
    After generating a client ID and secret code, click Copy to clipboard, then paste the information in Talend Management Console using the procedure in Configuring Qlik Cloud Authentication.
  • At least one user account must be assigned to a role that has the Administrate API Designer permission enabled. This setting is "tenant-wide", which means other tenant users with the API Designer role will then also have access to the feature. For further information about user accounts, roles, and permissions, see Talend Management Console User Guide

Procedure

  1. On the Talend Cloud API Designer homepage, click New API.
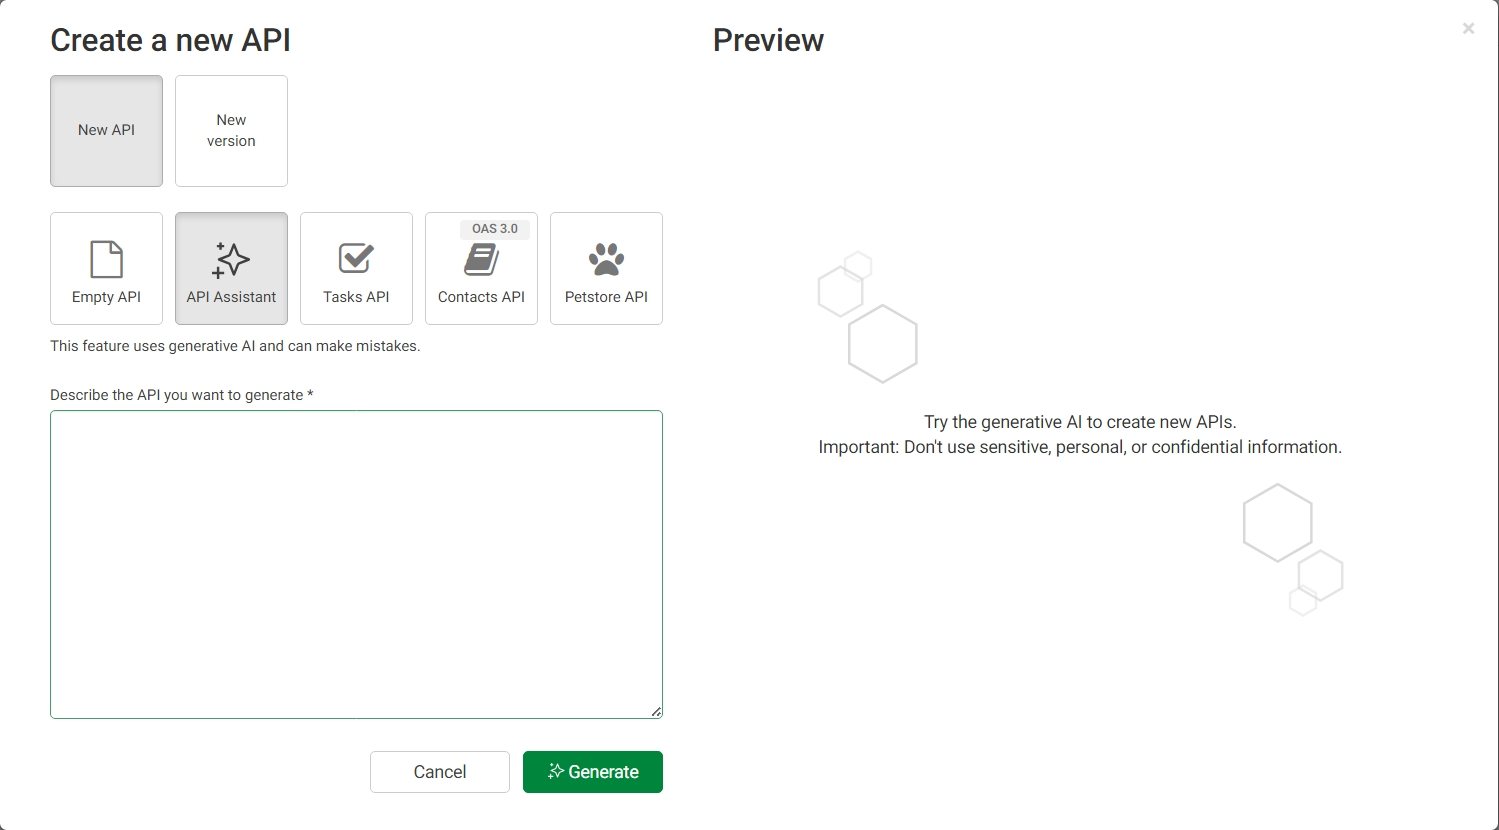
  2. Select New API and click API Assistant.
    API Assistant dialog box.
    Information noteNote: If the API Assistant icon is not visible, a user with the Administrate API Designer permission must enable the Generative AI-based features setting. They do this by clicking their user name in the top right corner of the Talend Cloud API Designer homepage, clicking API Designer settings, and then selecting the Generative AI-based features check box.
  3. In the Describe the API you want to generate field, use natural language to describe the API you want to create, then click Generate.
    The generated API is displayed in the Preview panel.
  4. Repeat the previous step to refine your description, if required.
    If you make multiple iterations, you can step backwards and forwards through each iteration by clicking the < and > buttons above the description field. You can do this only during the current session.
  5. When the generated API satisfies your requirements, click Save below the Preview panel.

Results

The generated API is saved and is added to the list of APIs on the Talend Cloud API Designer homepage.

Did this page help you?

If you find any issues with this page or its content – a typo, a missing step, or a technical error – please let us know!