Ingest from an external source regardless of where it has been sourced (RDBMS, HDFS or a cloud storage service such as Amazon S3, Azure ADLS and Azure WASB, Hive, local server, etc.) leverages two key steps required to onboard data into Qlik Catalog:
- Defining the source/entity (metadata)
- Ingest (data)
Loading data into an entity
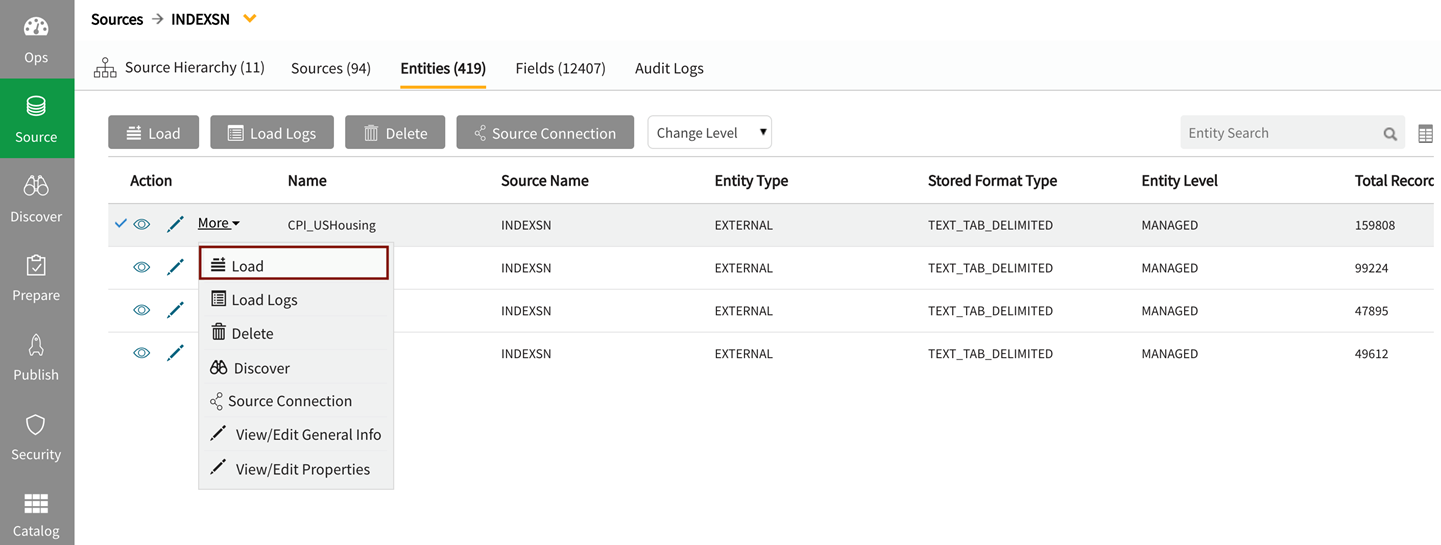
Once sources have been defined and metadata is in place, data can be loaded from the source. To load data into an entity, navigate to the entity, highlight the row and select Load from the More dropdown menu.
Loading data

A data load modal displays for the user to assign editable date and timestamp fields to the load--this marker is important because it becomes the data load partition id. If it is not changed the default id is the timestamp at time of load (down to the second). Select OK.Radio buttons provide choice of load types: New (default), Append, and Overwrite. This will initiate the data load.
Data load modal

Scheduling
To schedule a recurring data load, click on the Scheduling expander in the Data Load modal and enter a Quartz expression, such as:
-
0 */15 * ? * * -- run at 0, 15, 30 and 45 minutes past each hour of every day
-
0 15 10 ? * MON-FRI -- run at 10:15am Monday through Friday
Once the Quartz cron expression has been entered, click OK to schedule the data load job.
Data load scheduling

If an expression has been entered, modified, or deleted, only a scheduling action takes place when you click OK. To trigger an immediate load when changing the expression, select the Load Immediately checkbox. If the Data Load modal is open and the expression is not modified, clicking OK will trigger a load.
If you use a Quartz cron expression, the next time you open the Data Load modal, the Scheduling section is automatically expanded, and any previously entered options are restored.
Removing a scheduled load job
A previously scheduled load job can be removed by:
-
Opening the Data Load modal, clearing the Quartz cron expression, and clicking OK; or
-
Editing the Entity, opening the Properties tab, and deleting the property scheduled.load.job.configuration by clicking on the circled X.
Removing a scheduled data load

Adding a Scheduled Load Column to the Entity Data Grid
You can add a Scheduled Load column to the Entity data grid to more easily identify which entities have load jobs scheduled.
Scheduled load column

To add this column to the grid, follow these steps:
-
Select Profile from the username dropdown menu in the top-right corner of the Catalog user interface.
-
Open User Profile and Preferences and select the Properties for Grid tab.
-
Under All Properties for Grid, expand the External Entity entry
-
Scroll down and select Scheduled Load, and click Save.
This will add the Scheduled Load property to My Preferred List.
My Preferred List under Properties for Grid

Once the Scheduled Load property is visible in My Preferred List, continue with the following steps:
-
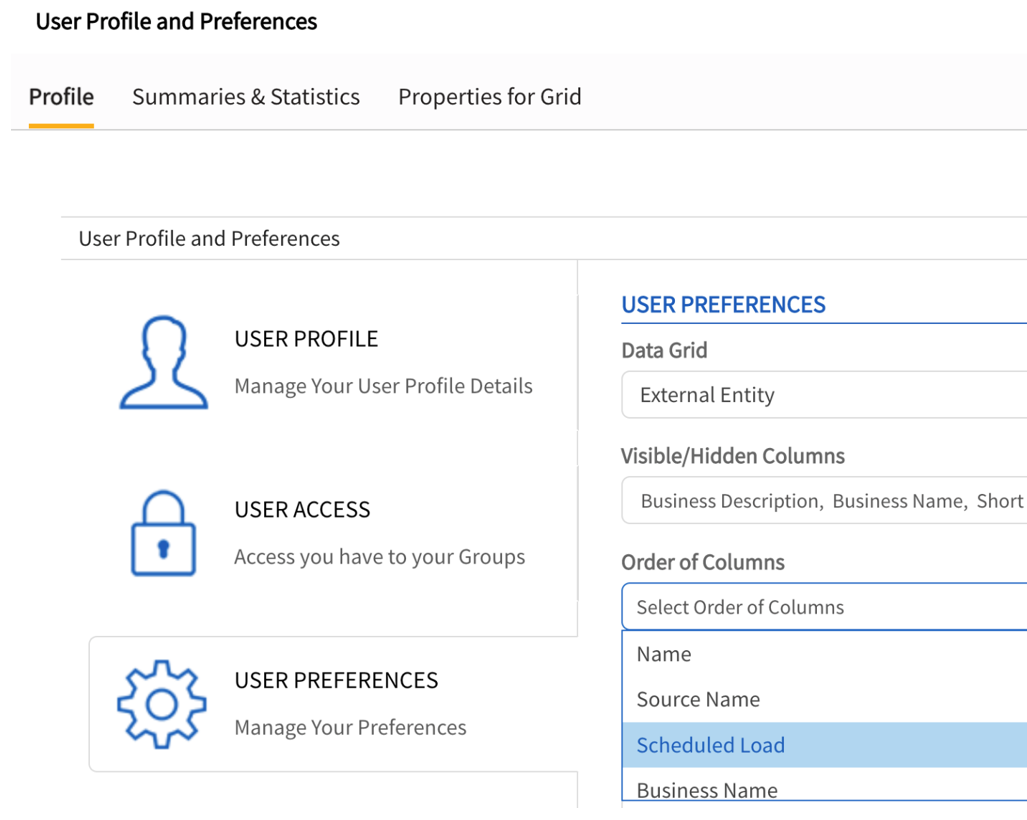
Go to User Profile and Preferences and select the Profile tab, and then select USER PREFERENCES.
-
Change the Data Grid to External Entity. Scheduled Load is present under Visible/Hidden Columns.
-
Under Order of Columns, find the entry for Scheduled Load and drag it to the desired position.
User Profile and Preferences

Load Status
Depending on the amount of the data ingest and the speed of the connection to the source system, this may take several minutes. If the data is several gigabytes or larger the load may take significantly longer. The status of the load is shown in (Job Status), a RUNNING status will appear until the load has FINISHED. To refresh logs and monitor the load status select the load row and select Reload Logs from the Bulk Action dropdown menu. When users first arrive at the load screen and data is loading for the first time, click on  Refresh button to initiate the load.
Initialized Loads
When jobs are queued but have yet to start running they are in an INITIALIZED state. In the context of QVD loads where QVD entities are initialized but have not yet started loading, users may see this status lingering for longer than is typical for non-QVD entities. A maximum of five QVD data loads in INITIALIZED state at a time are allowed. Note behavior for INITIALIZED loads when Tomcat is restarted: Loads in INITIALIZED state when Tomcat is started will remain in the INITIALIZED state and not convert to RUNNING state after a restart but will FAIL after a mandatory two hour waiting interval. In contrast, jobs that are in a RUNNING state when Tomcat restarts are killed and FAIL immediately.
Refresh Load Logs to refresh the load status or set an Auto Refresh interval from the dropdown options:
- No Auto Refresh [default]
- 15s
- 30s
- 60s
Refreshing load logs

Upon completion, Job Status will show as FINISHED or FAILED and show results of the load:
Completed refresh

Completion status will show as FINISHED or FAILED and the log will show results of the action. When Job Status is FINISHED the records provide totals of Good Record Count, Bad Record Count, Ugly Record Count, and Filtered Record Count.
Record count

Select round expand or collapse icons to the right of the record counts to view messages with information about why records may have excepted as Bad or Ugly.
Viewing record count messages

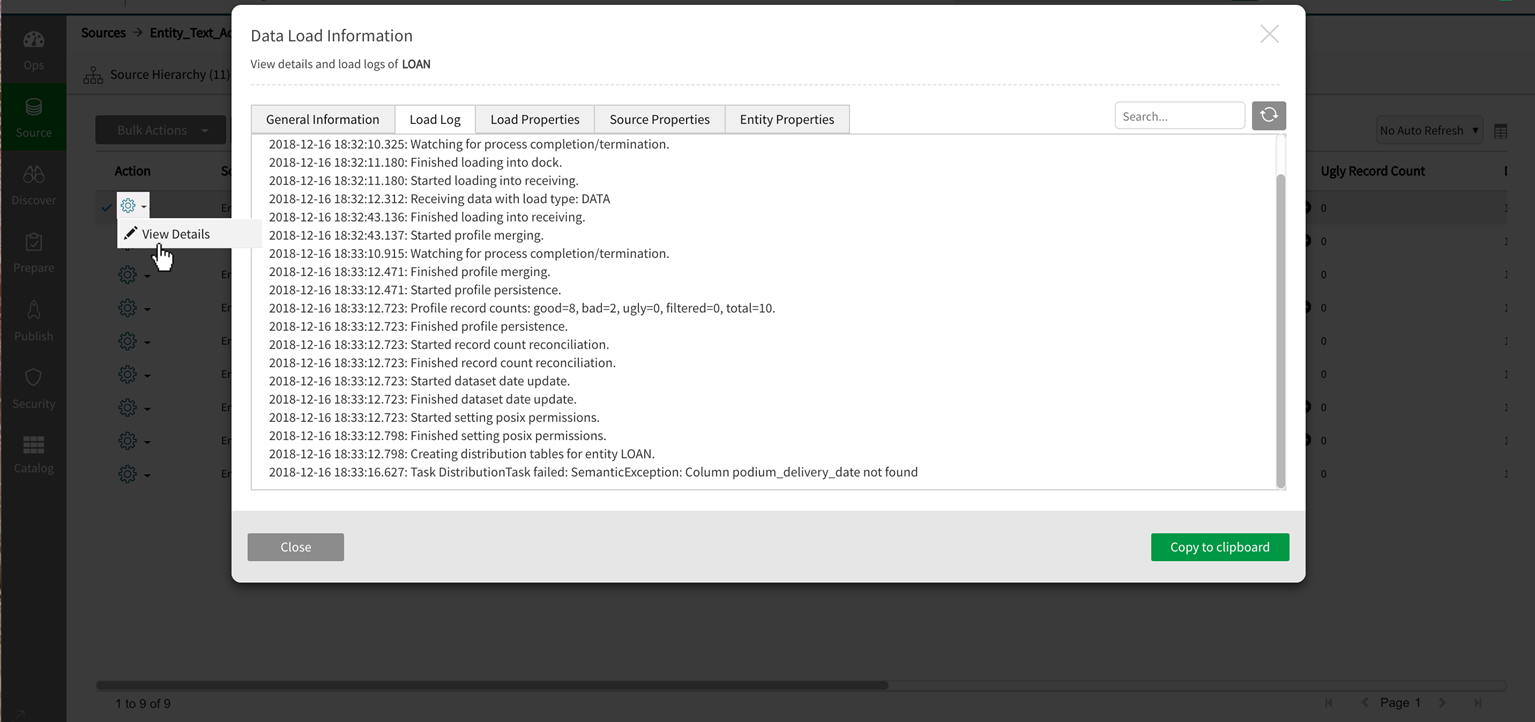
When Job Status is FAILED, select View Properties from the action dropdown to open Data Load Information.
Load Log contains details regarding why the load failed.
The Load Log

